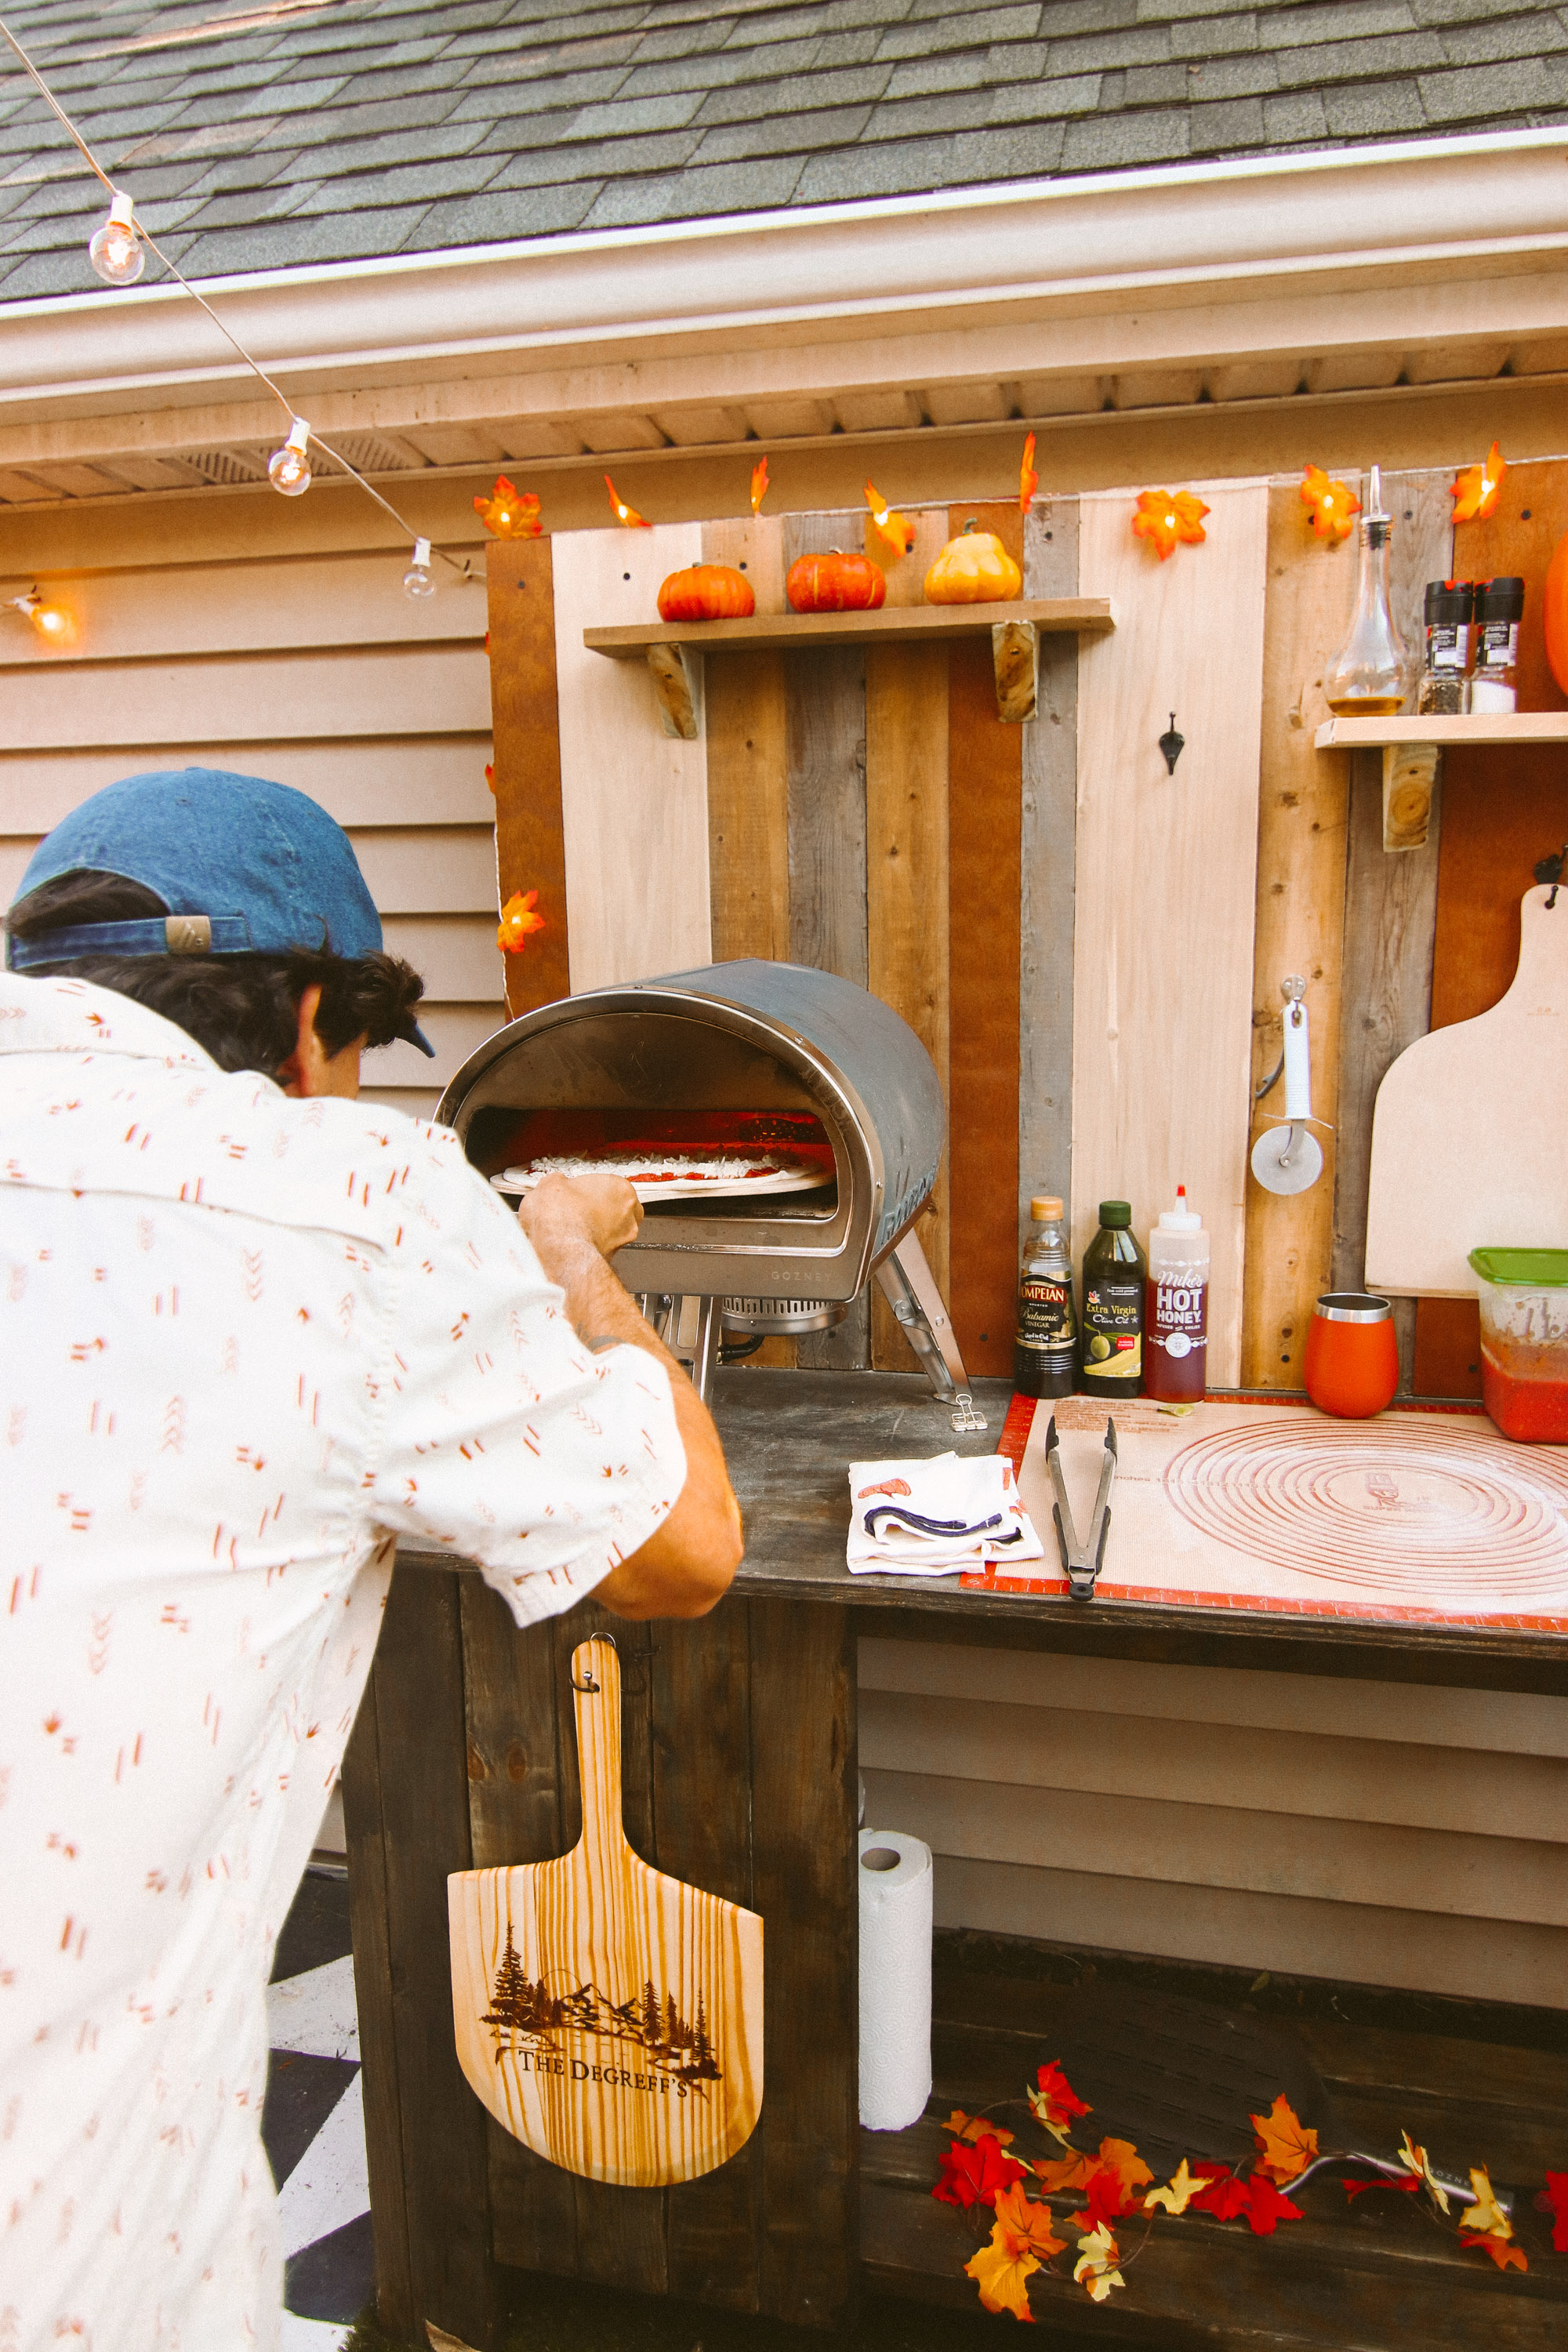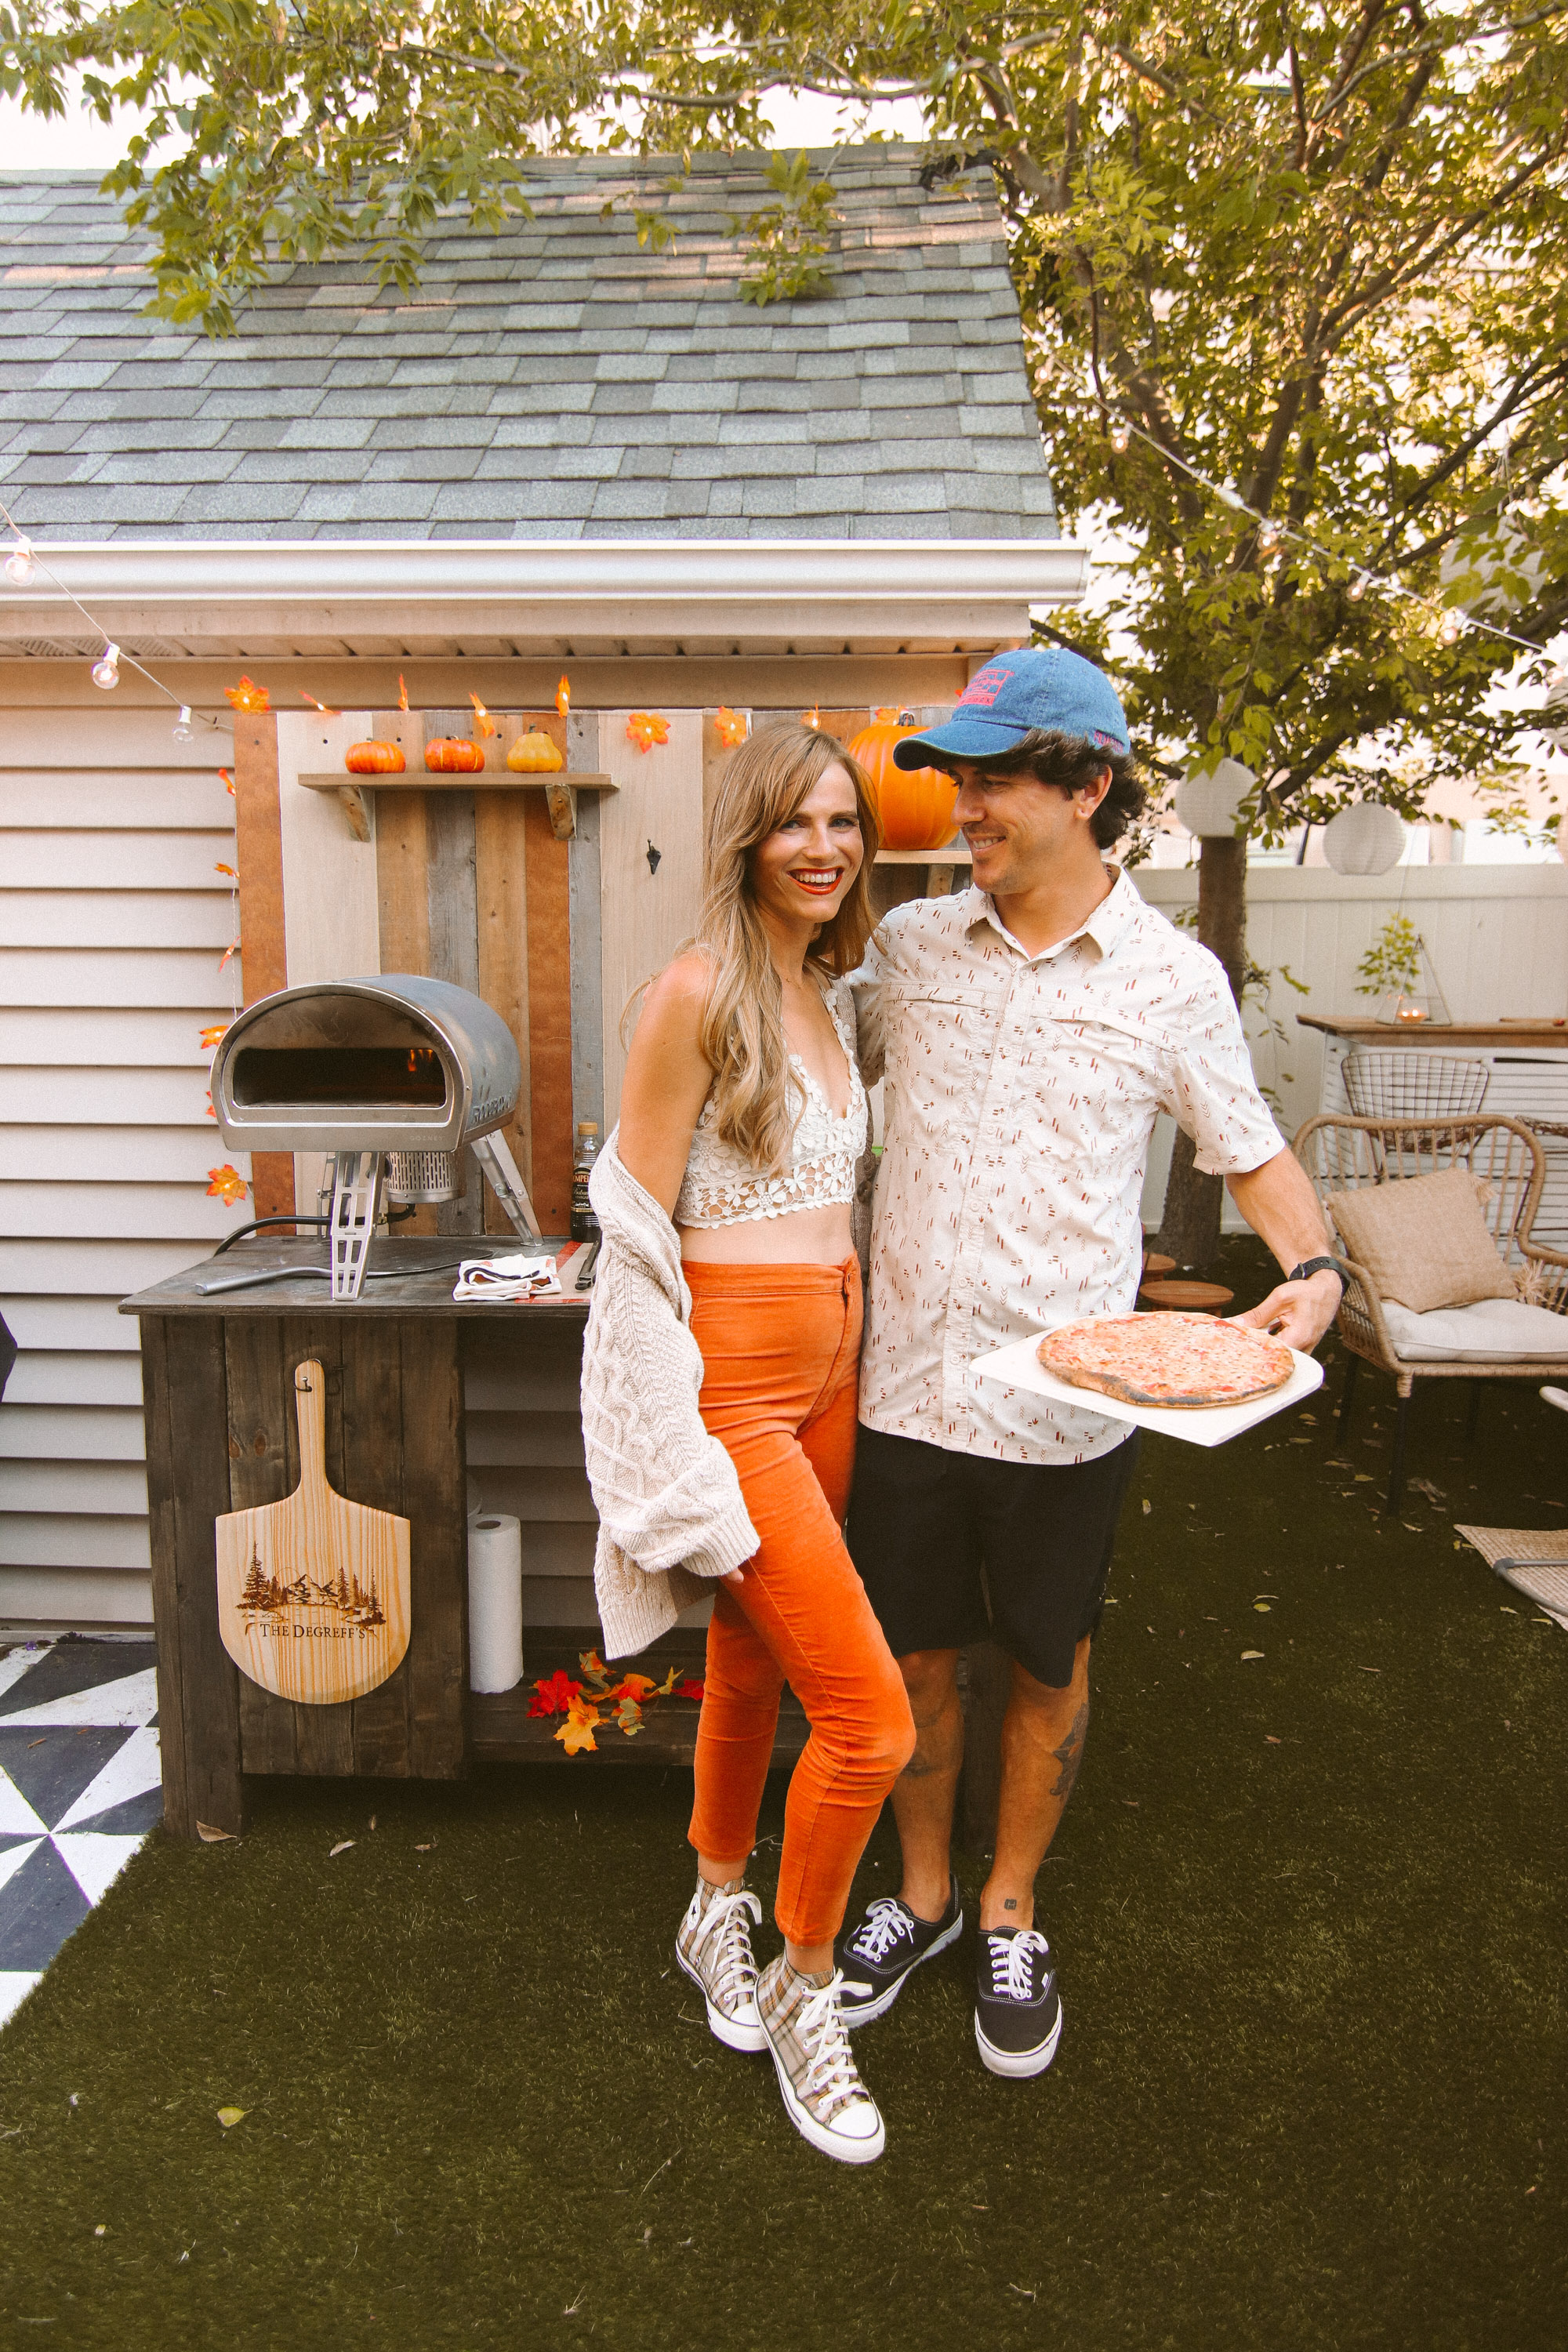
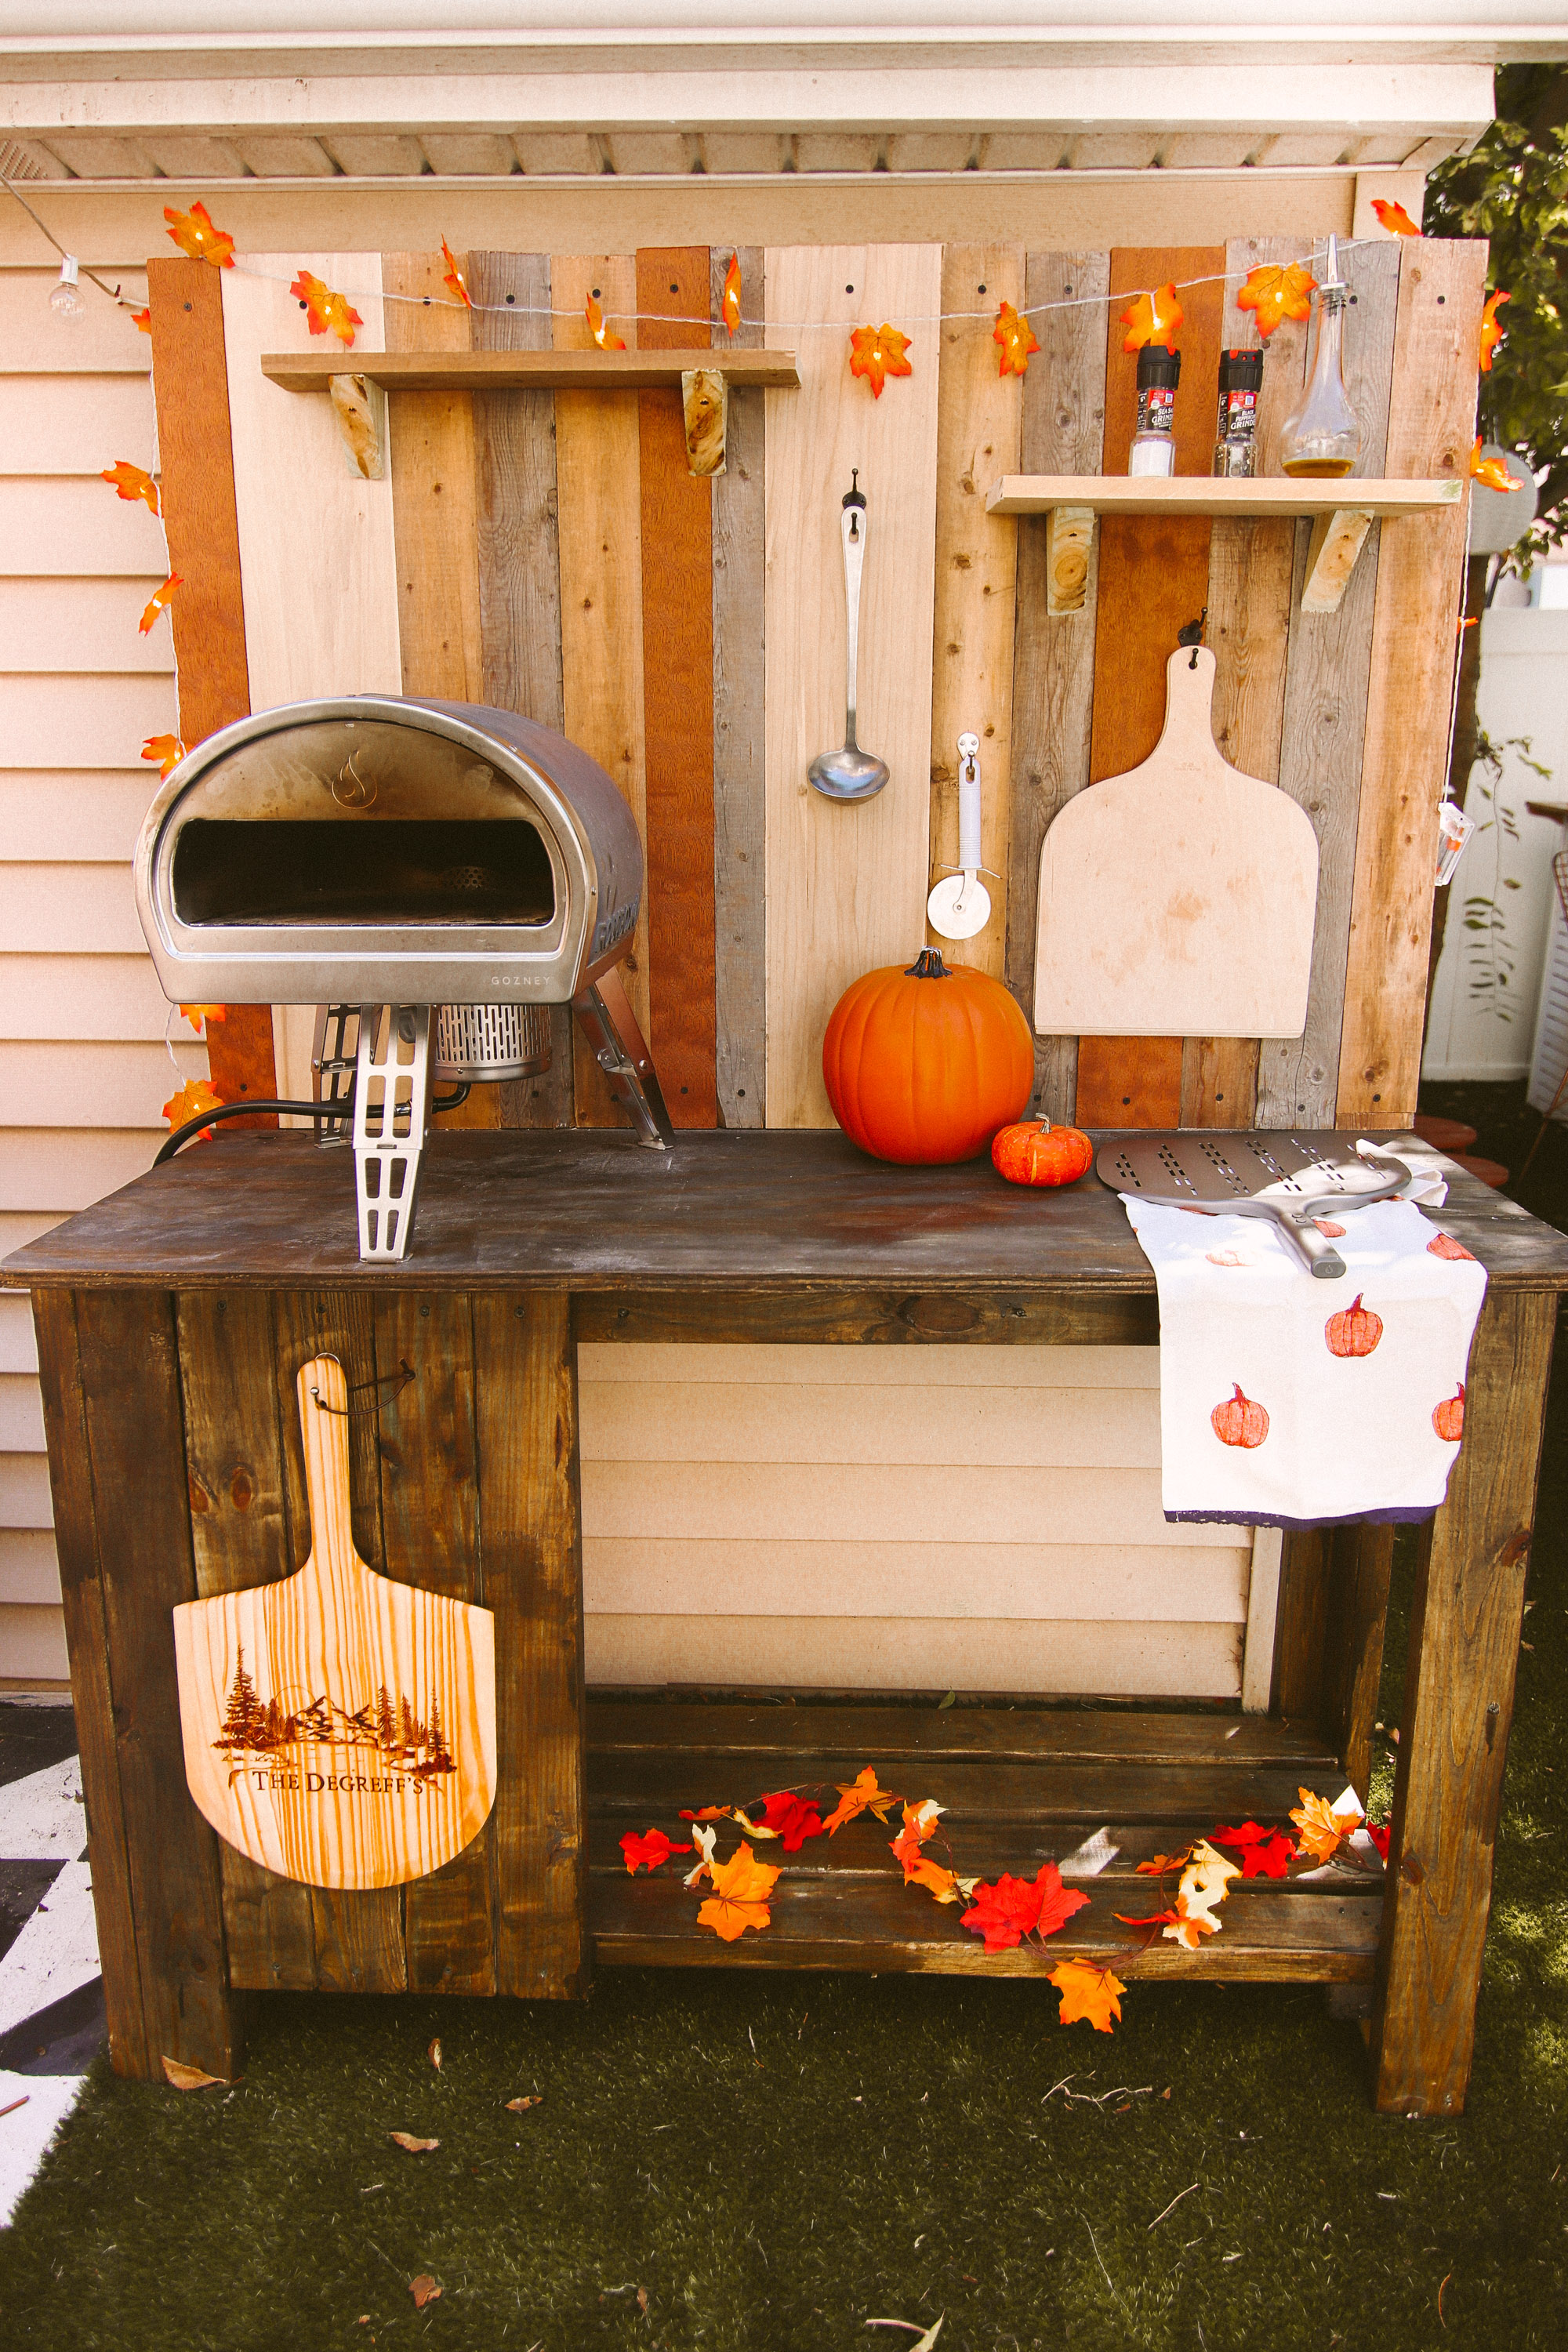
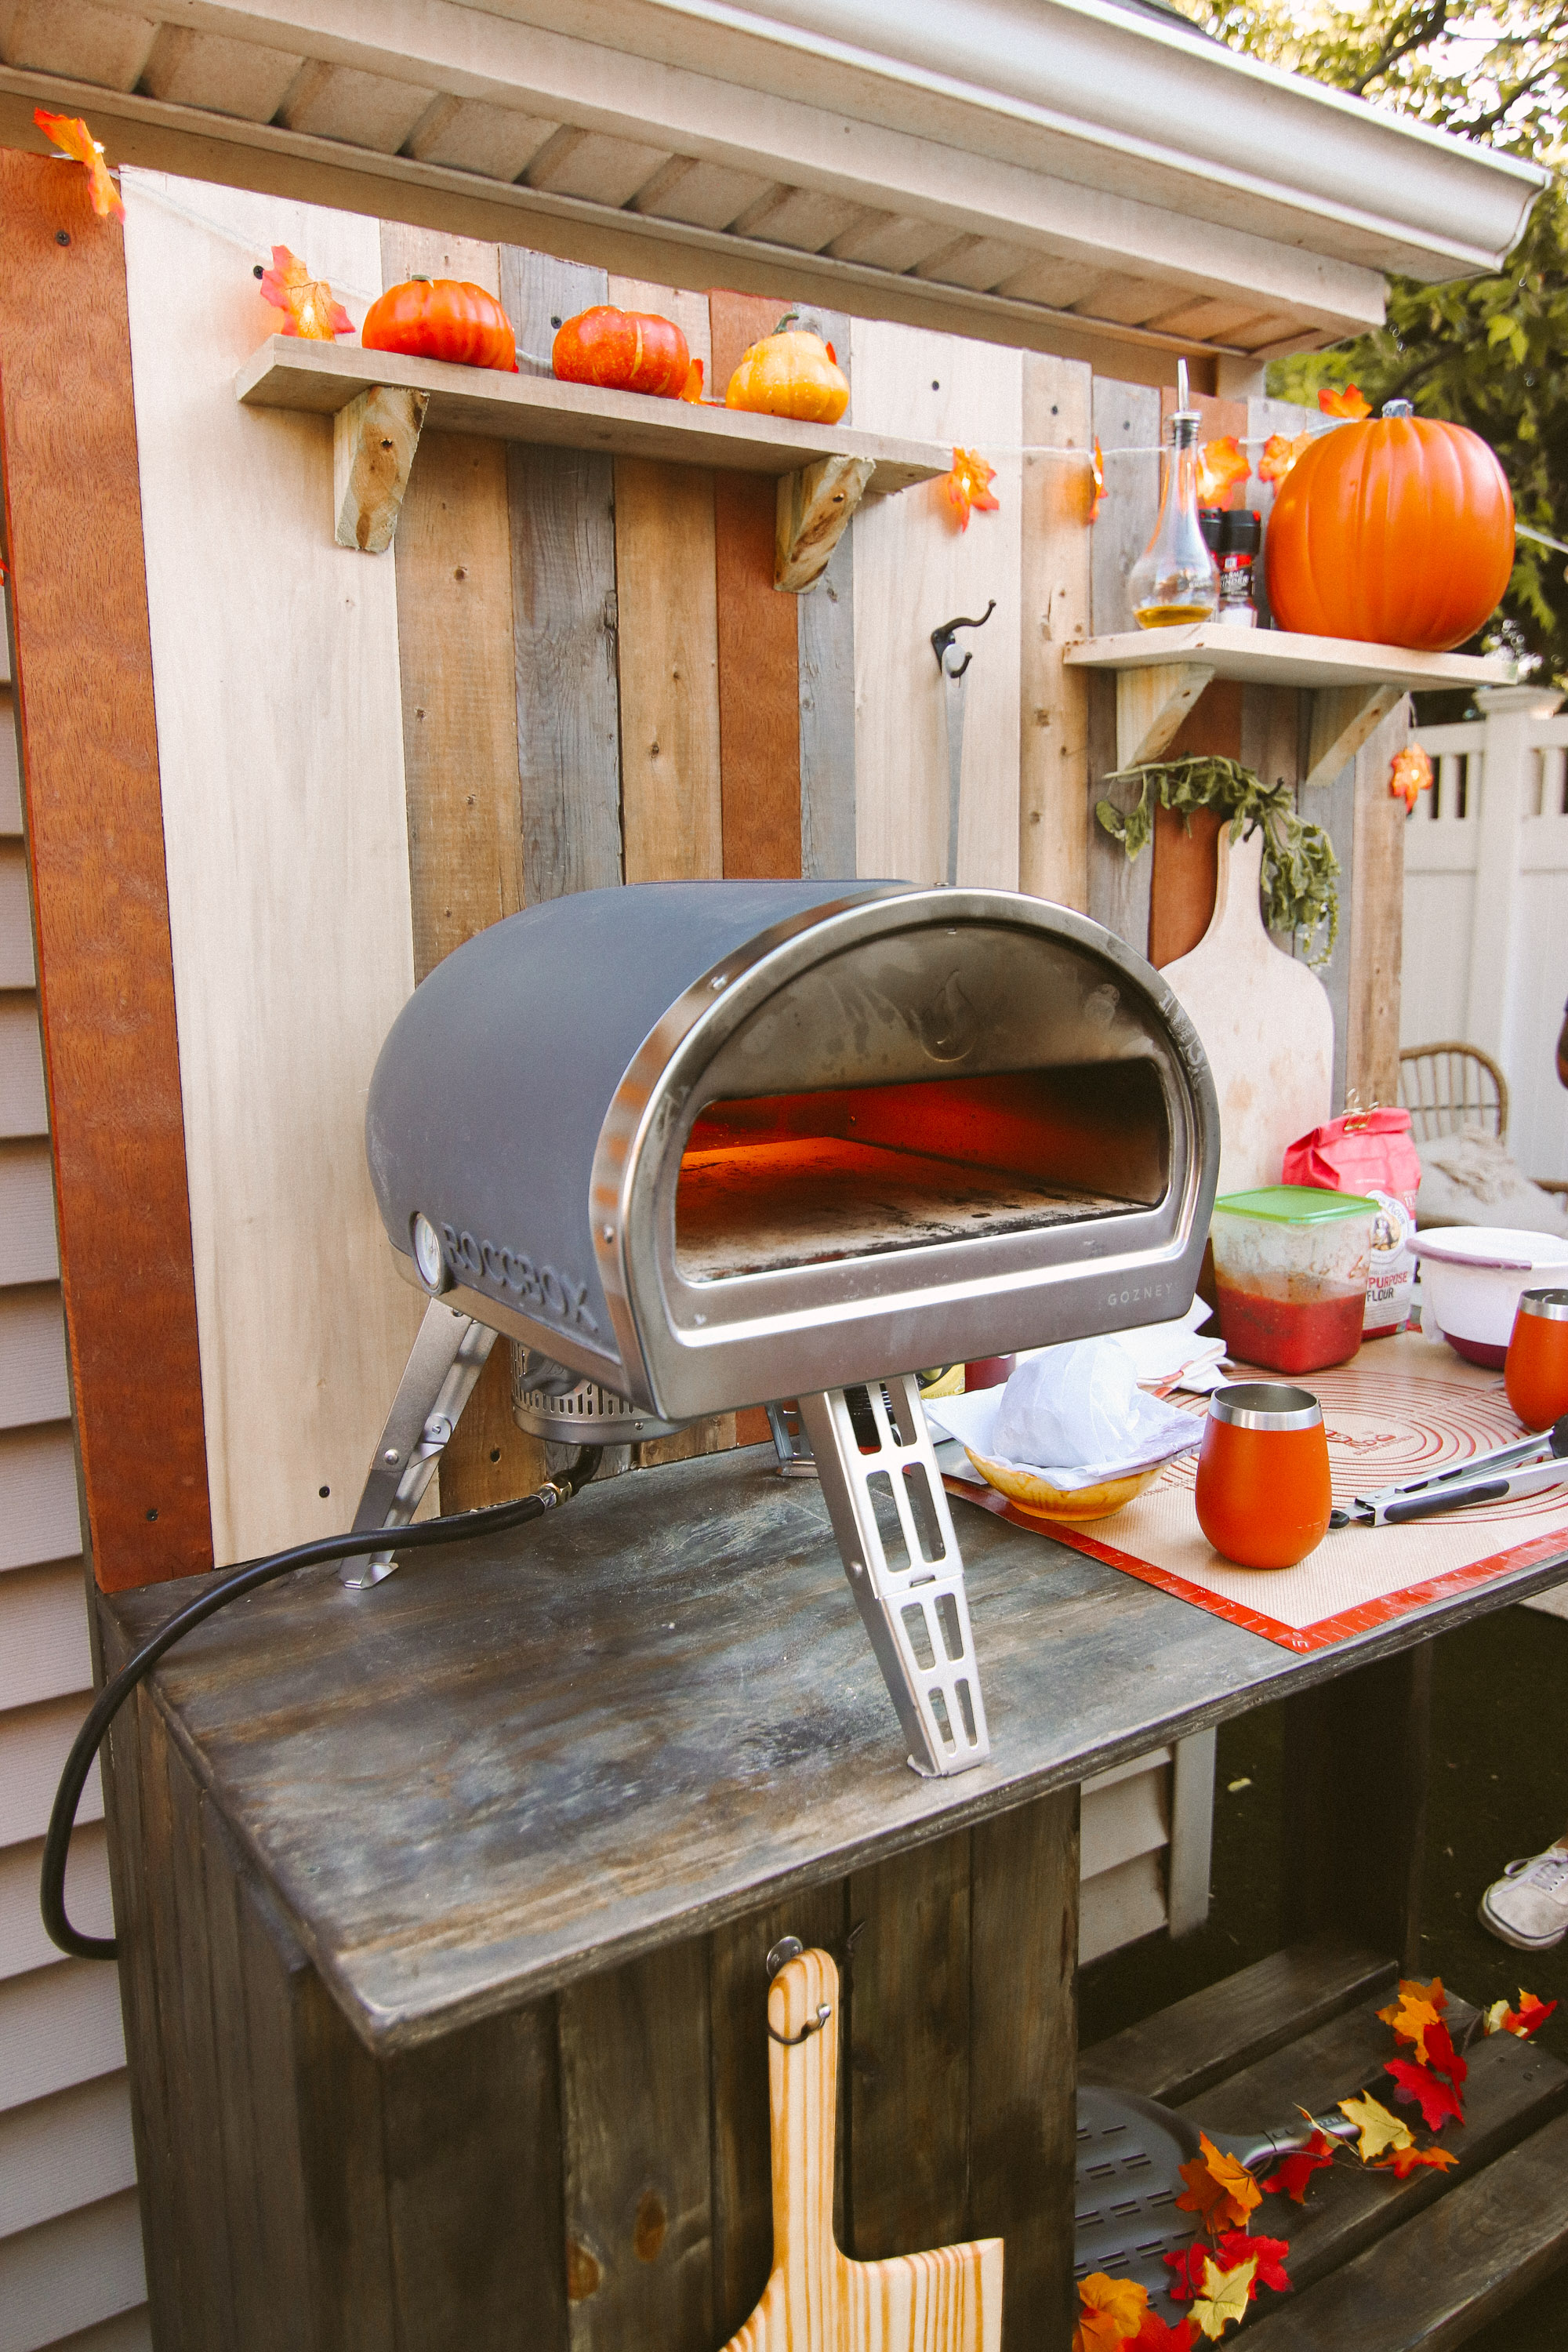
After building the authentic pizza oven in Marthas Vineyard, we knew we had the itch, and needed to find a way to create the same type of pizza experience in our home. For us, it is about more than just pizza. It’s about everyone in the family chipping in and helping to make the dough, it’s about spending our mornings cooking and then it’s about sharing pizza and the experience with close friends and family as they hangout in our yard at sunset. The whole “pizza night” around an oven experience is one we knew we wanted our kids to grow up remembering, but our biggest issue in our current home was space. We have a really tiny yard since we live very close to the beach, so we needed to find a solution. When we stumbled upon the Gozney Roccbox, we knew we found our solution. It’s a restaurant-grade portable pizza oven that runs on gas and reaches 950 degrees. It has a built-in thermometer and retractable legs so we can easily bring it with us to a friends home, or store it in our garage during the winter months. We also loved that it has a silicone skin on the outside, so the kids cannot get burned to the touch. There were so many things we loved about this oven, so we decided to design a table to house it that fit all of our pizza-making needs. I looked at pinterest for inspiration, and drew out all of our favorite combinations into one table – we wanted open shelving for ingredients, hooks to hang our sauce spoon and peels and a prep space to toss our pizzas. With all of that in mind, we drew up a plan, and in total it cost under $250 to build!
Matt found plans for work benches that had a similar layout to my drawing so he could follow the basic structure. He worked off of this plan, and this one.
Materials:
3⁄4” Pressure treated plywood sheet
16 Pressure treated 2×4’s
2 1⁄2” decking screws and 1 1⁄2” wood screws
2 in 1 poly/stain
Tools Used:
Circular saw
Drill
Sander
Speed square
Brush
Measuring tape
Level
The majority of the structural elements Matt based on the Ana White design, with a couple of touches and design cues taken from the Fix This Build That bench.
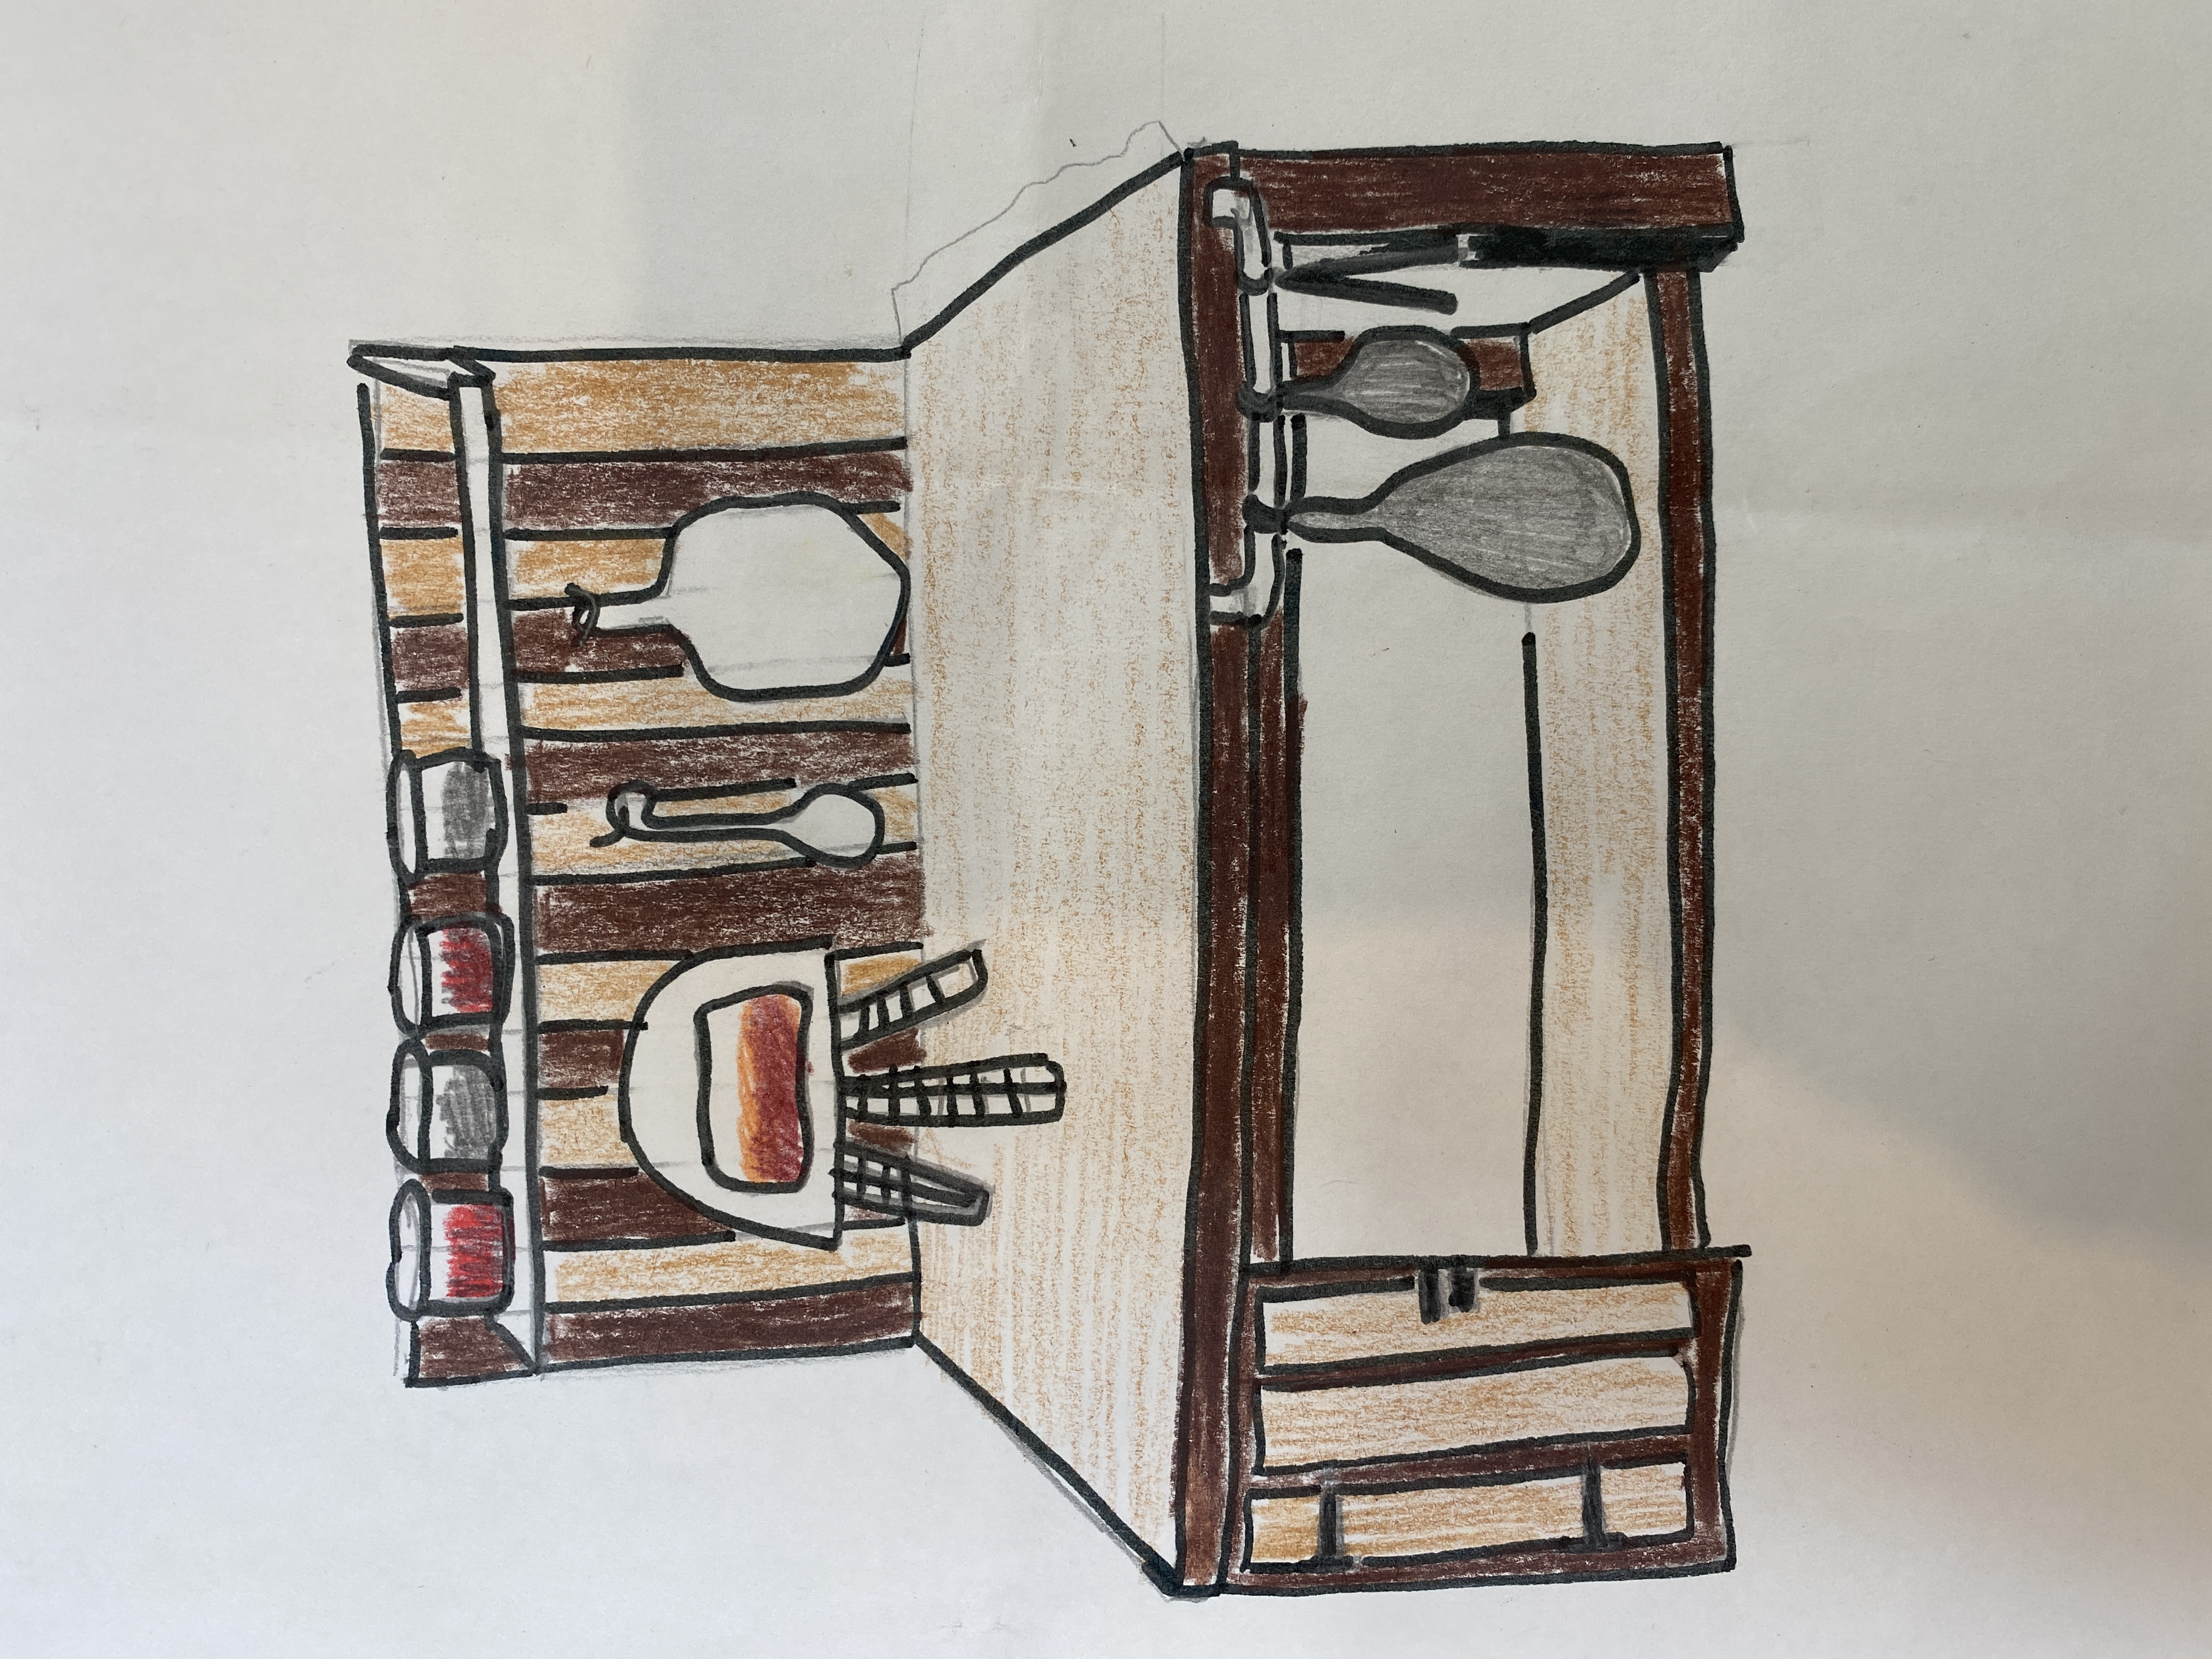
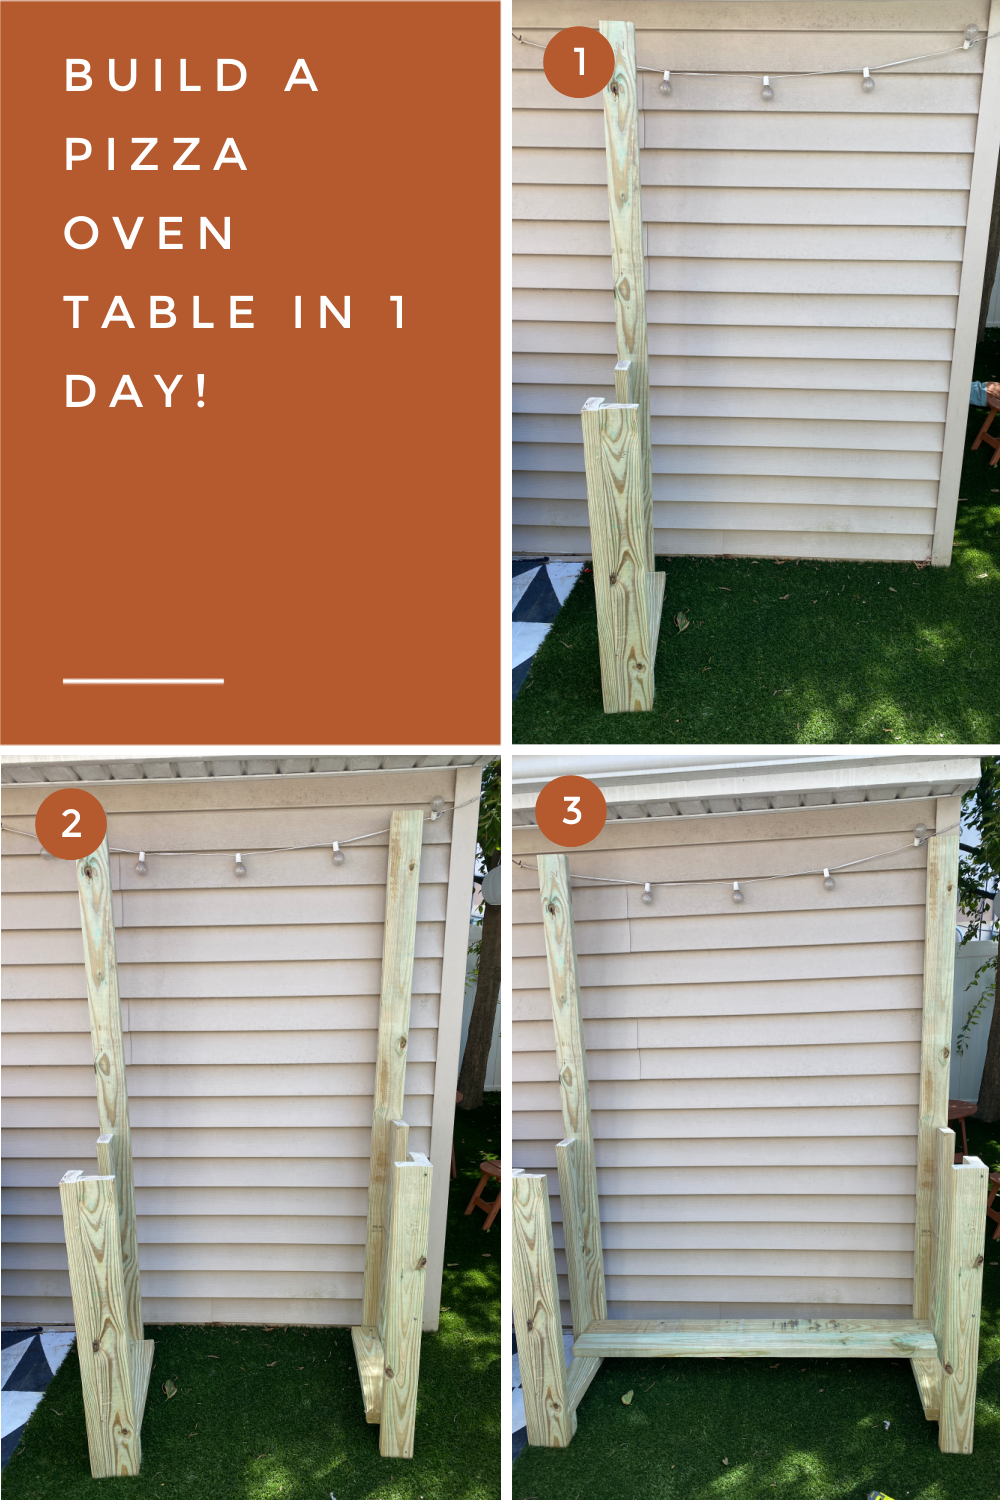
Matt started with steps 1-4 from Ana White’s plan to create the legs, however he cut his 2×4’s at 35”to give us a 36” counter height. He also used a 72” 2×4 on each of the rear legs joined to one of the 35” ones to create a base for the upper wall behind the oven where the shelves and hooks are mounted. [STEP 1-3]
Instead of just using two 2×4’s to create a lower floor like in Ana White’s plan, he used 4 to create a deeper and more sturdy surface. He figured that would be better to hold the propane tank and would let us store more things underneath. He also put in the vertical 2×4’s to cover up the area where the propane tank sits, so you can’t see it from the front. It gives a cleaner look. [STEP 4]
The counter top was cut to 54”x 22” (at step 6&7 of Ana White’s plan) and it’s a nice size for this pizza making setup. We might have added an inch or two to the depth to give a bit more room to the Roccbox. [STEP 5-6]
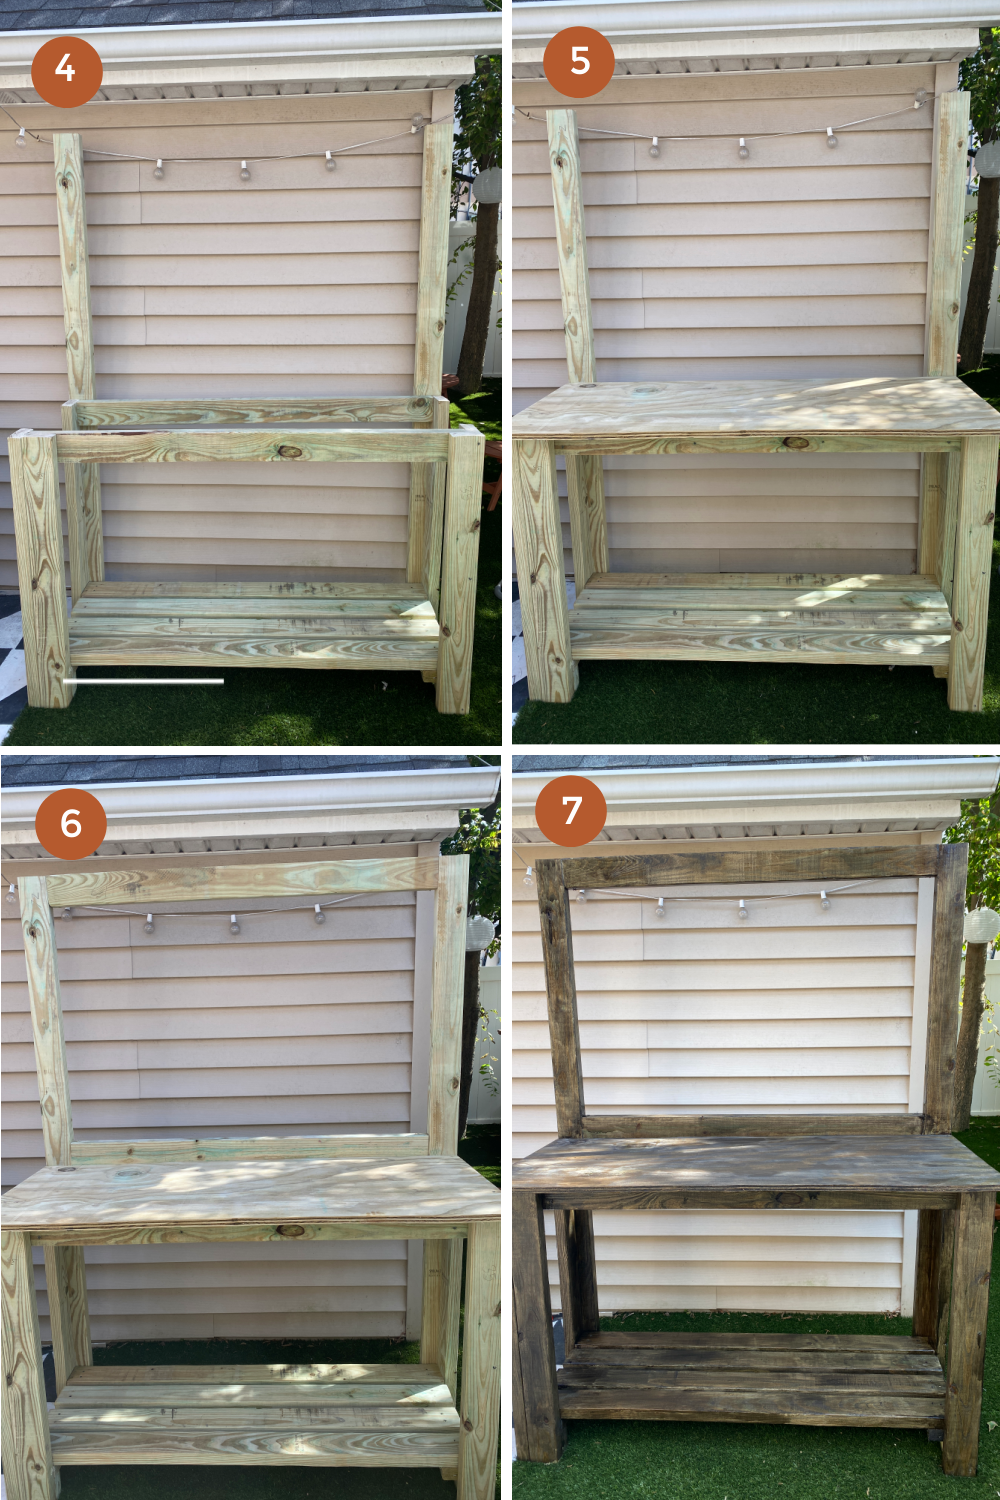
After this was complete, Matt took 2×4’s spanning the width and attached them to the 72” rear legs, which was what held the decorative wood pieces. Sea’s dad has a wood shop in town, and he gave us a stack of scrap wood. Matt cut that into pieces of the same size and filled in the back to create the wall. He then used a couple of small pieces and some 2×4’s cut at a 45 degree angle to make my homemade shelves, and we stained the entire table with a combination poly/stain in Jacobean to protect it and give it a dark brown color. [STEP 7-10]
We added a couple of hooks to hang peels, including this amazing peel that was woodburned by Sting Rea Studios.

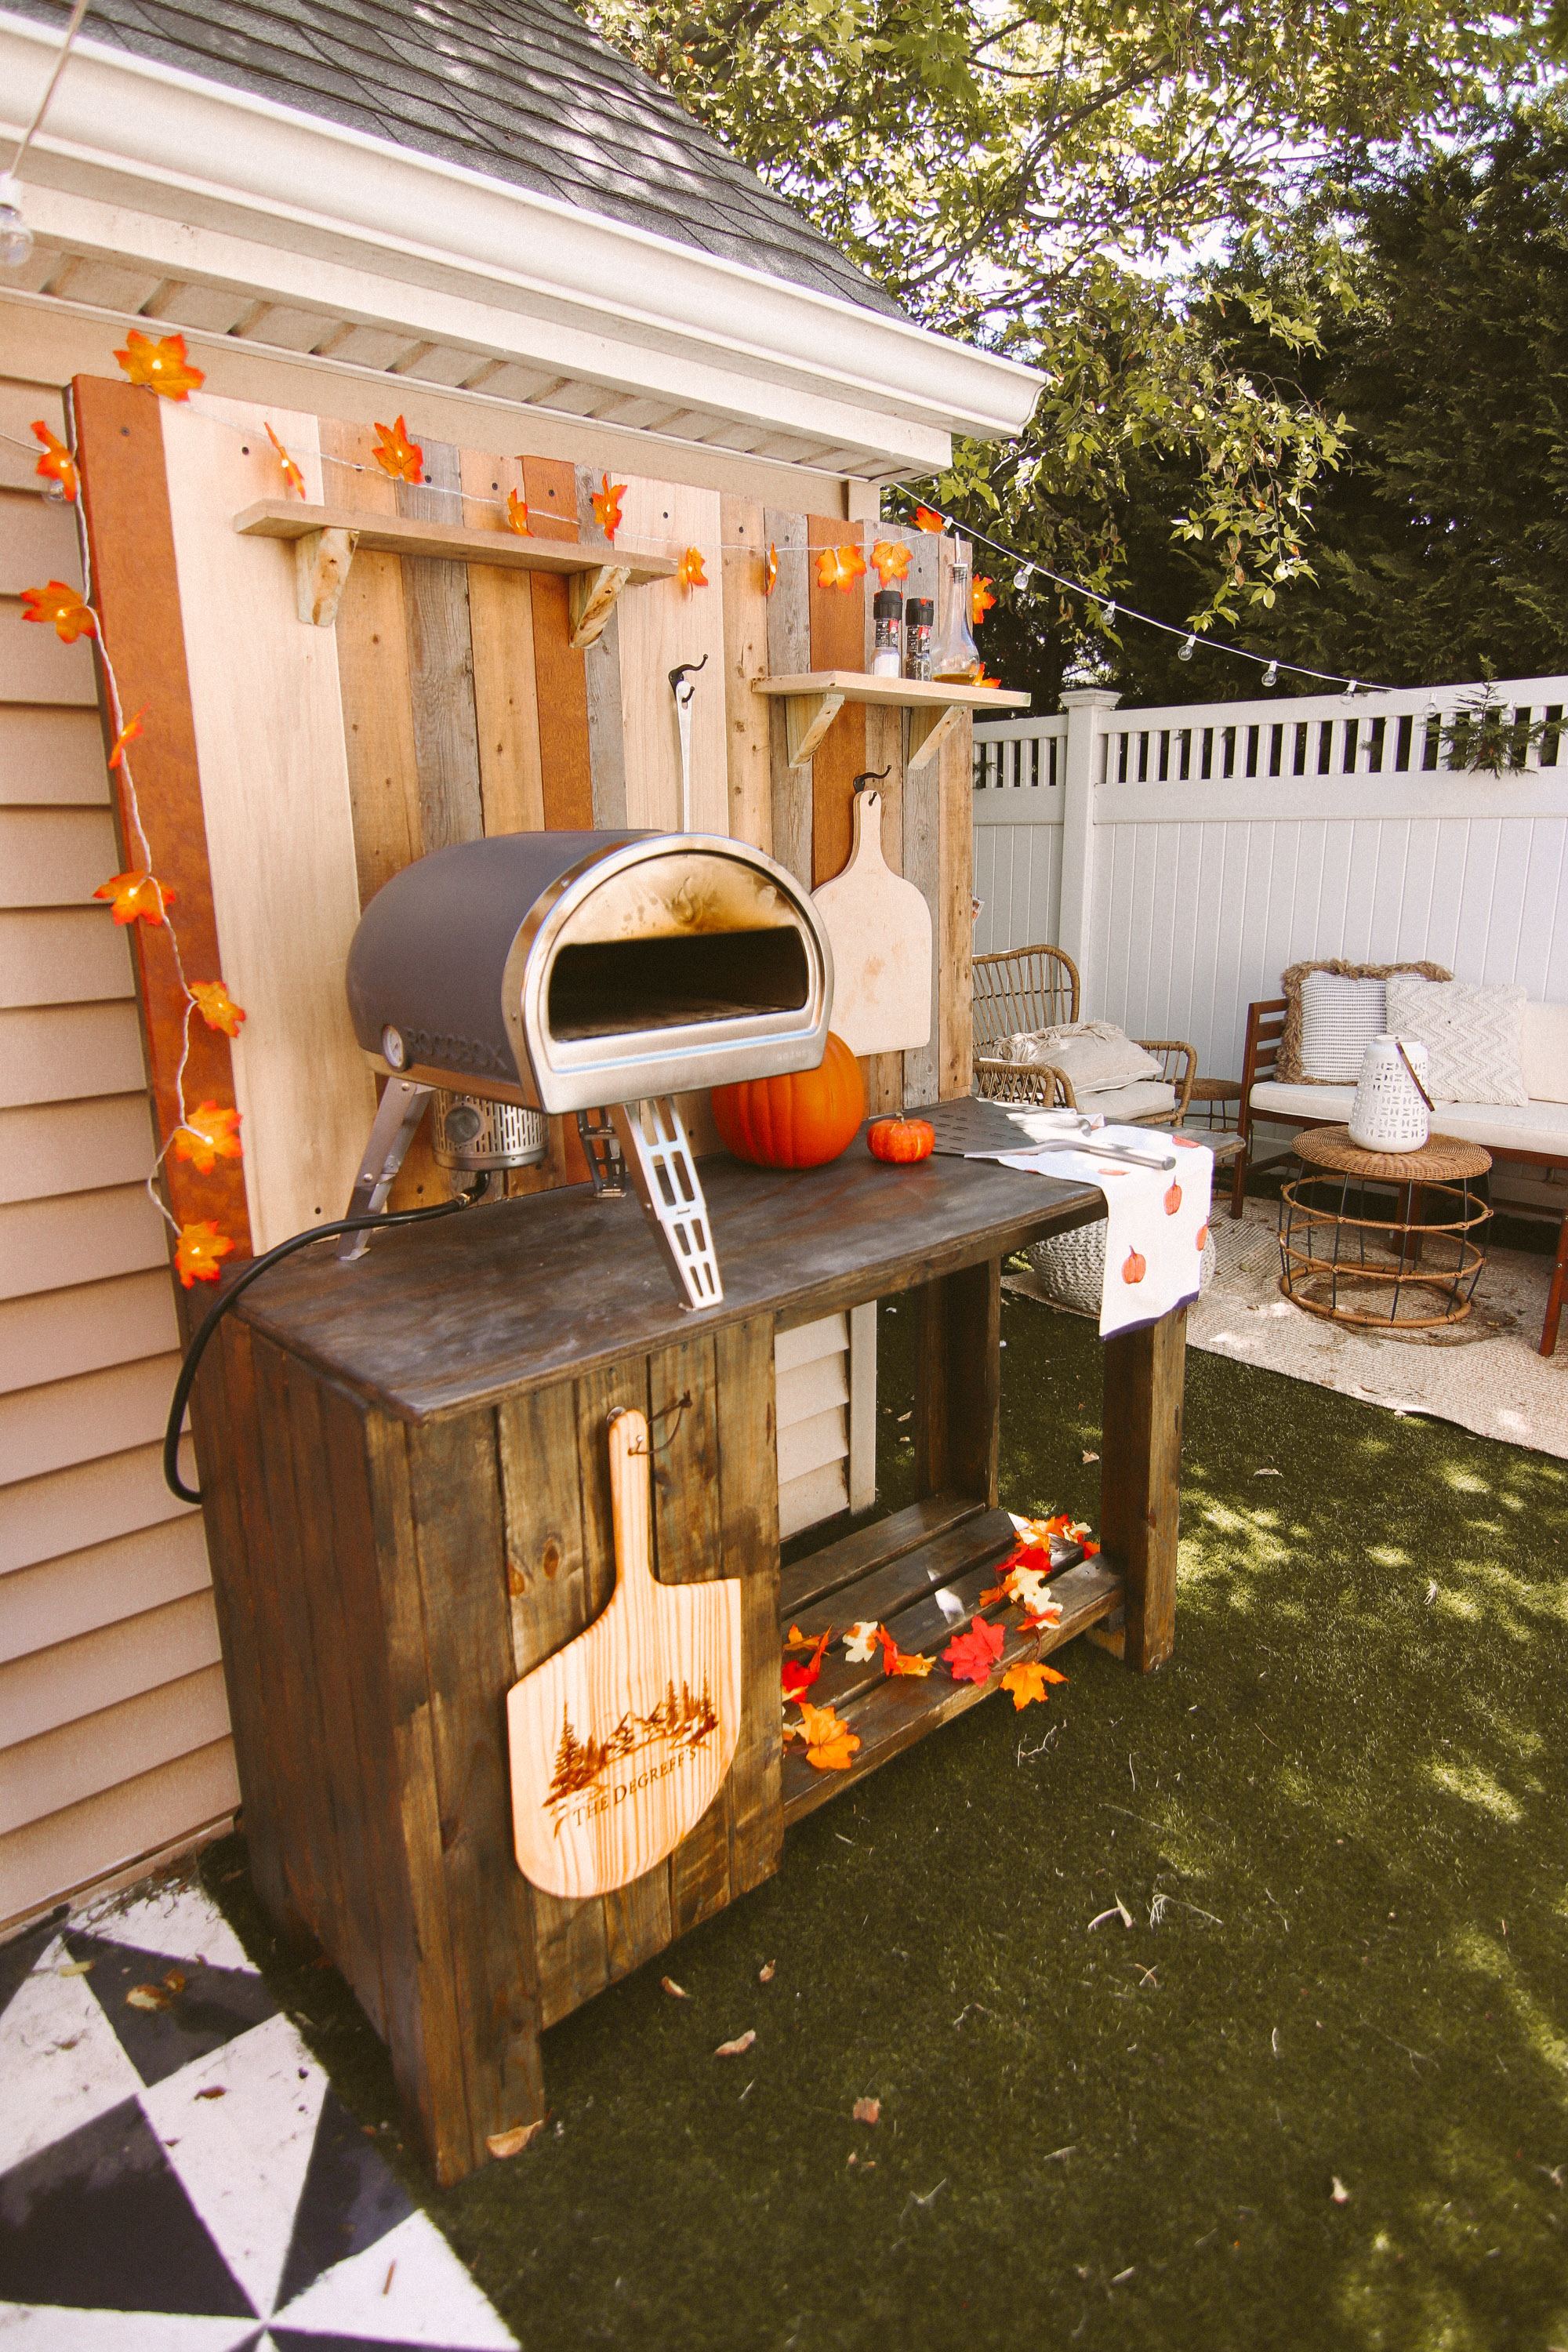
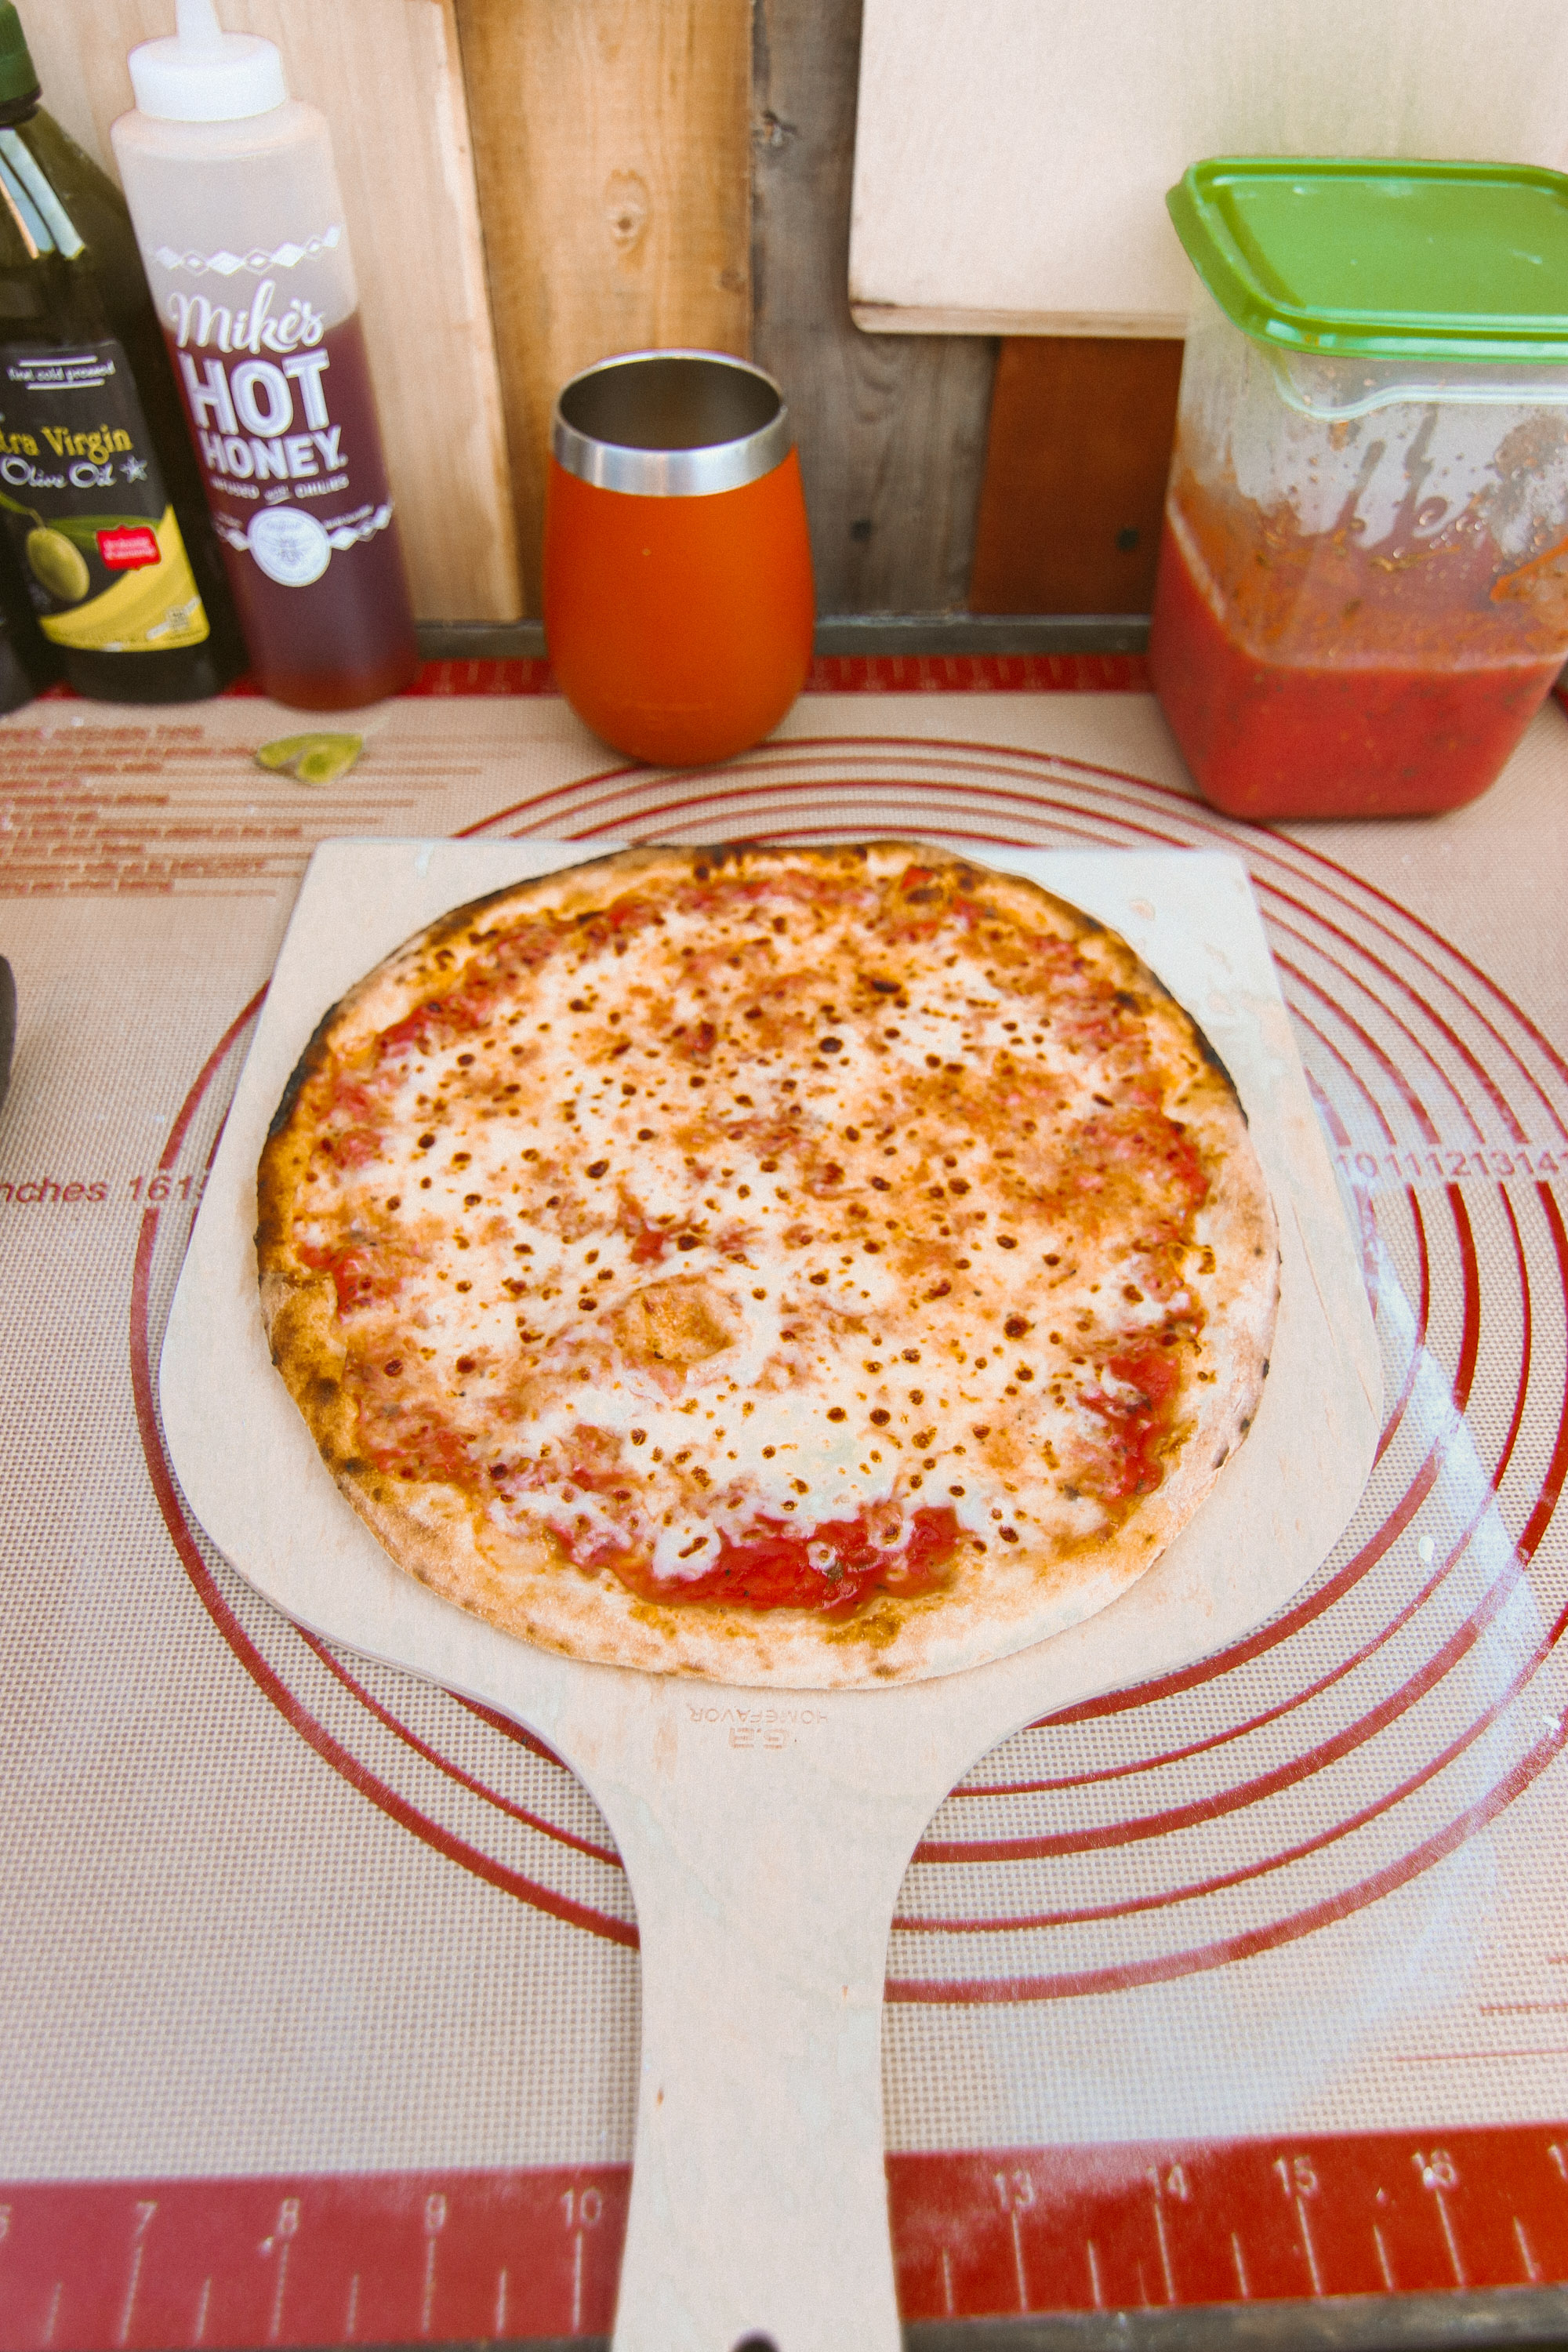
We’ve had two pizza nights since we set everything up (we snapped these photos on the second one!) and so far it has been incredible. The roccbox takes about 30 minutes to heat up before cooking, and we use the same recipe that we shared here for the pizzas. The pizzas cook in about 1 minute, and it is so fun to experiment and try to come up with new combinations! Last night we made what we called a “weird pie” which was a white pie with ricotta and parmesan cheese topped with brussel sprouts, hot honey, balsamic and onions. It came out SO good!!!
I’ll be sharing tons more about our oven soon!!!