
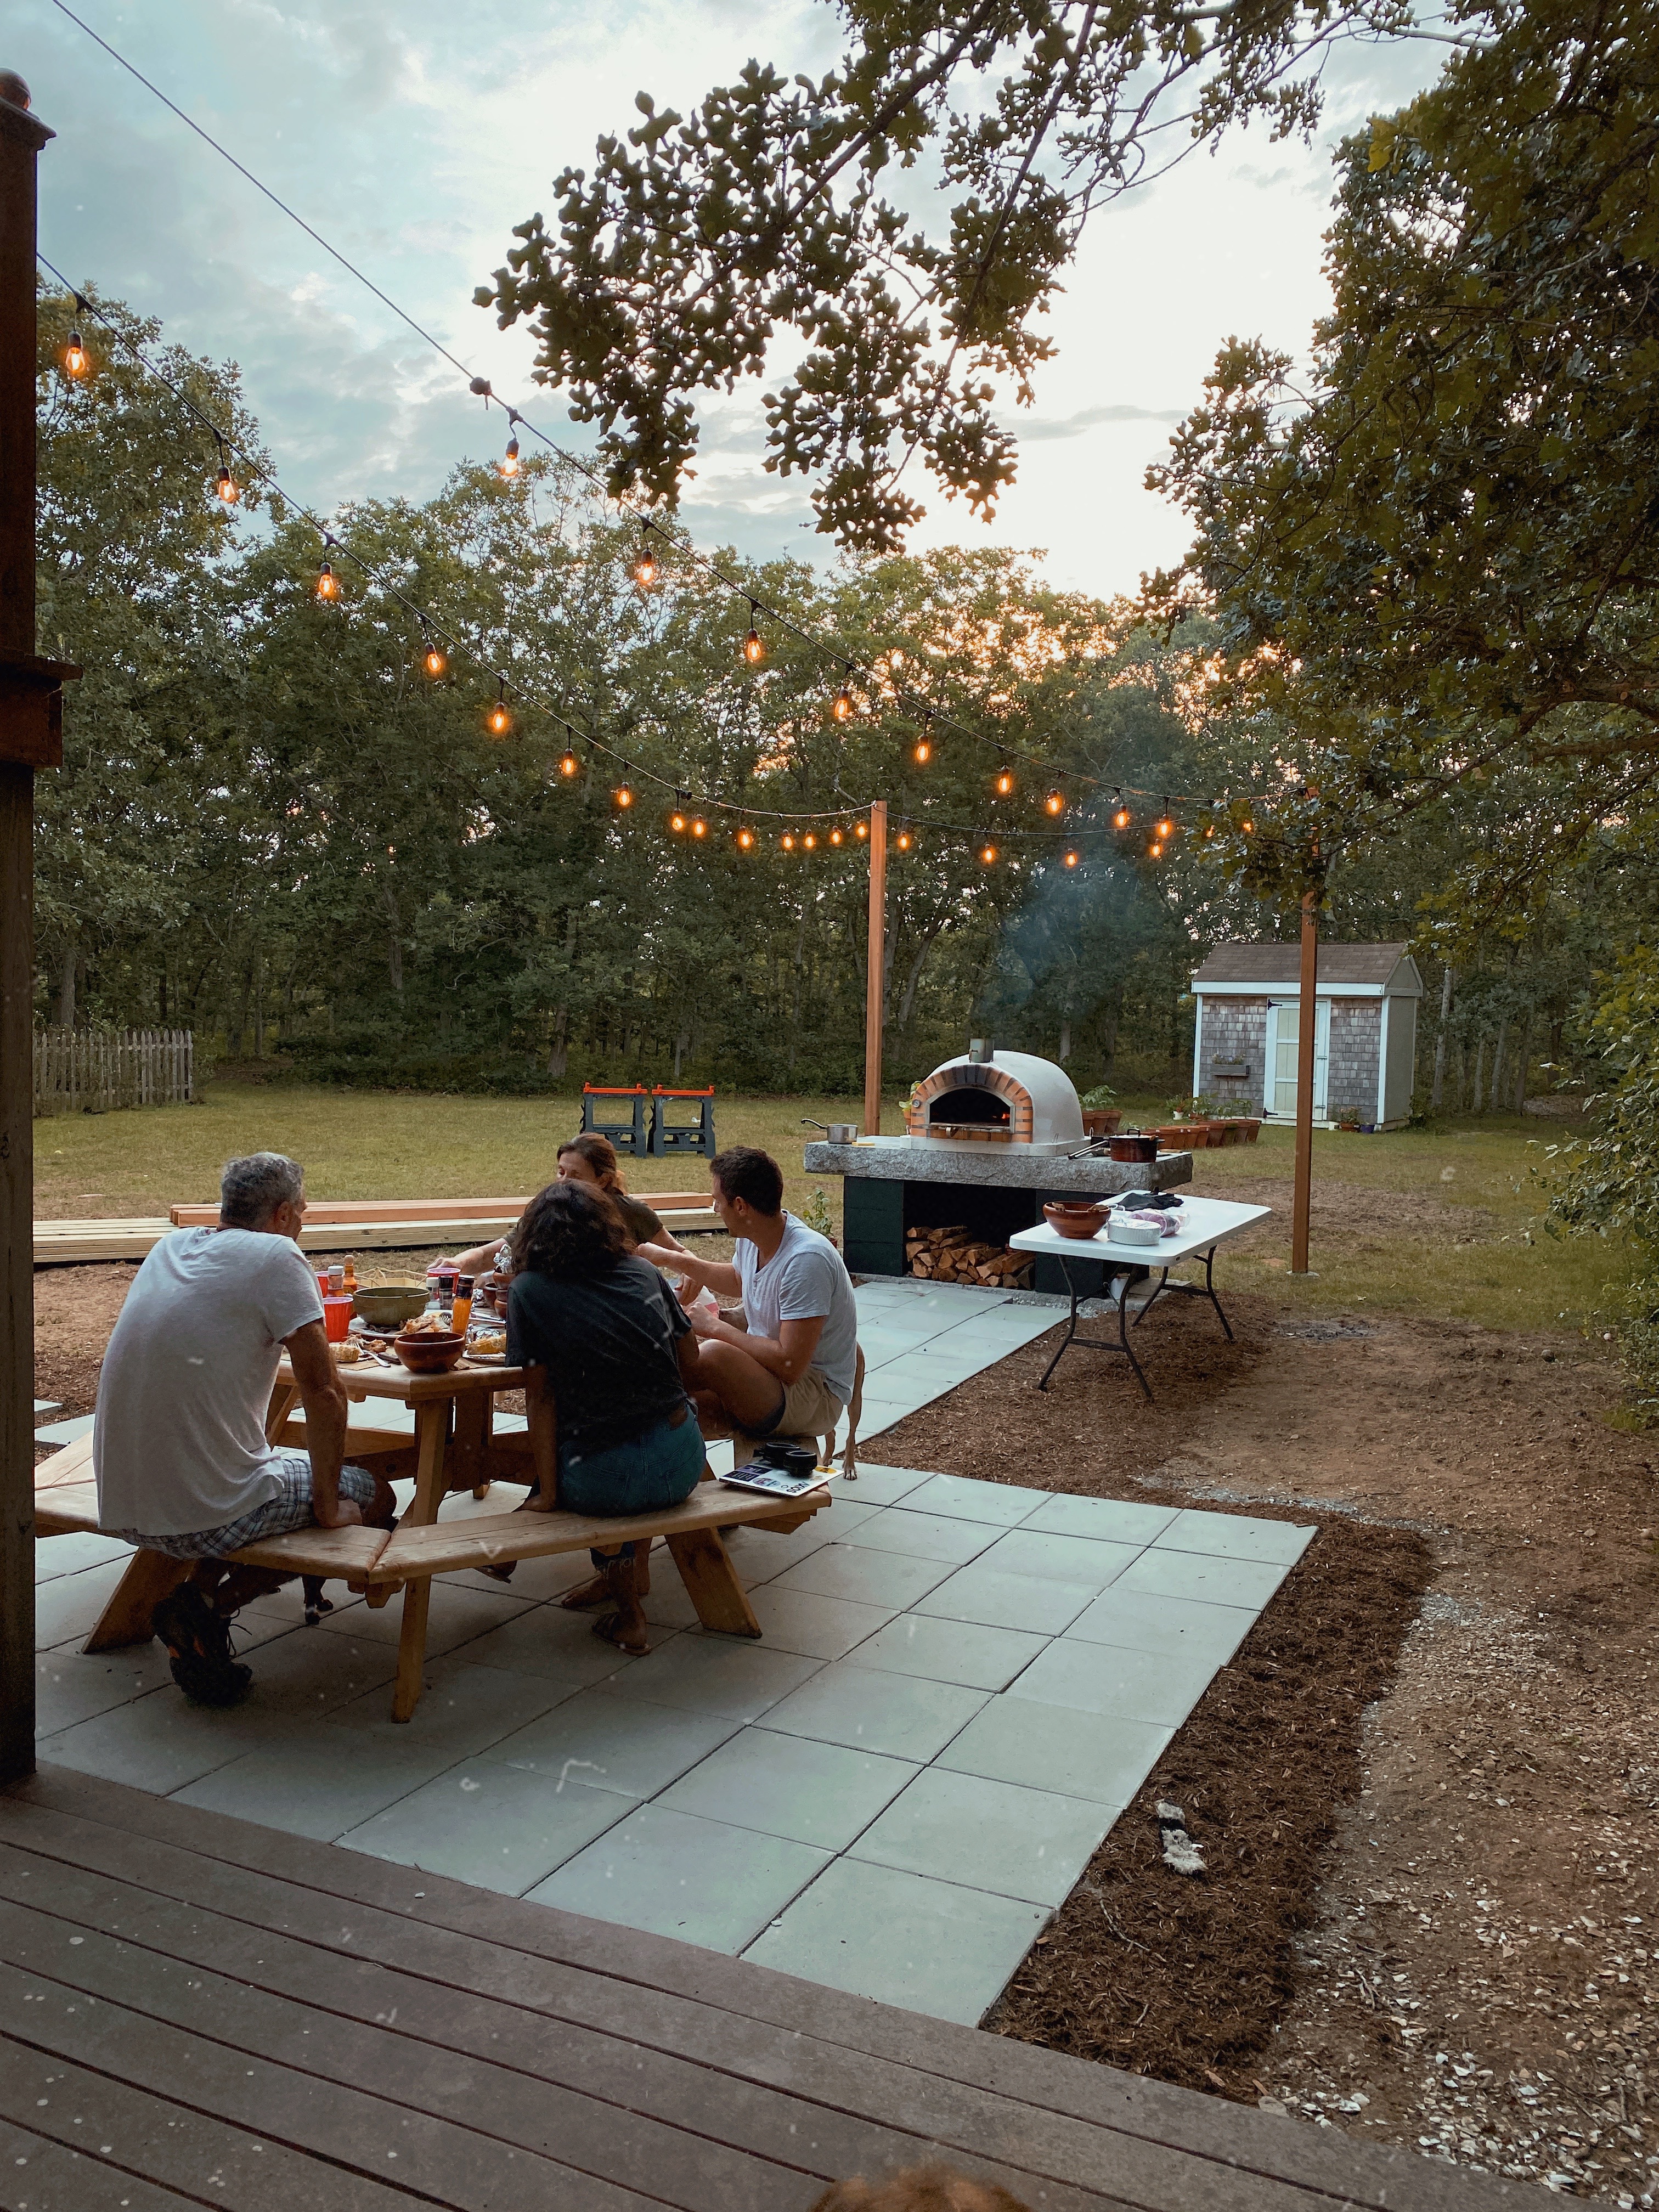
For the past few years, Matt has mentioned to my dad how cool it would be to install an outdoor pizza oven in Marthas Vineyard for the Summer. The two of them have always bonded over their mutual love of pizza since day 1- I can remember in the first year that I was dating Matt, he and my dad went on a NY pizza taste test crawl, and we stopped into about 3 different pizza shops. That’s when my dad was like … okay this guy is cool! Matt worked in a pizza shop in Miami through college, and loved making pizzas so much that he continued to work there part-time when he had a 9-5 job. It’s one of his passions, and creating this oven was like a dream for him, so my dad went all-out! I am going to preface this post by saying that my dad is a general contractor, so he knew what he was doing. I think this is definitely doable as a DIY, but it isn’t necessarily simple, and you may hit snags and feel like you need to hire someone. Anyway, here’s our step-by-step process! We saved a lot of money on the labor cost by doing a majority of the work ourselves.

Step 1: Dig out a hole where the pizza oven is going to be placed : My dad, Matt and I all dug a hole to fit the stones for the pizza oven. This keeps the stones secure, and in place. We dug the hole about 4 inches deep, so that about half of the bottom stone is underground. We used a shovel to make the sides of the rectangular hole at an almost perfect 90 degree angle. Once the hole is dug out, it needs to be leveled. We used a rake to level it out, and my dad went around the entire hole with a level to make sure that one part wasn’t higher than the other. We found these stones that acted as a perfect base, but if you can’t find similar stones you’ll need to pour a footing (Where you dig into the ground and pour concrete) to support the base.

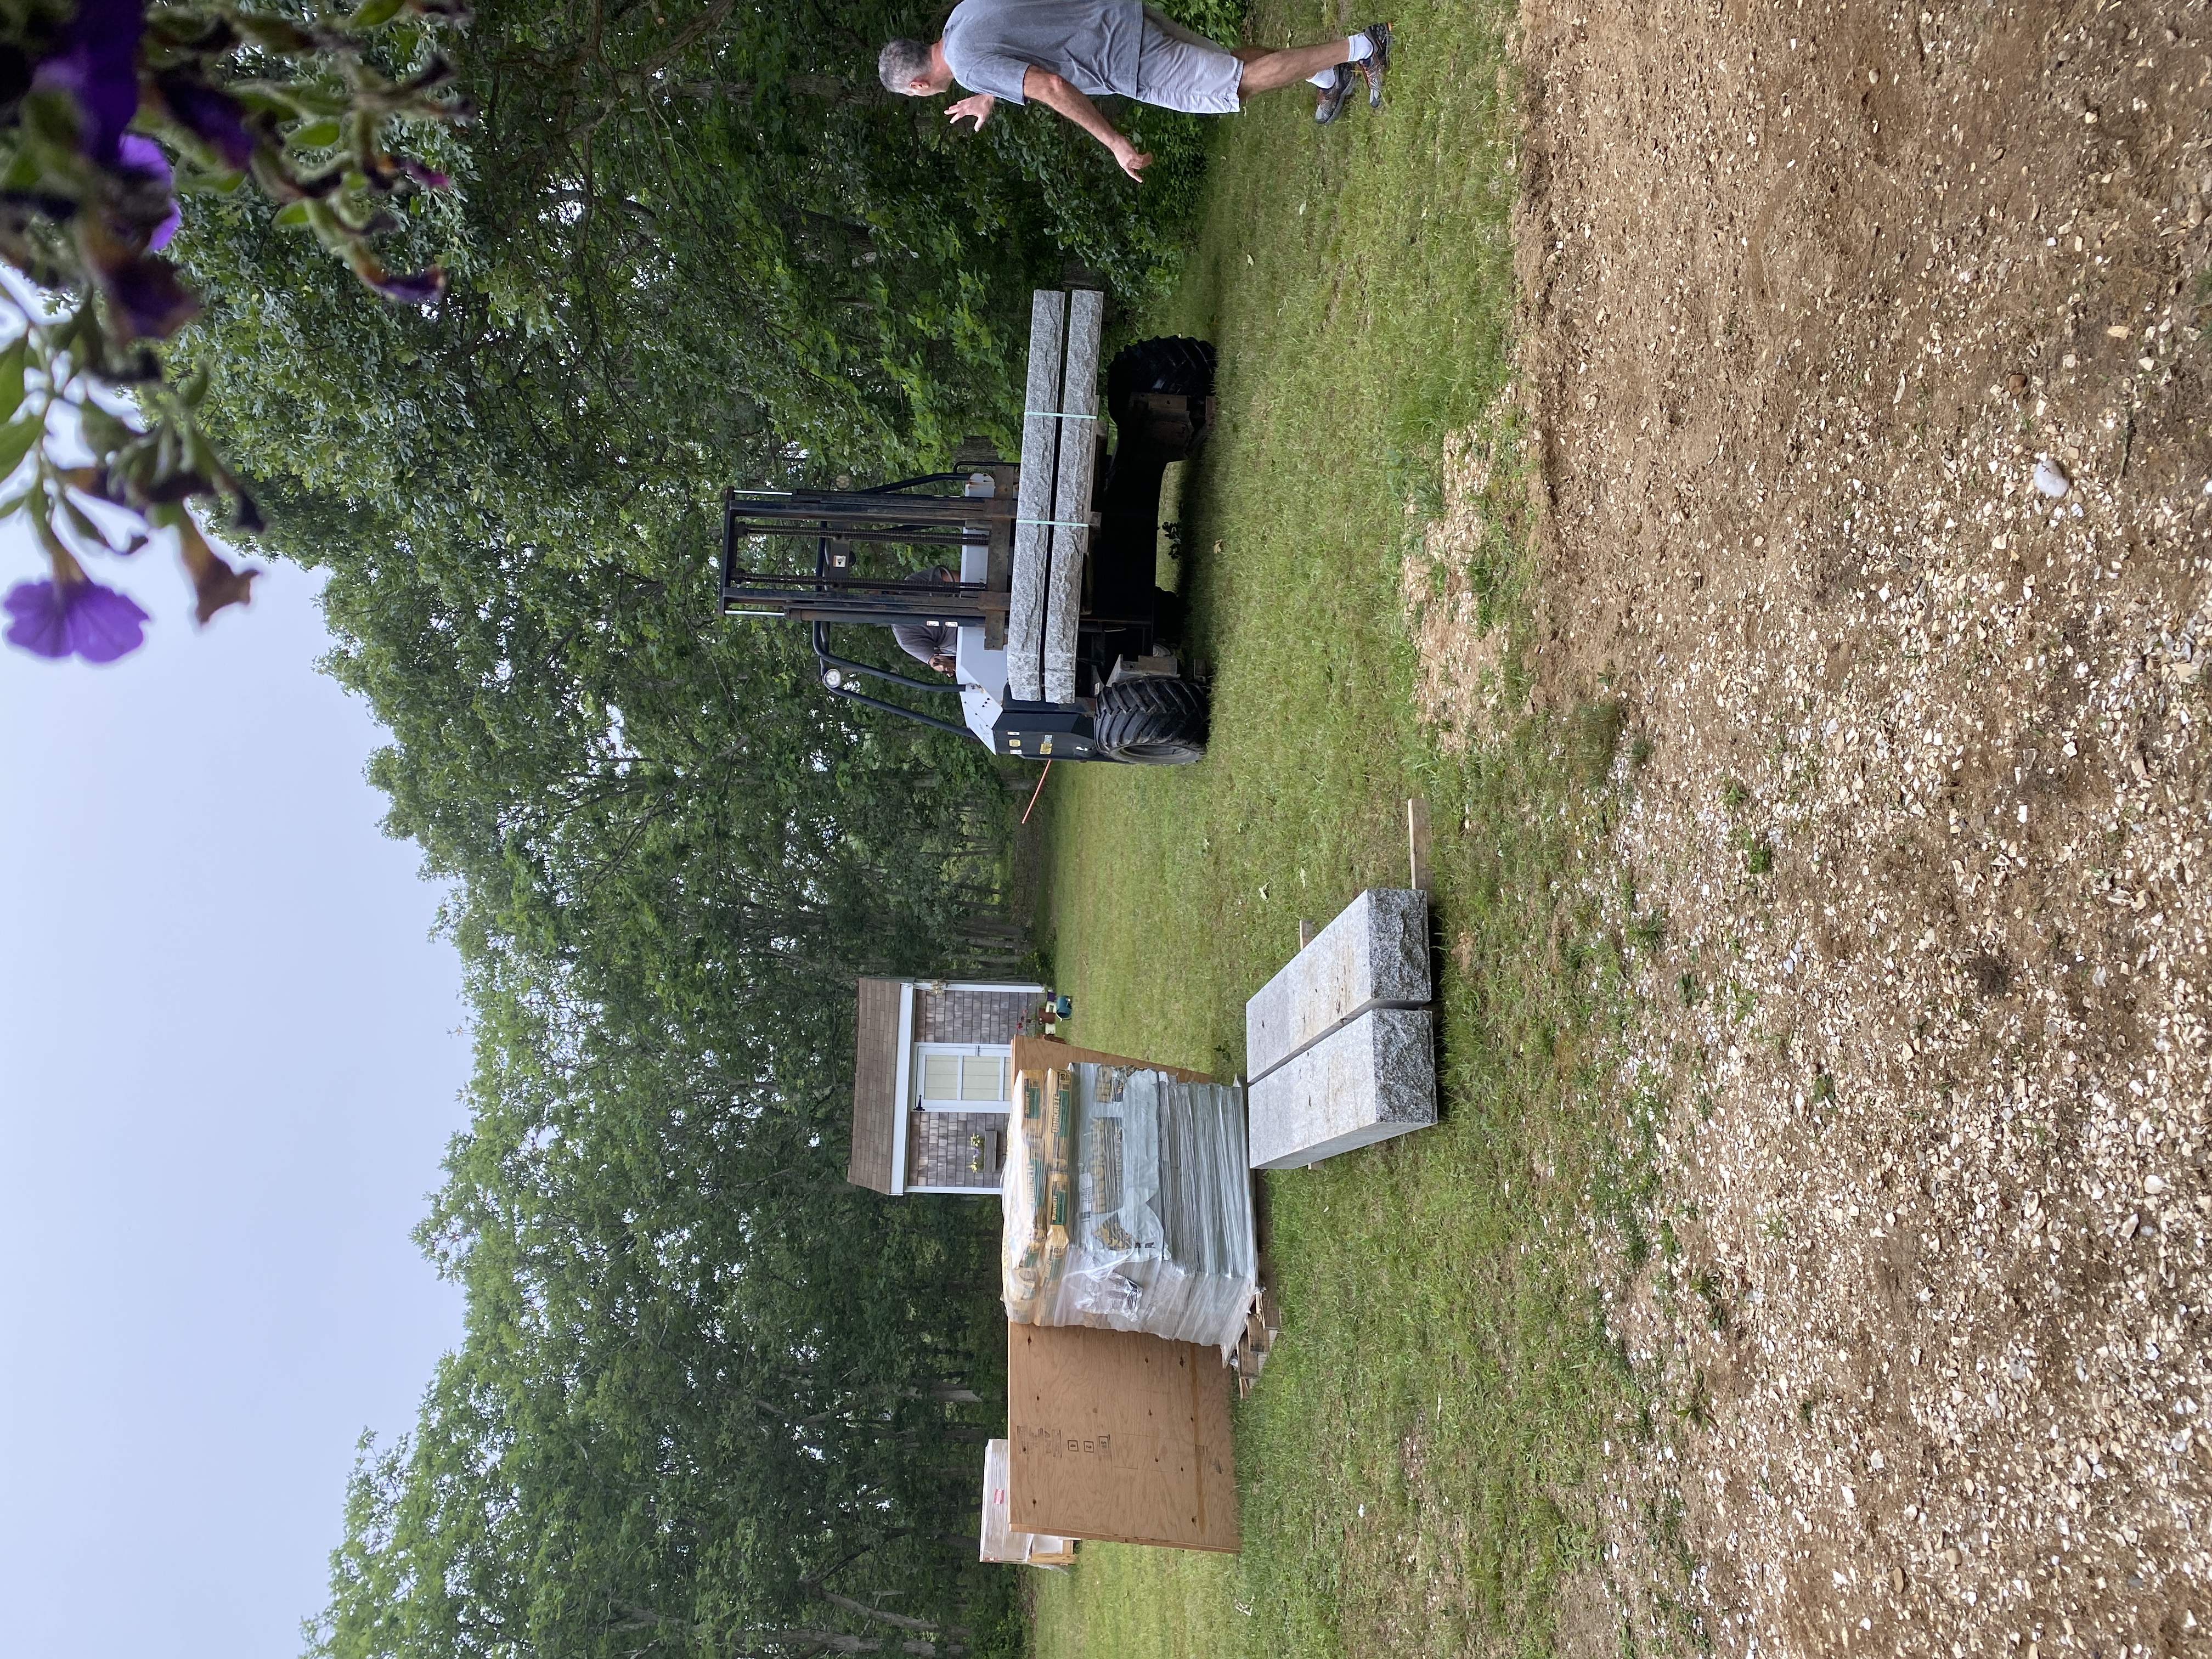
Step 2: Lay the bottom stones and mortar the cinder block in place: We hit a snag along the way on this step. The stones that we used were extraordinarily heavy, and my dad had purchased a machine to hoist them into place, but we soon realized the machine wasn’t going to cut it. We ended up having to rent a Bobcat, it cost $300 per day plus $75 for delivery. We only needed it for one day. First we laid the bottom row of granite stones in place. The bottom consists of 3 stones all lined up, and placed into the hole we dug.
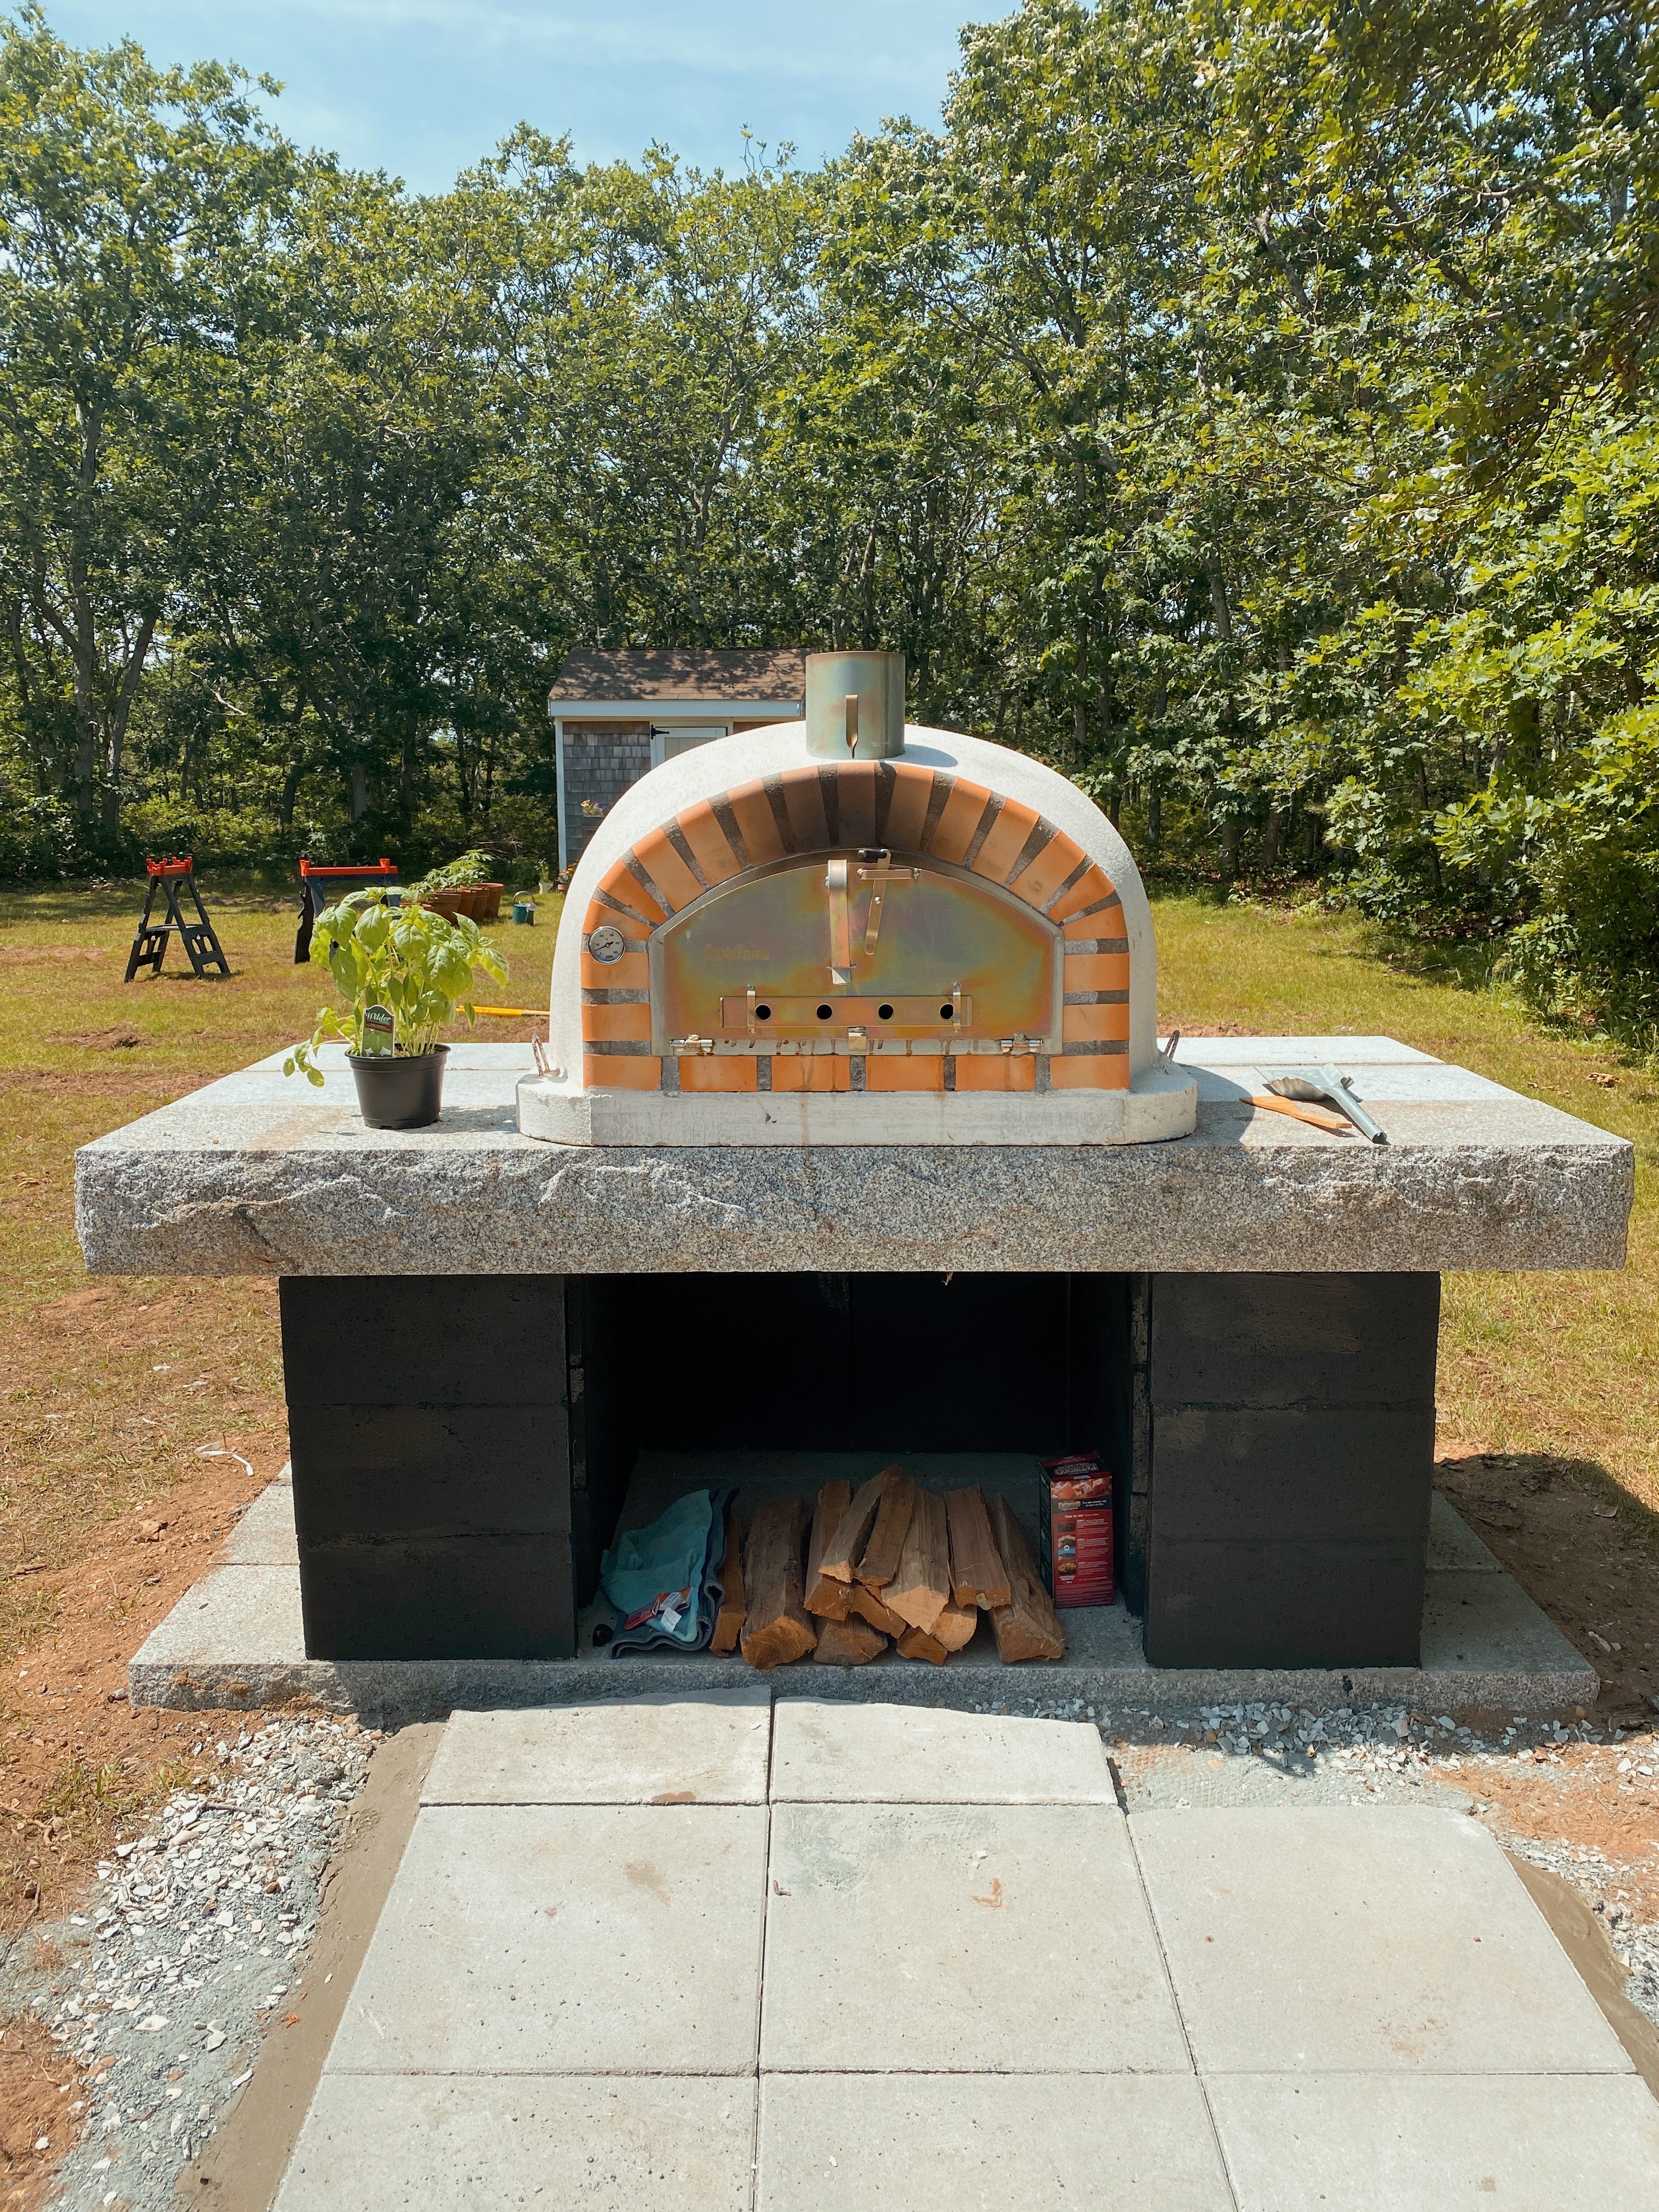
Once the bottom stones were placed, we mortared cinder block in place to support the upper granite stone. We let the cinder block dry overnight before placing the top stones.
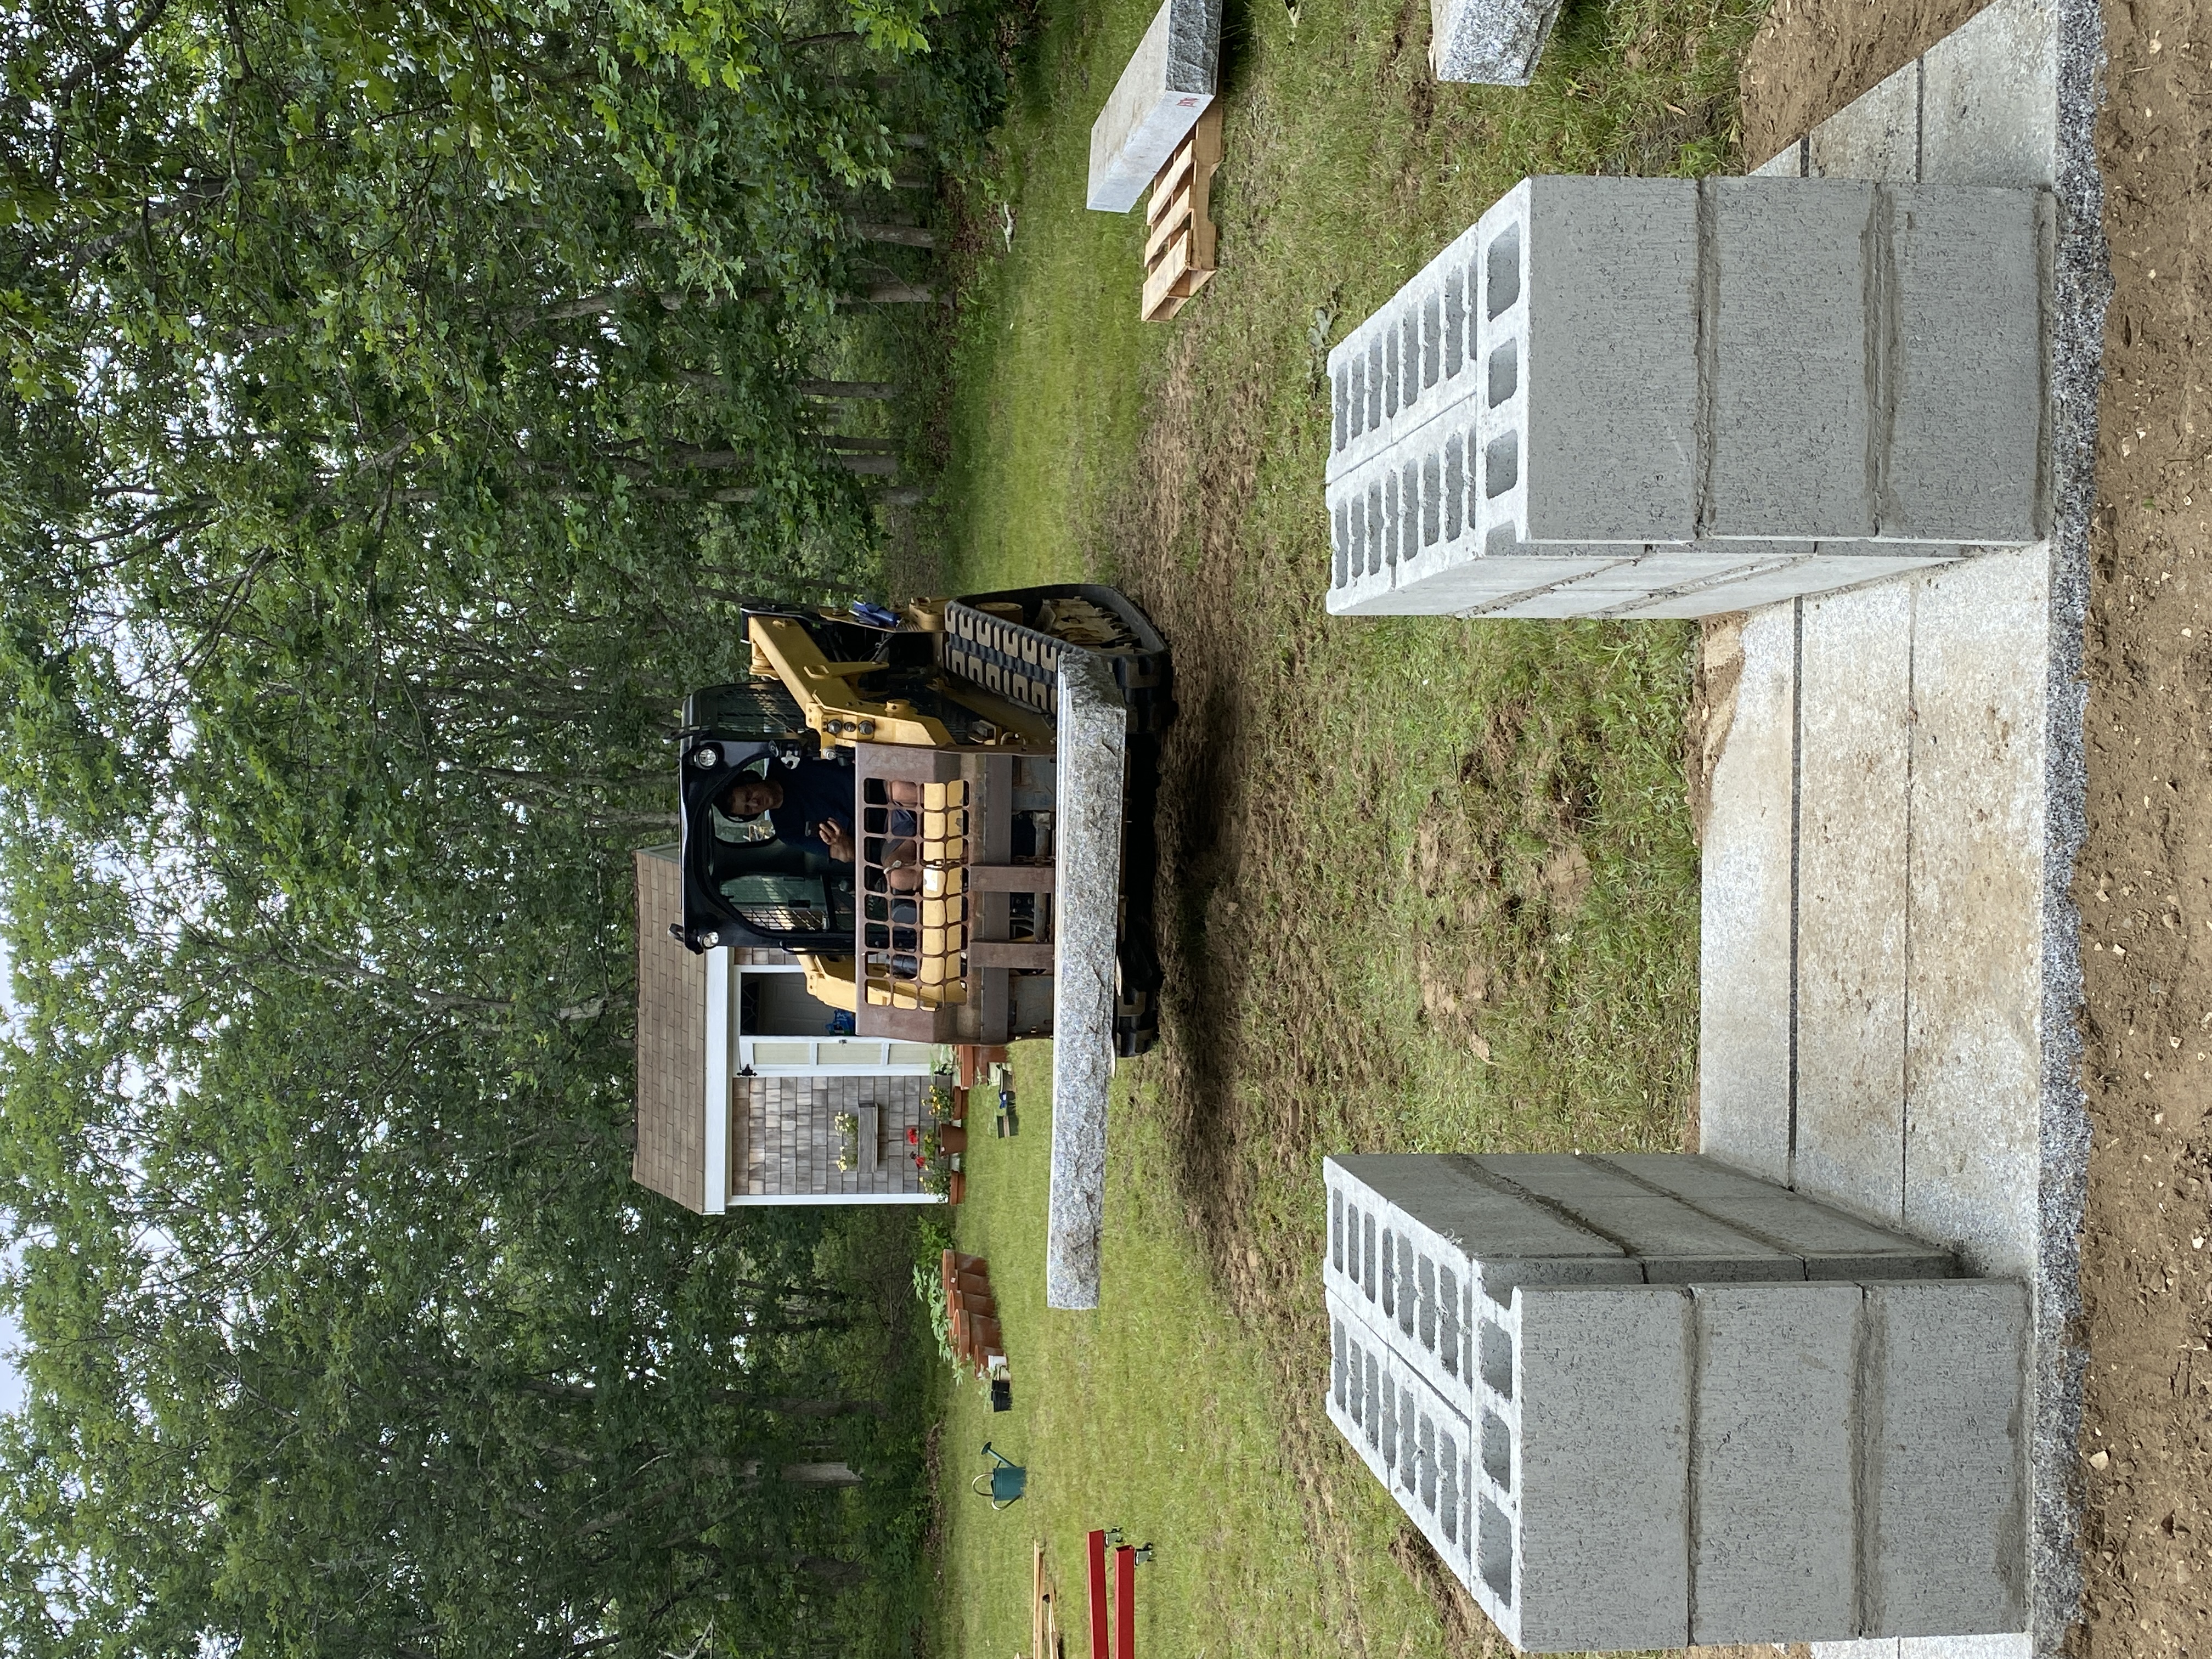
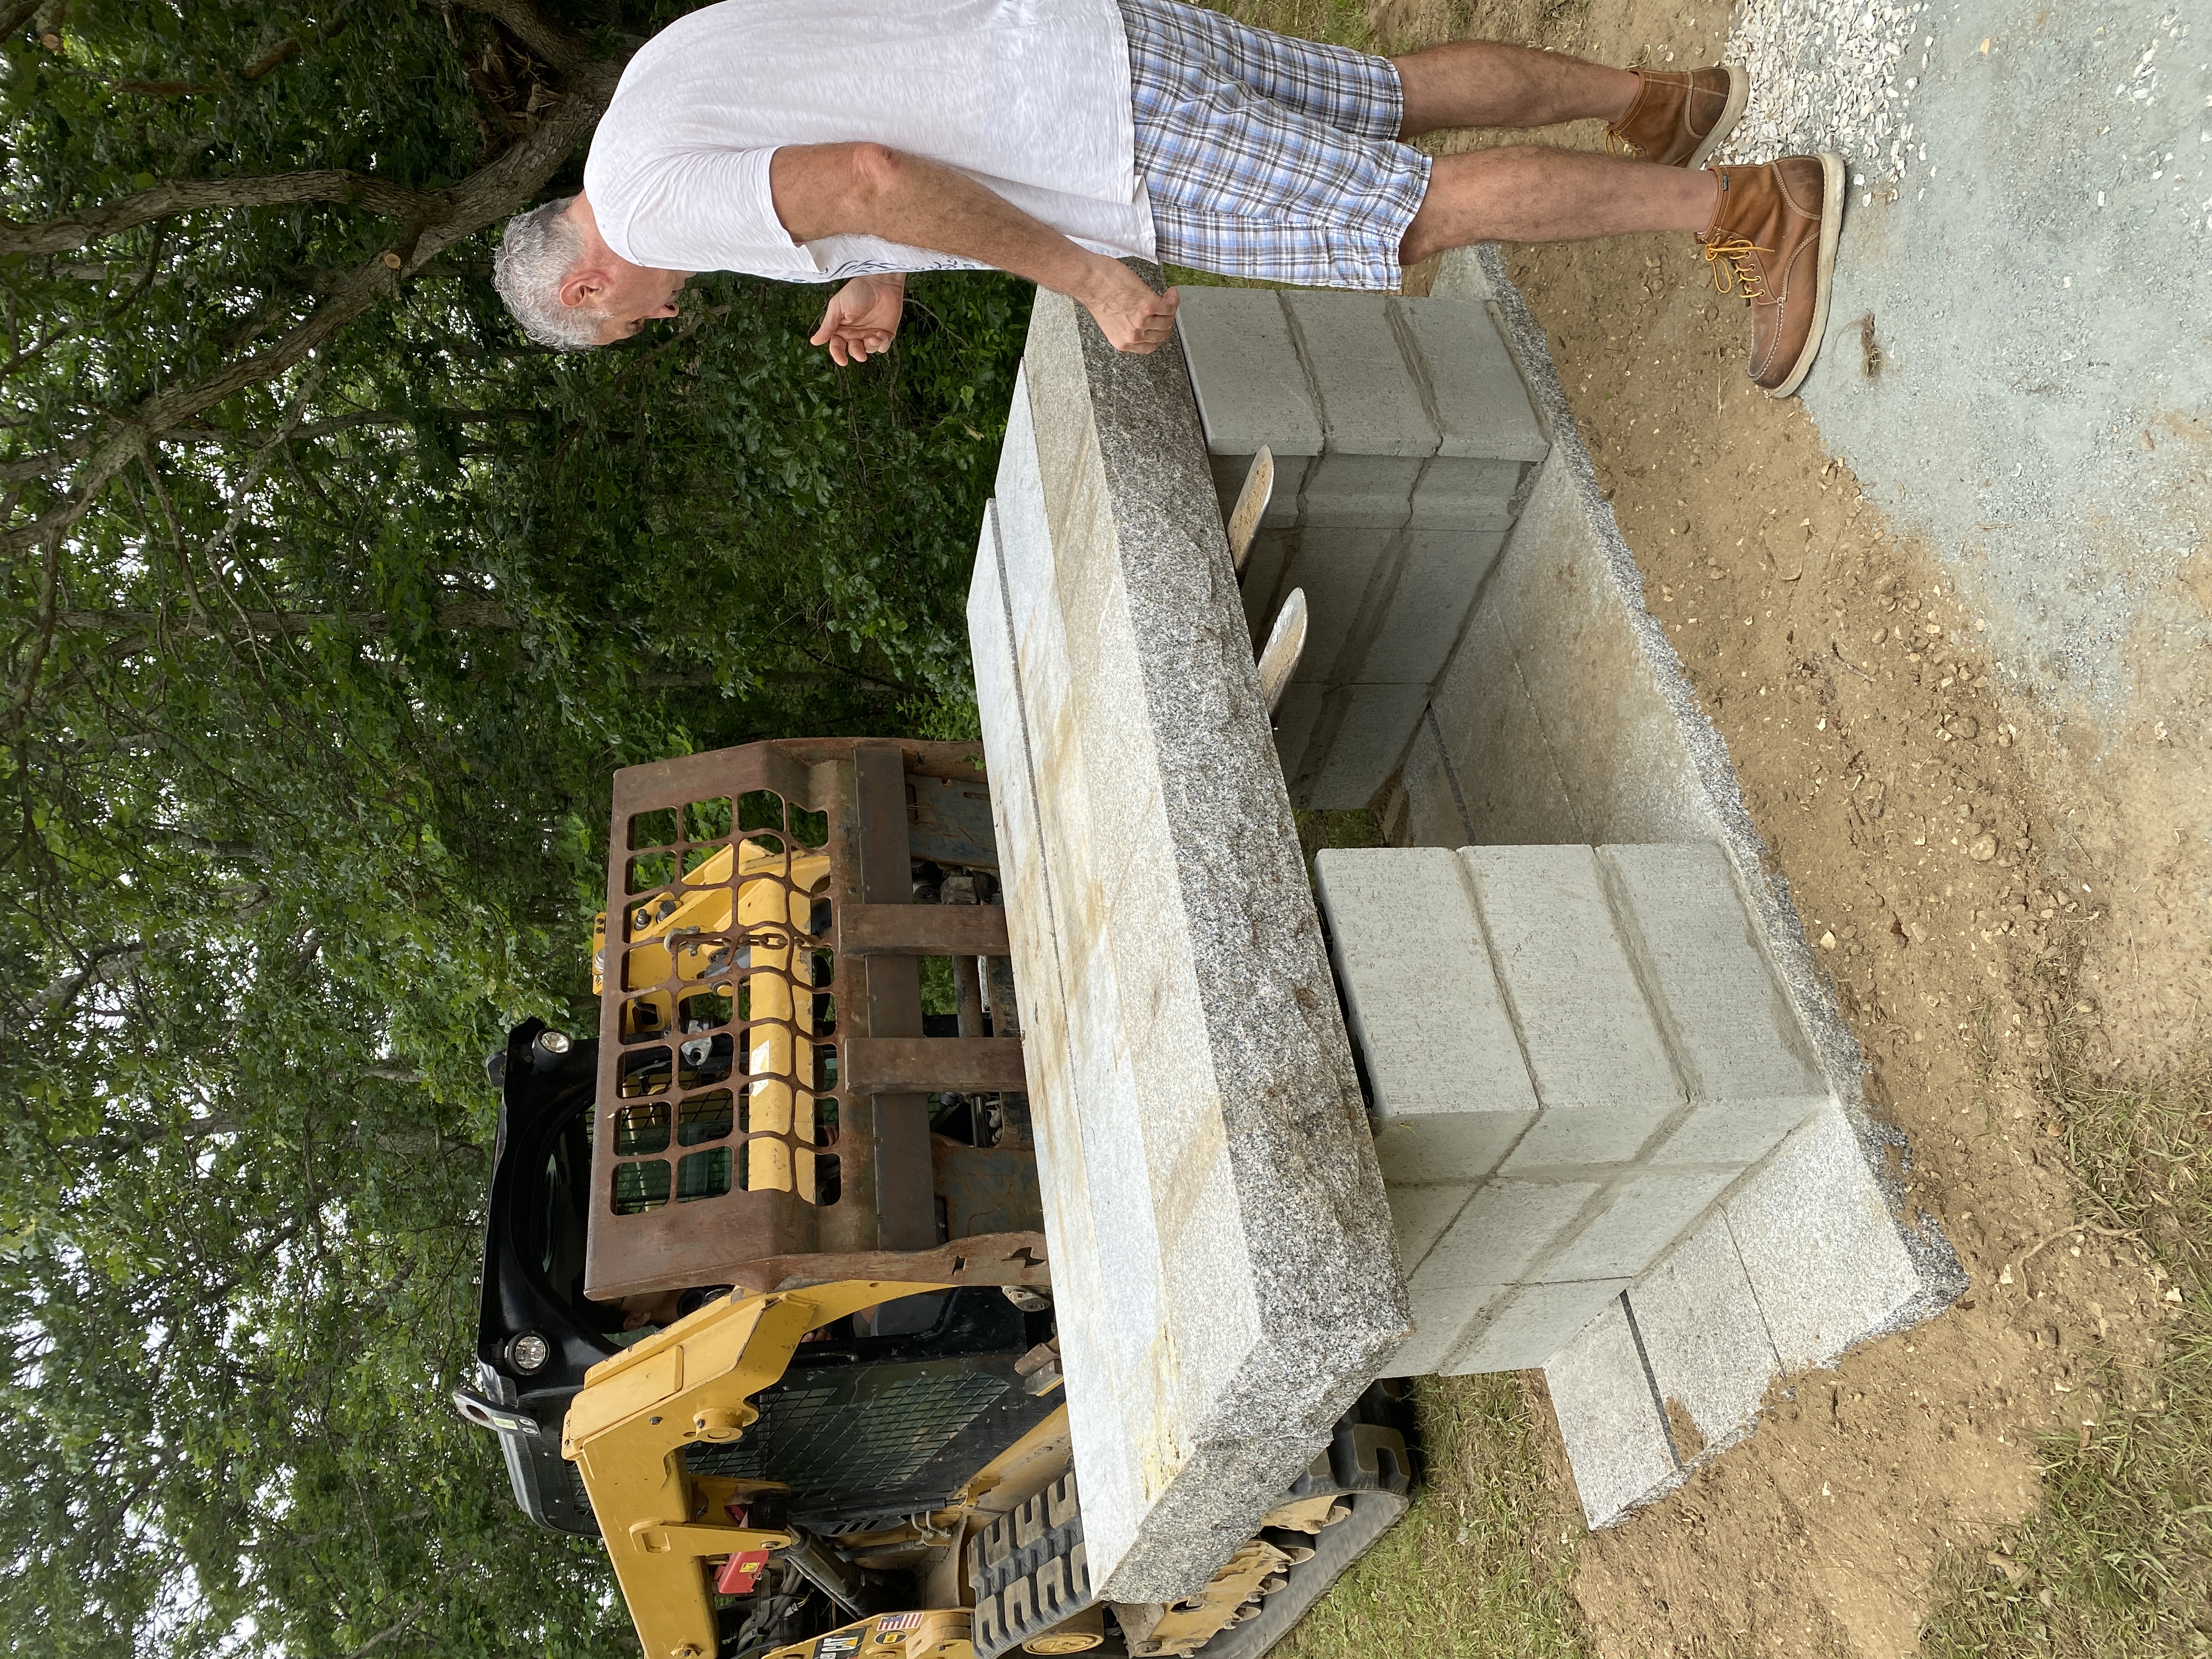
Step 3: Place the top stones over the cinder block, and place the pizza oven. The next day, after the mortar on the cinder block had dried, the Bobcat placed the top 3 stones on top of the cinder blocks. The stones were extremely thick and supportive, so therefore we didn’t have to pour a top slab. Just FYI, the stones we used are called “granite treads” and I couldn’t find them online to link, but you may be able to find them if you search locally near you. Be very careful about this, because you don’t want the pizza oven to outweigh the stone that is holding it up. The Bobcat driver lined all 3 granite stones up on the ground before lifting them up, and placed all 3 at the same time. Once the top granite stones were placed, the Bobcat then hoisted the pizza oven on top. We didn’t mortar the top stones or the pizza oven in place, because they will not shift or move just due to the weight of both of them.
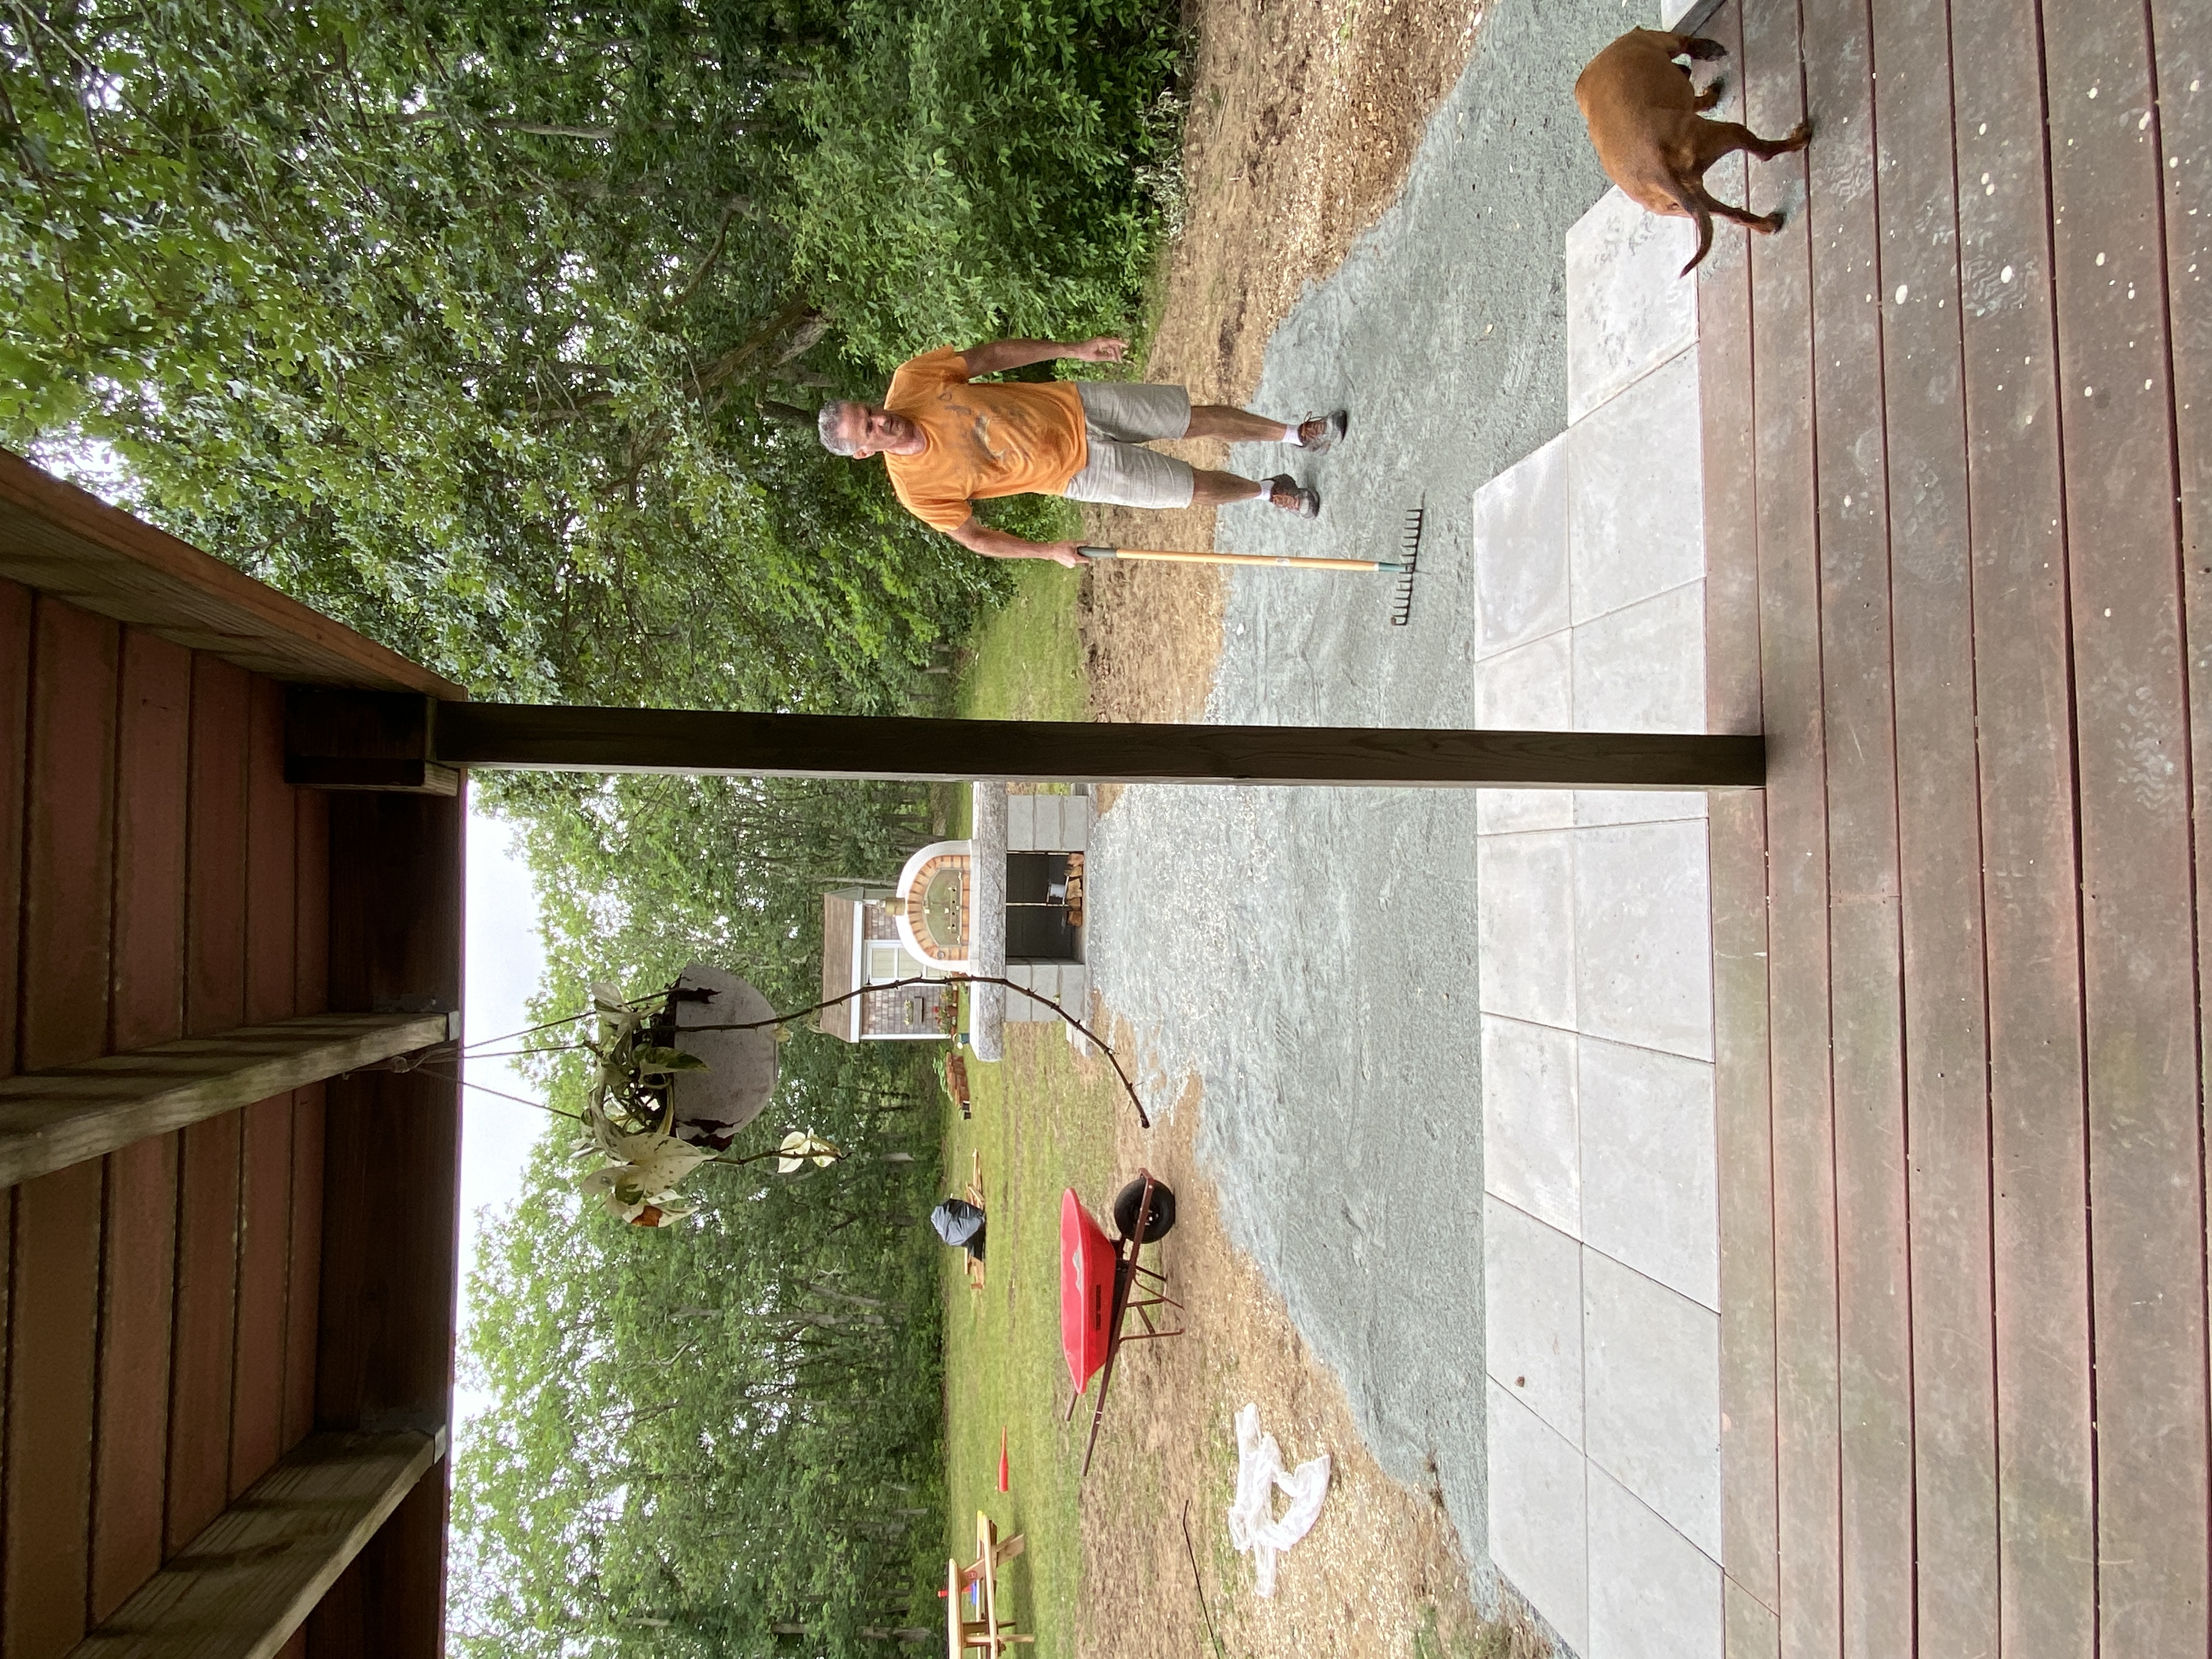
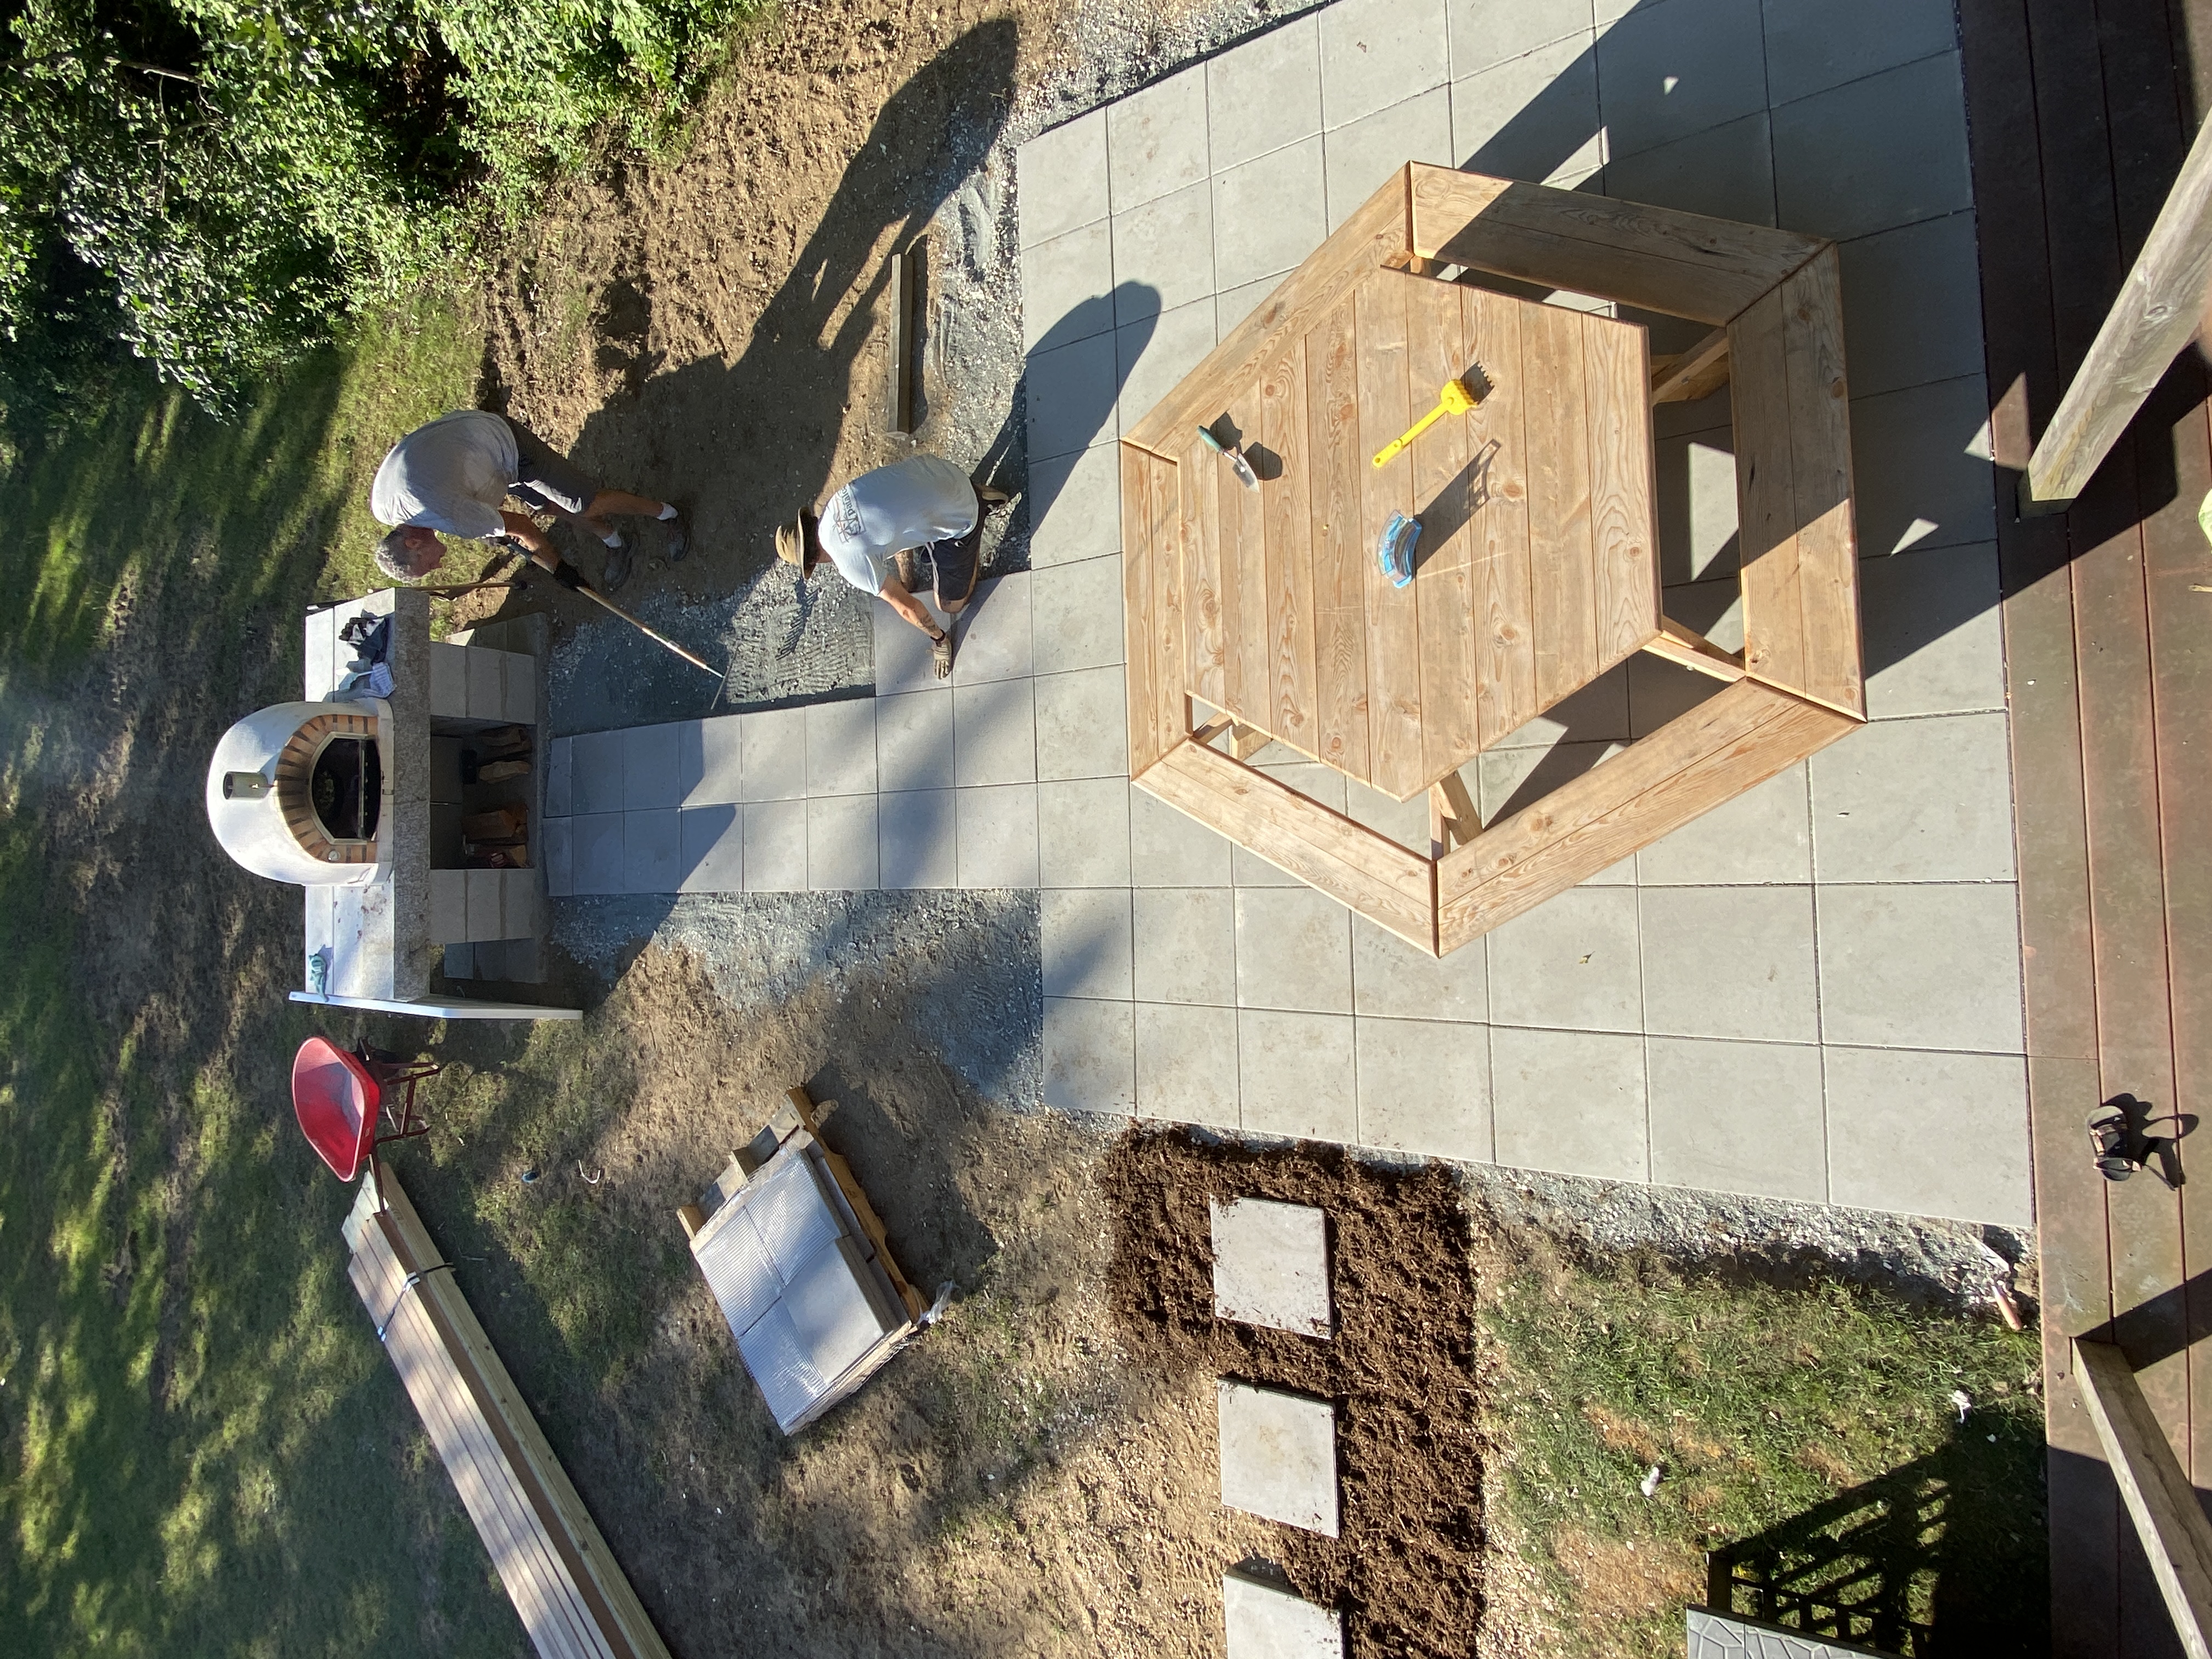
Step 4: Lay down and level setting sand, and lay Pavers. The pavers we put in are extremely heavy (probably 50lbs each) so they just needed to be placed on a level surface, and they stay in place. We had setting sand laid down, and then we raked it and leveled it out over the space where the pavers went in. We did an eyeball leveling, and then as my dad and Matt laid the pavers, they leveled each one out one by one. It was a pretty grueling process. They would place a paver, and then see where they needed to build up each side with more sand or less to make them all leveled out. We started with the first row closest to the house, and completed each row and worked our way out toward the pizza oven. Please note the pavers we used are concrete pavers, which is why we could set them this way.
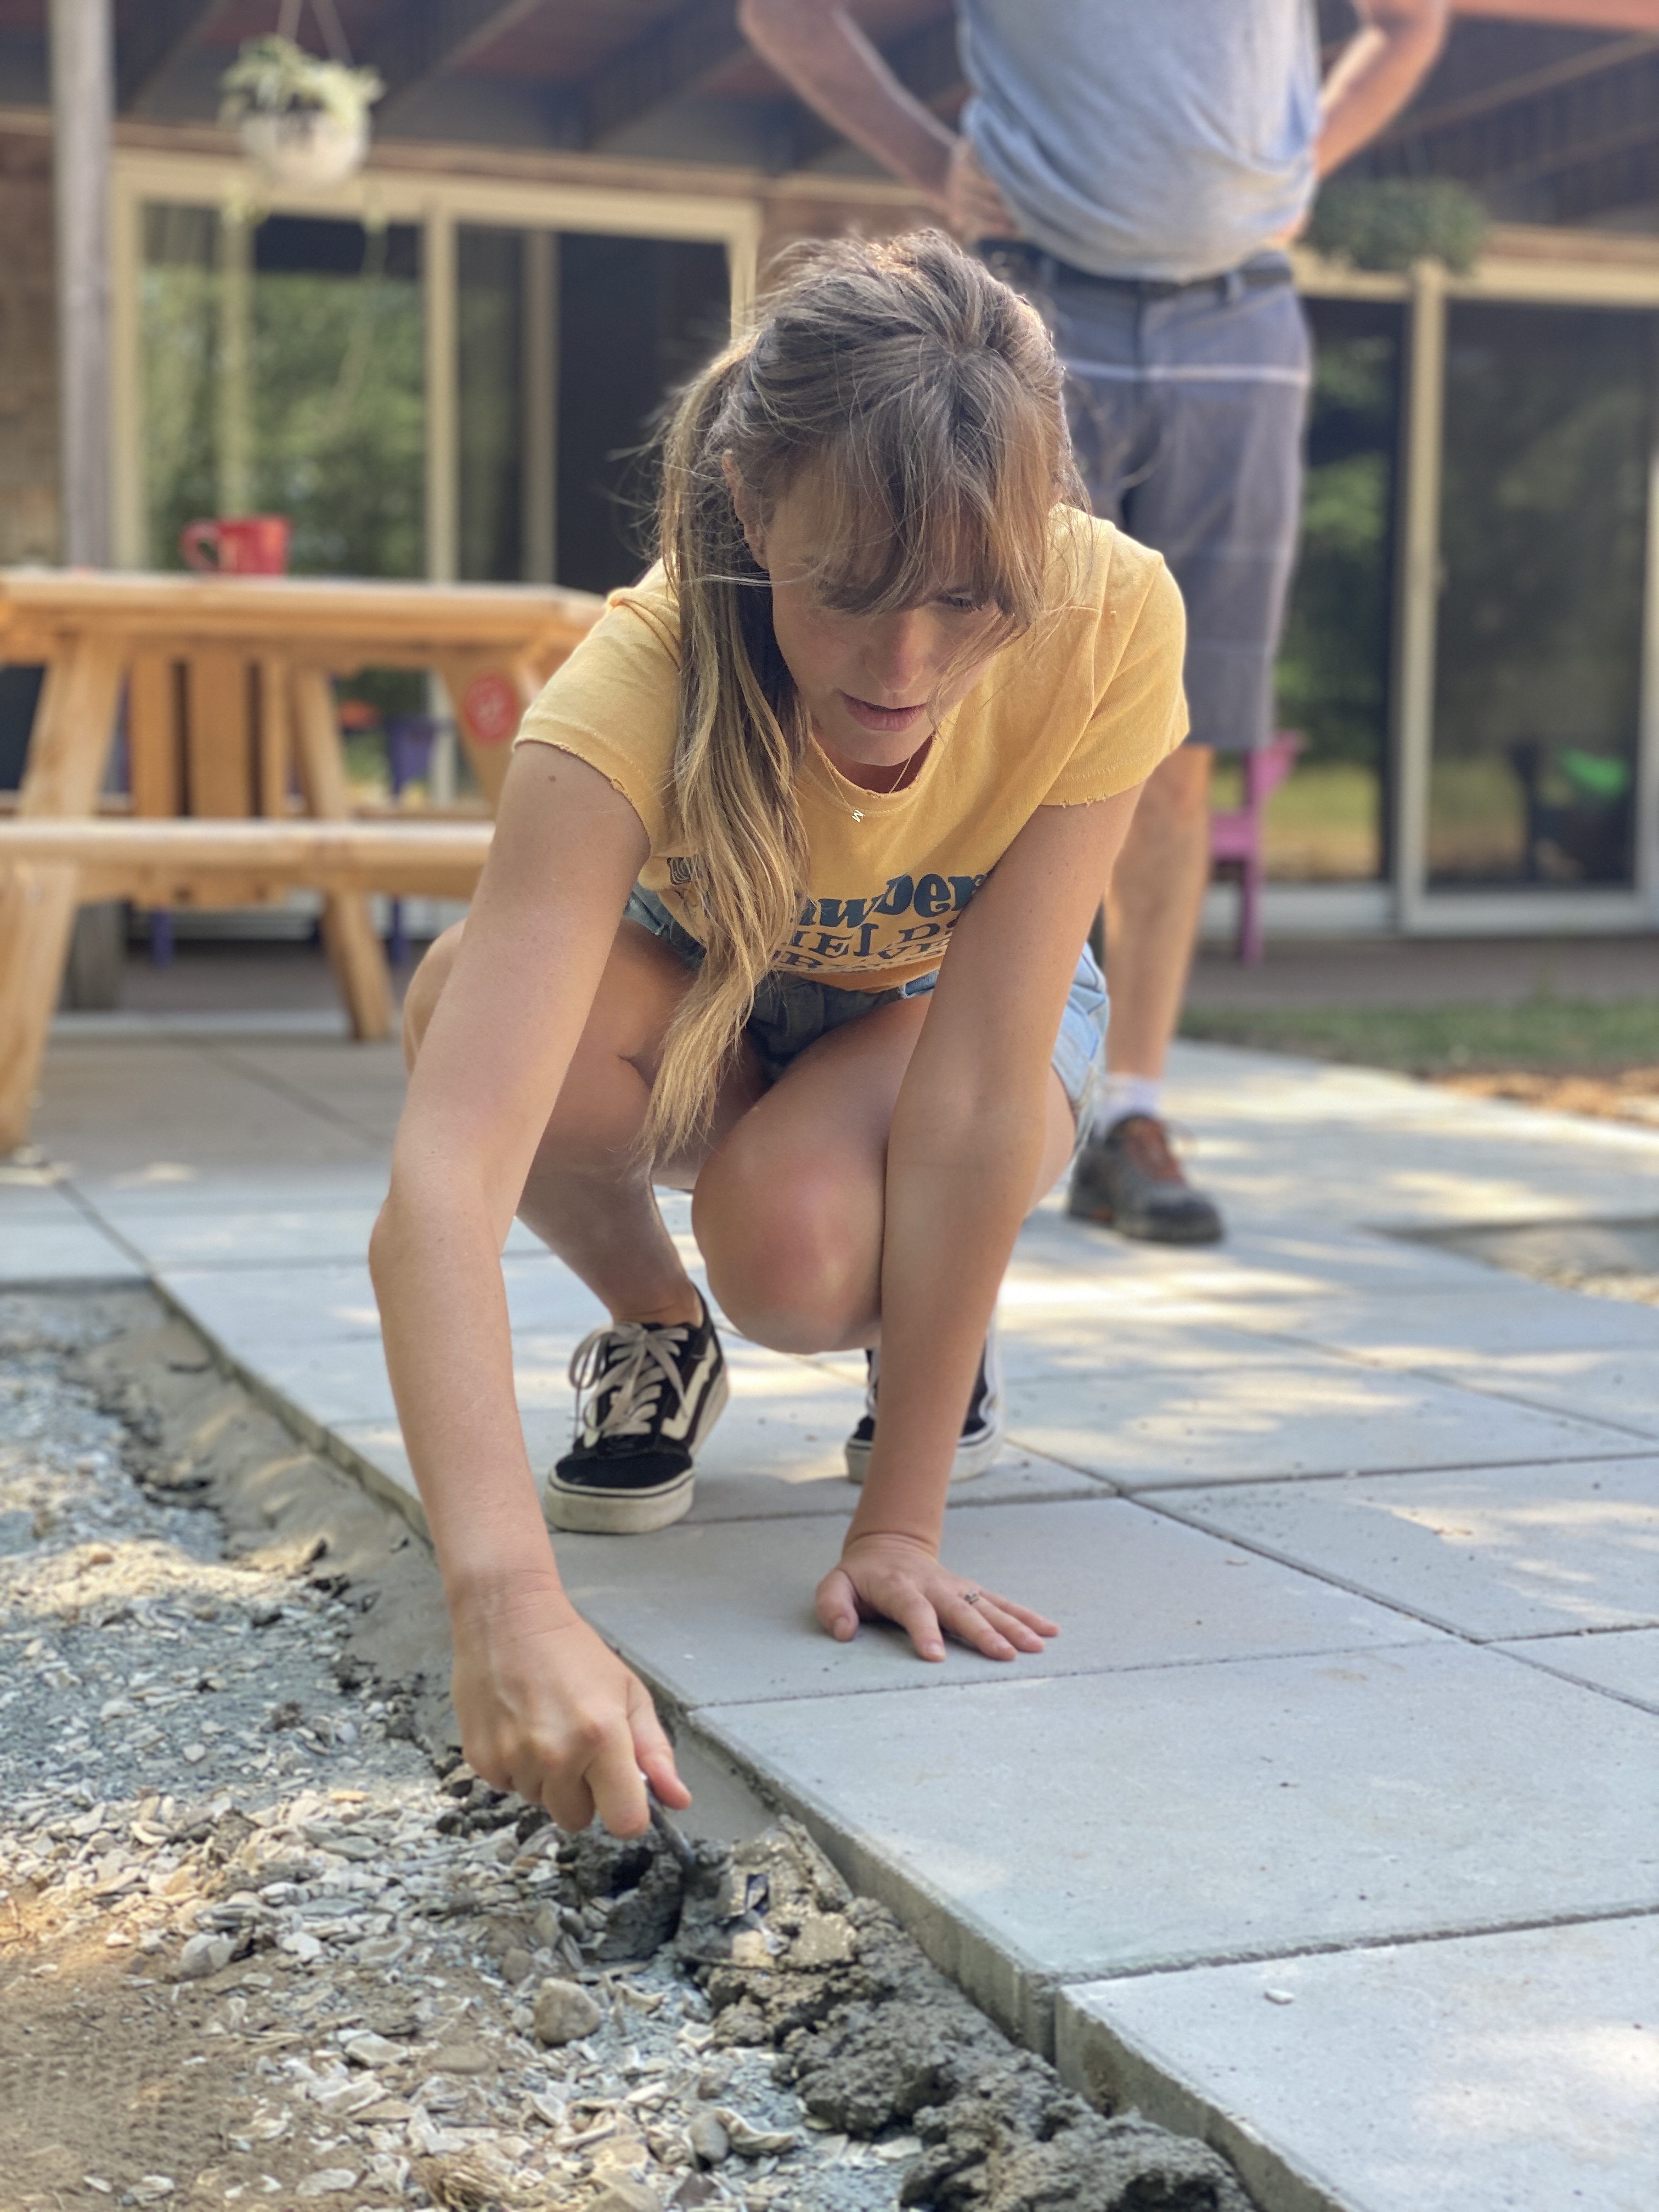
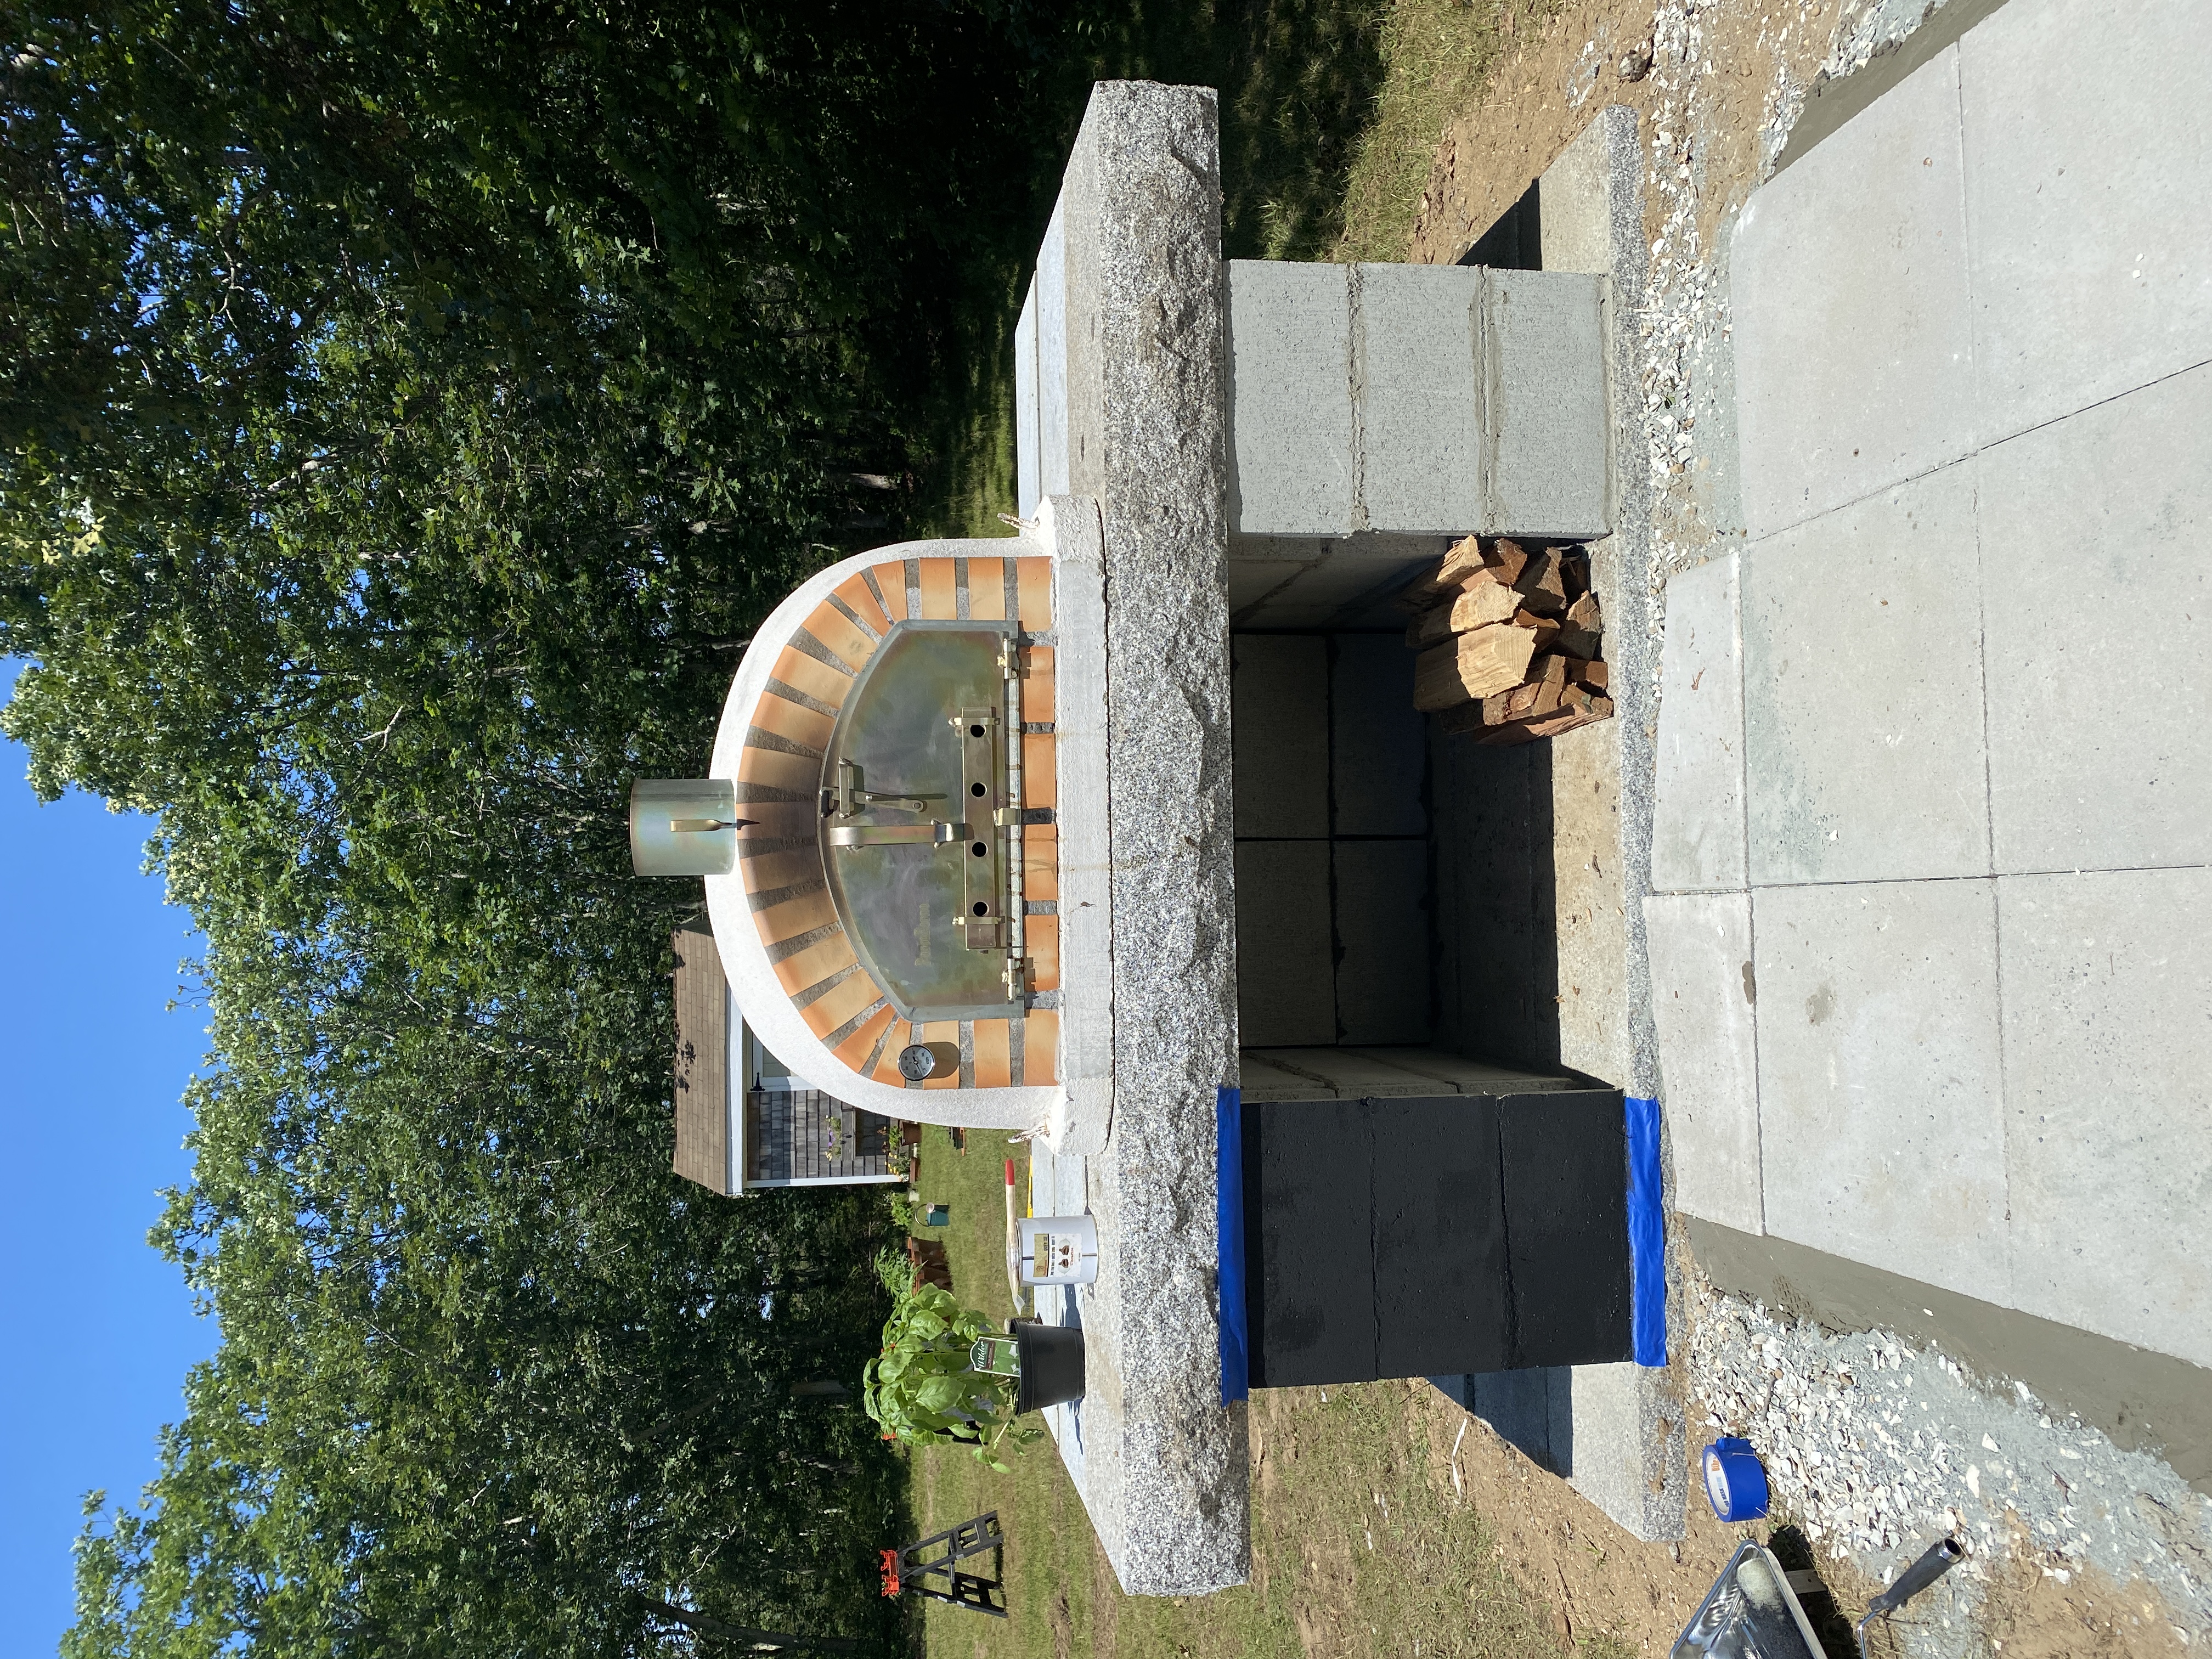
Step 5: Mortar the edges to keep the pavers in place. Once the pavers were all in place, to keep them locked in and from settling or shifting, we mortared around the edges. Matt laid the mortar with a big shovel, and then I smoothed it out so it connected evenly with the top of the tiles and the dirt on the bottom.
Step 6: Paint the cinderblock with Cement Paint. The final step was more cosmetic, but I thought the oven would look more complete if we painted the cinderblock. Cement Paint is great, and provides great coverage for years, so I slapped two coats on and Voila!!!
If you are planning on using this post to create your own pizza oven, I’ve linked some pieced that we used below. Feel free to DM me any questions or comment below!