
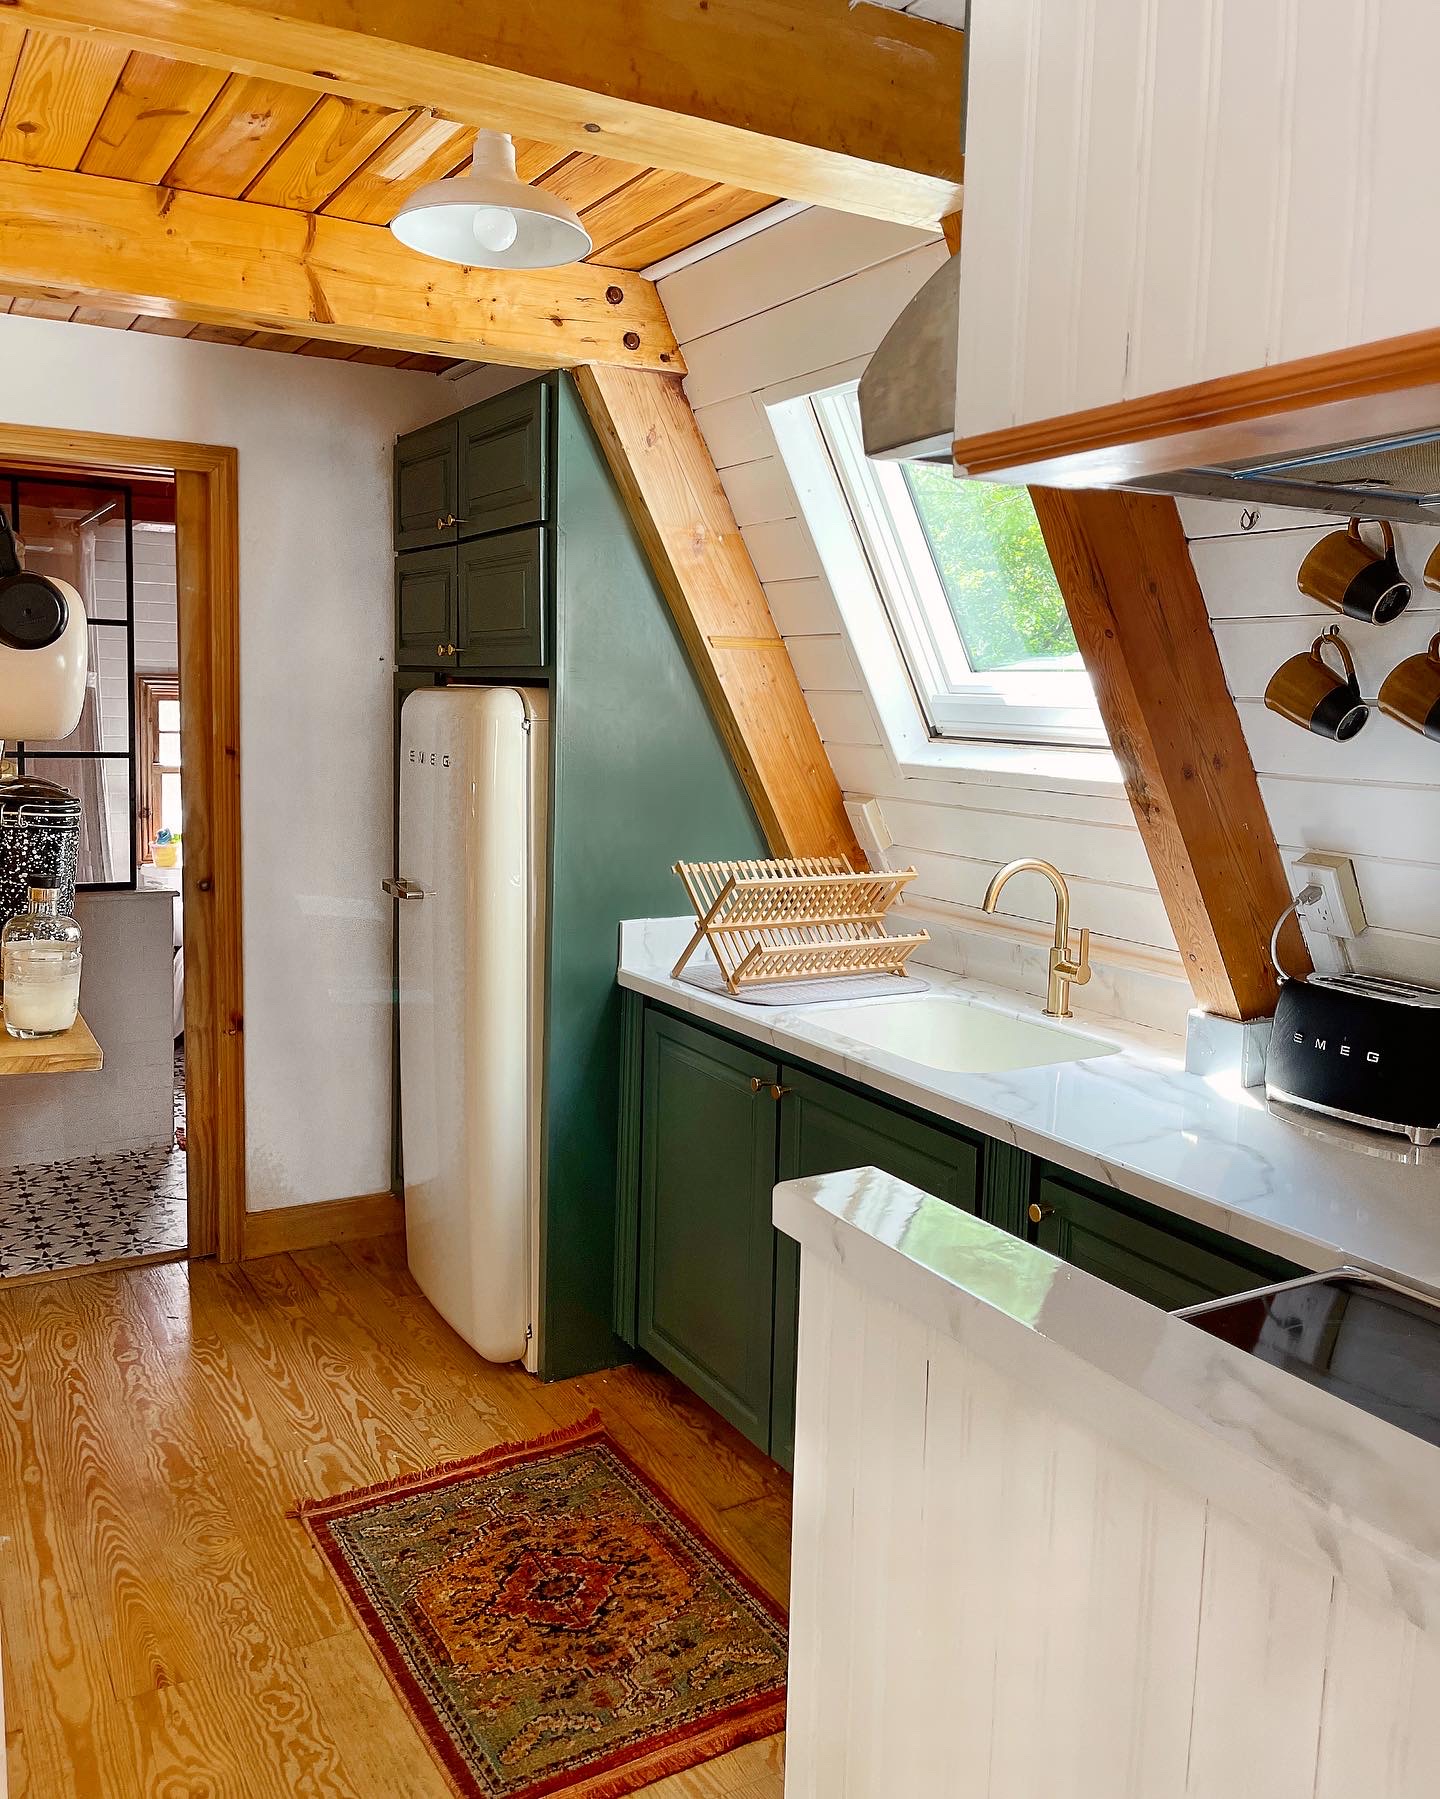
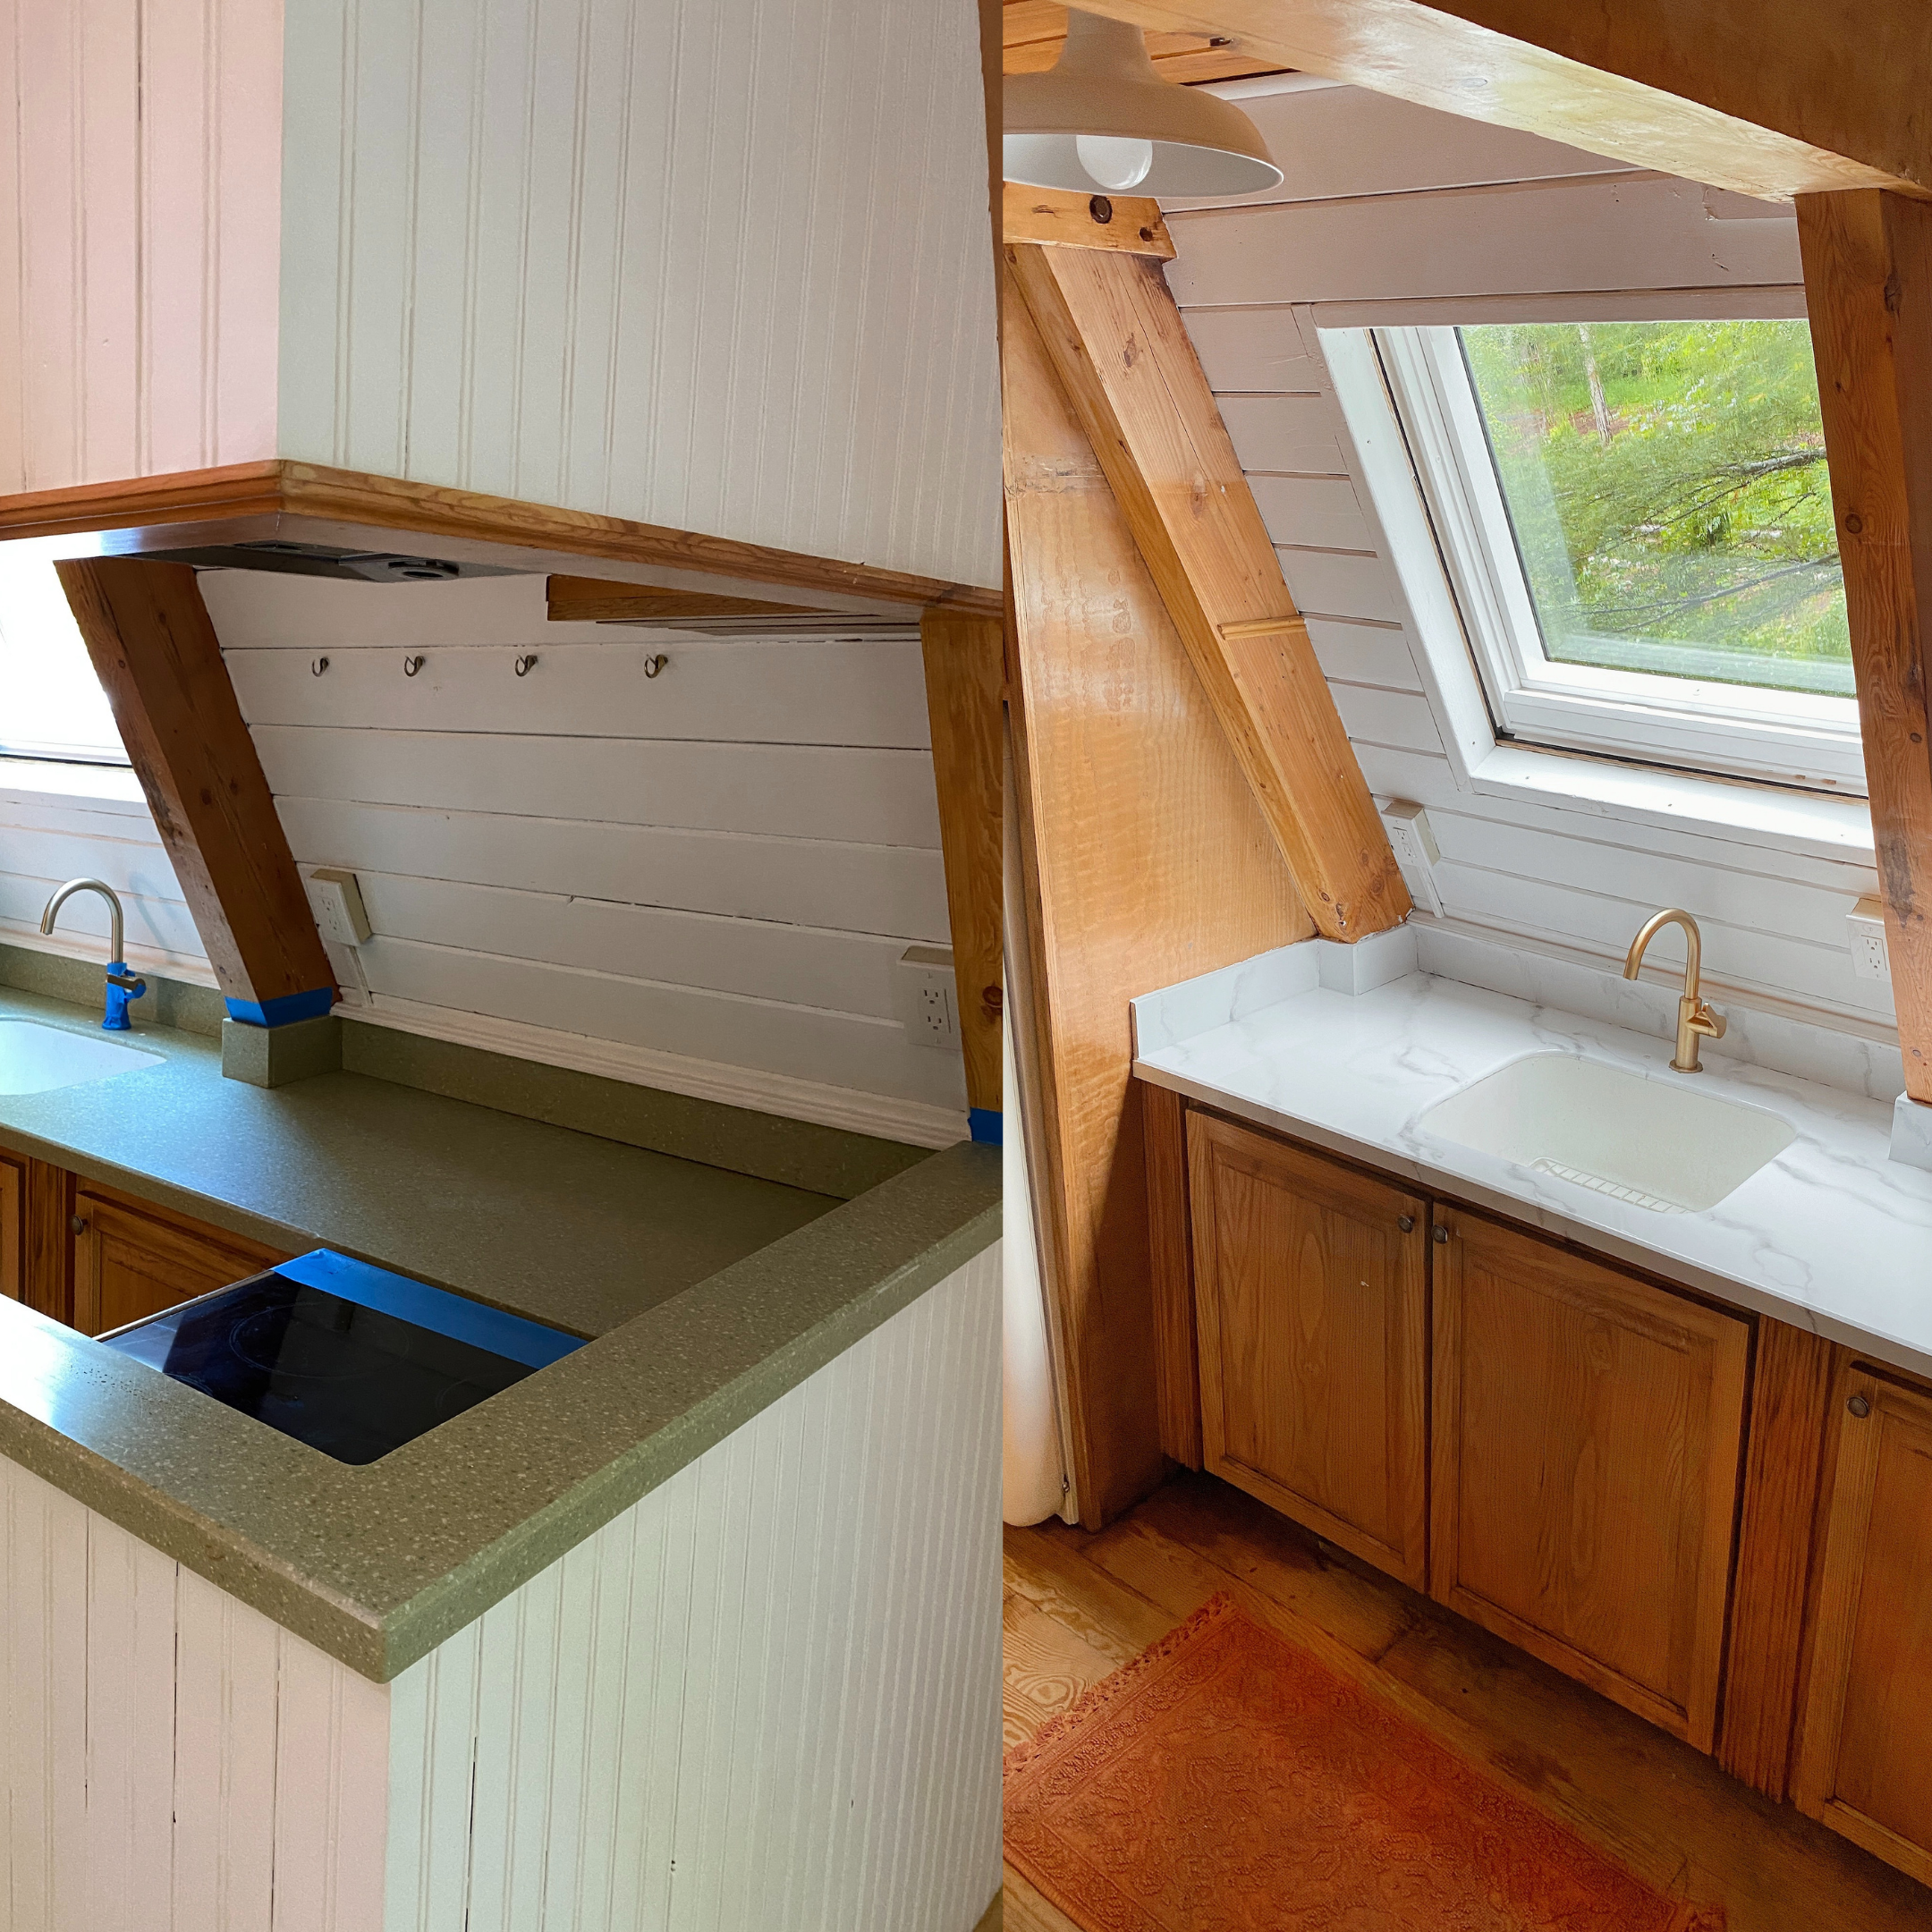
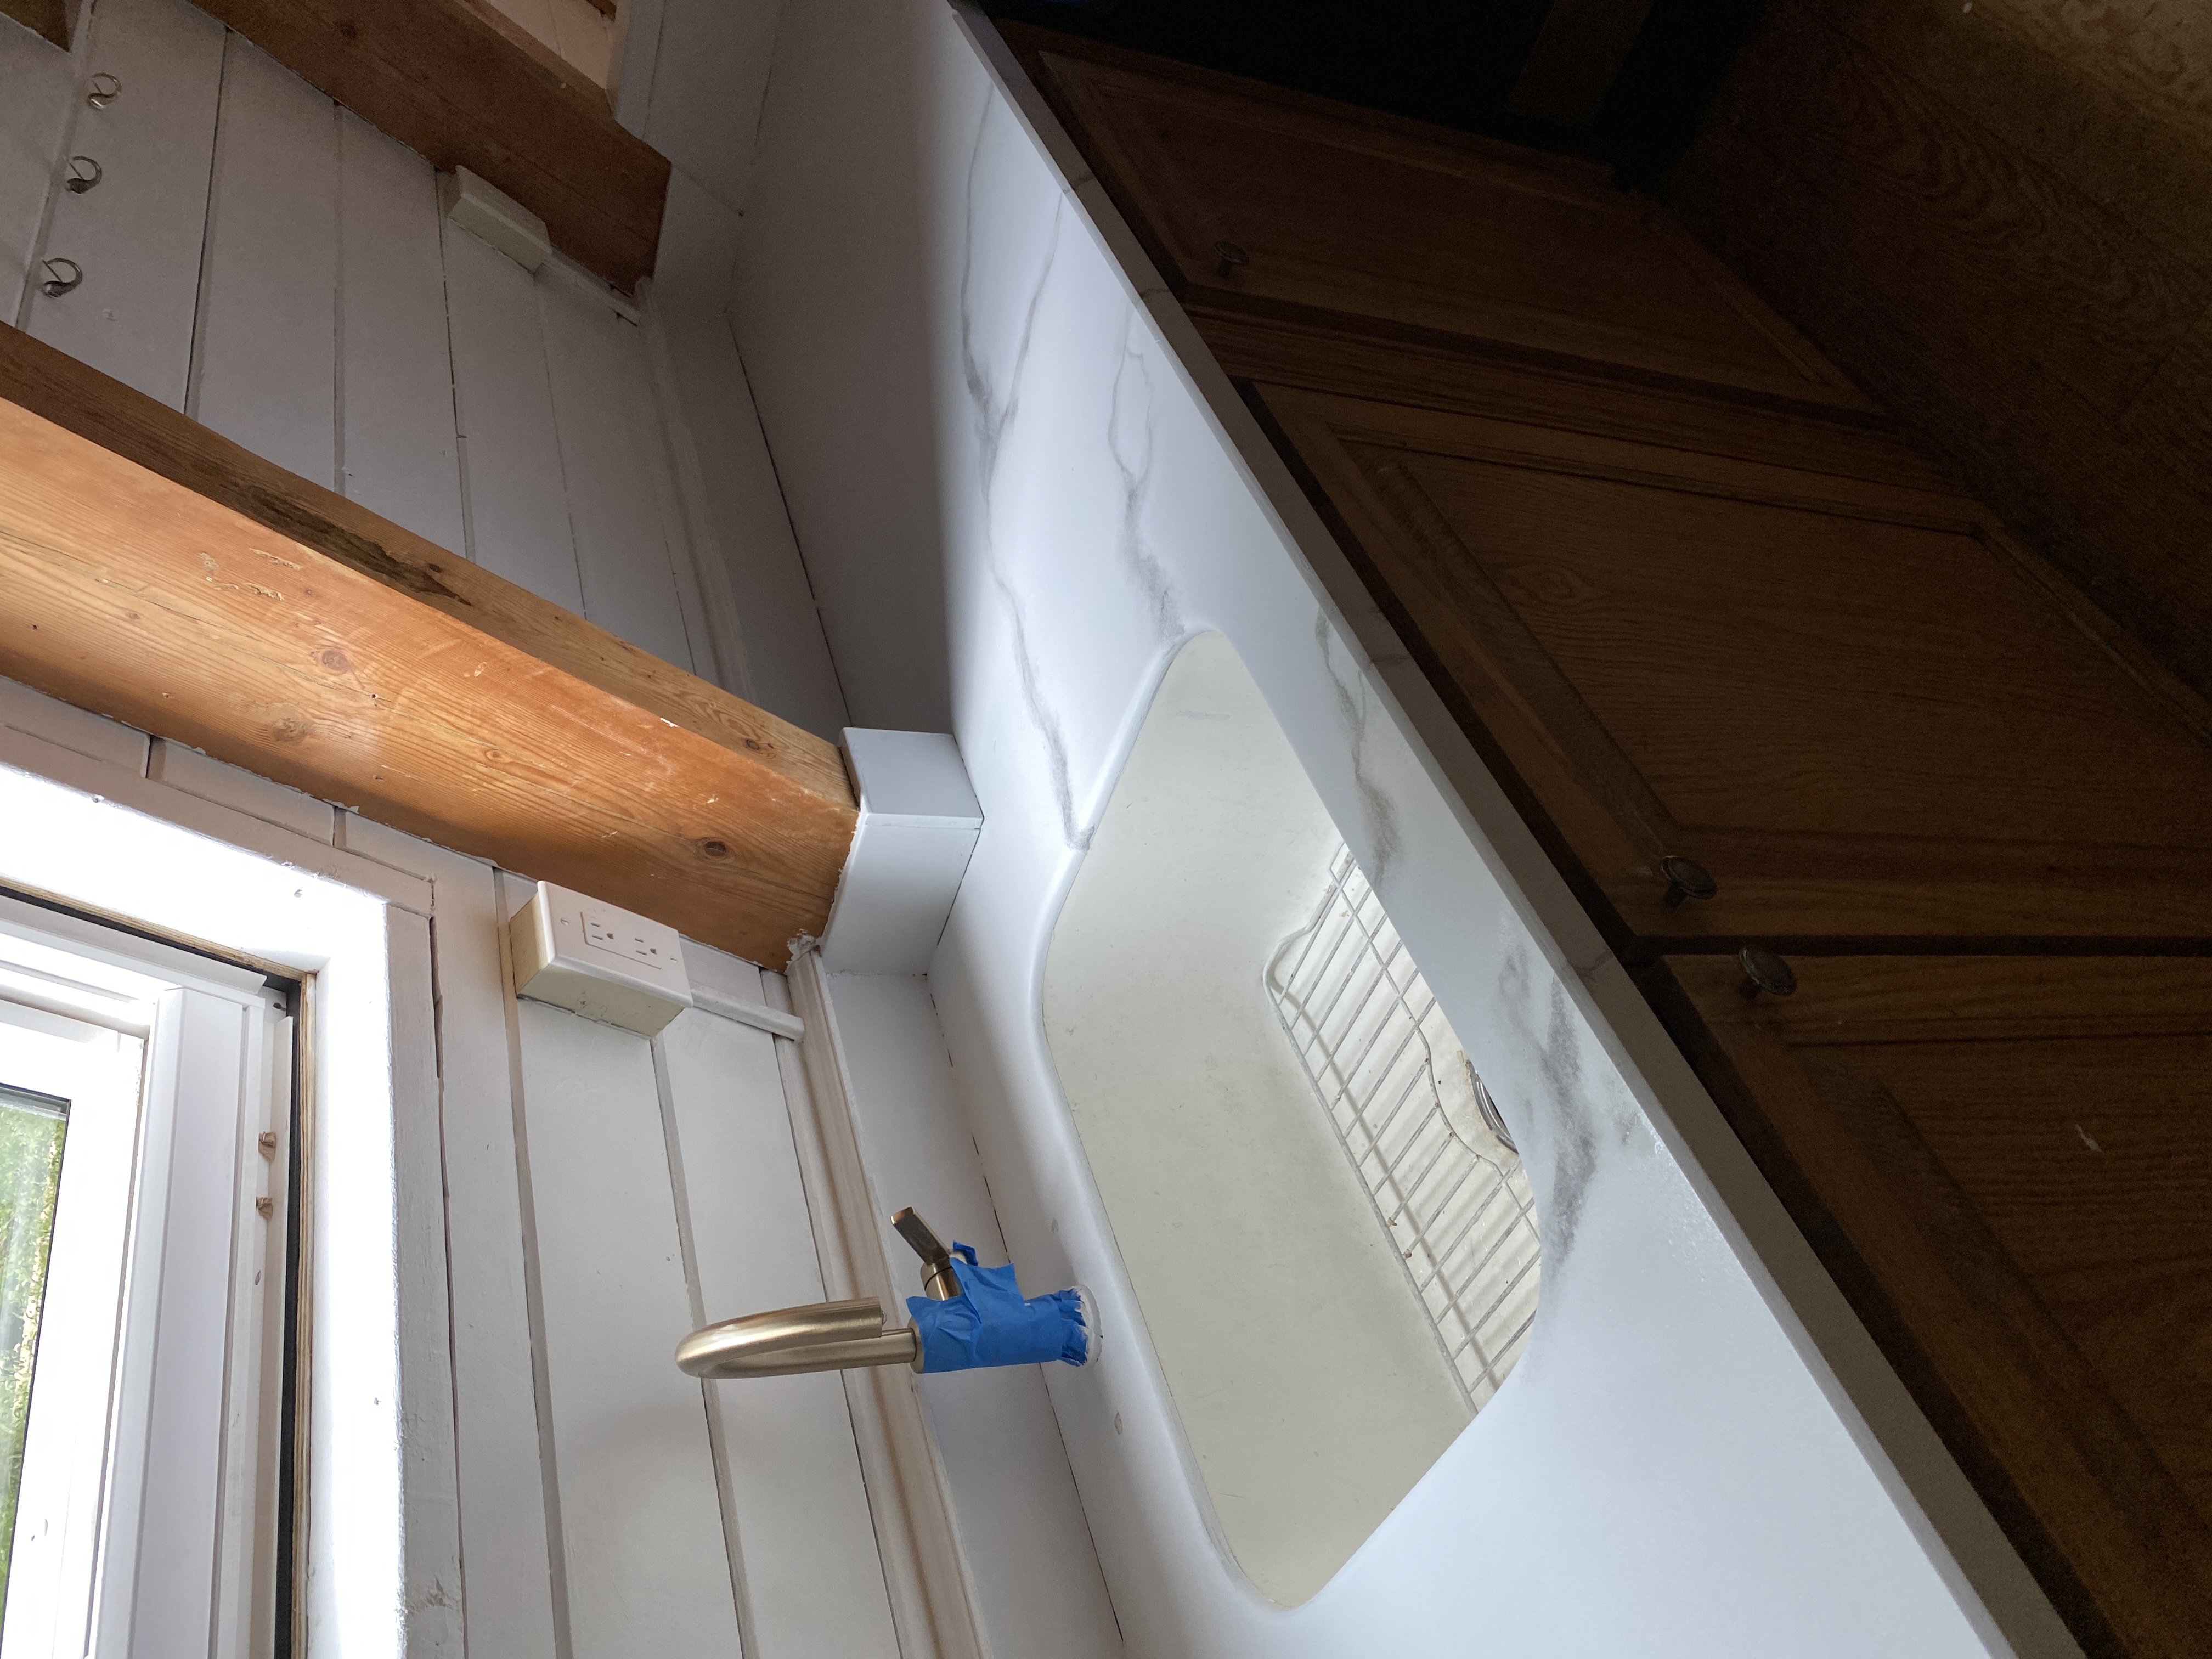
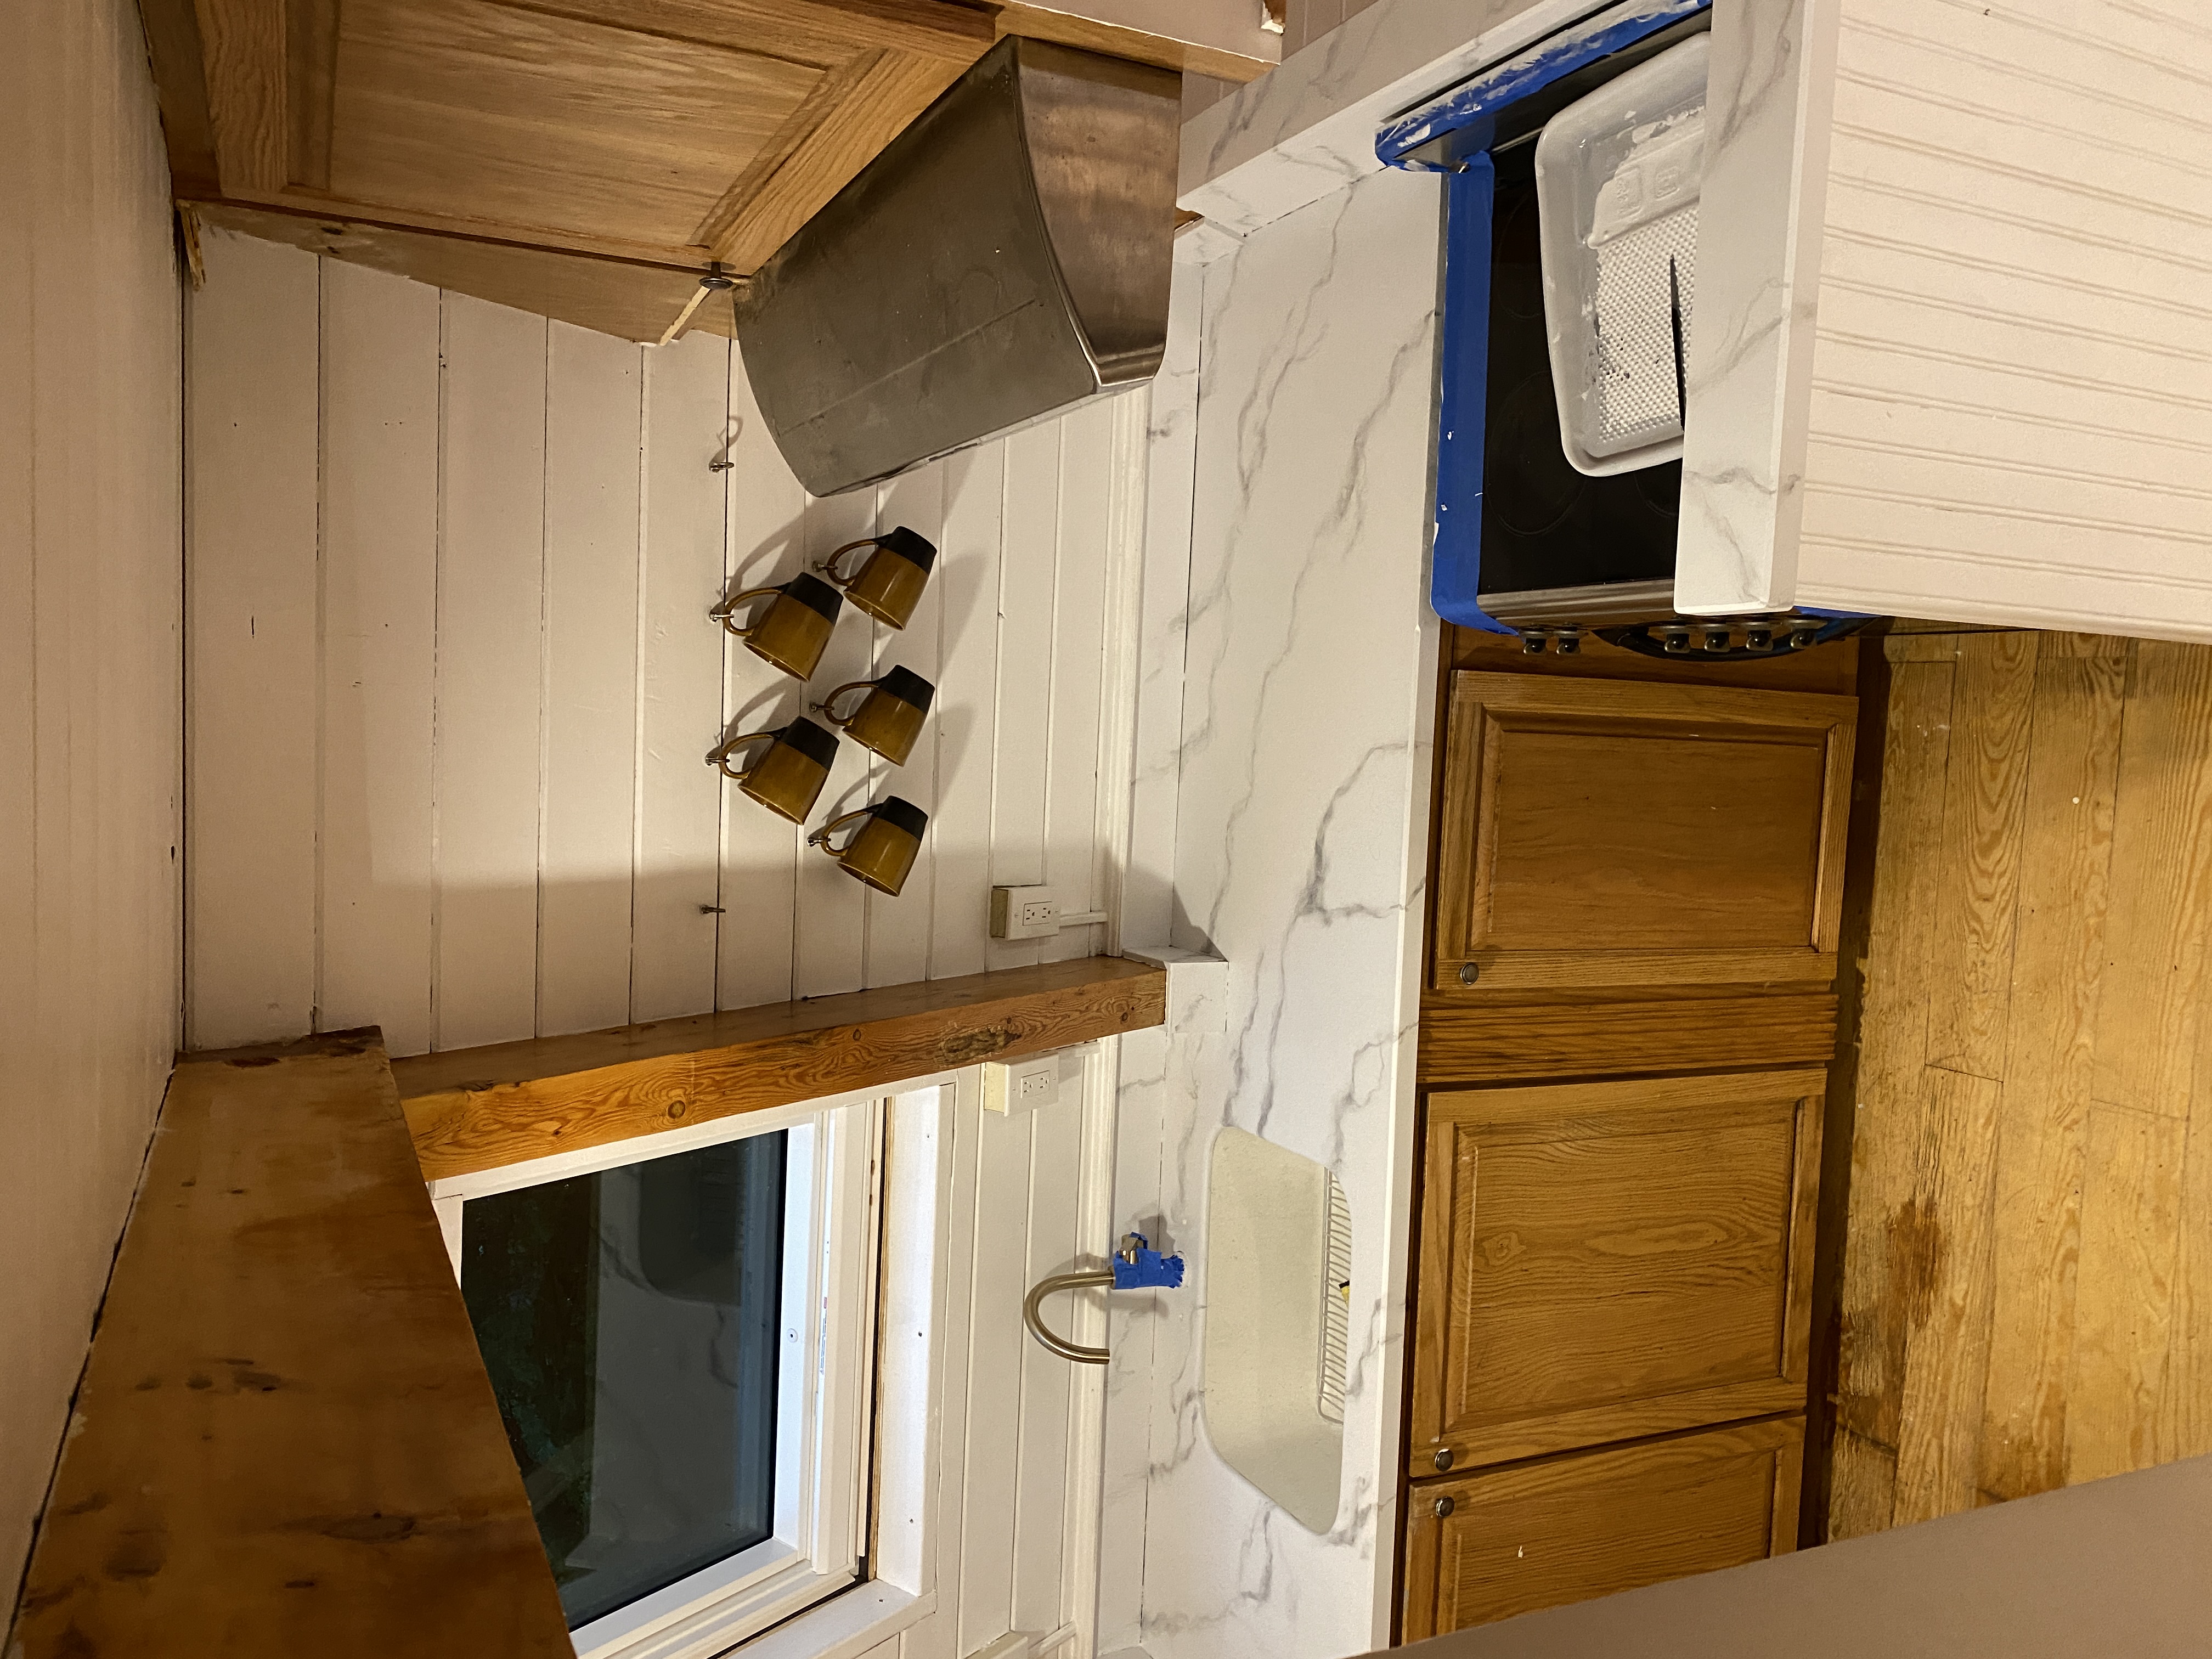
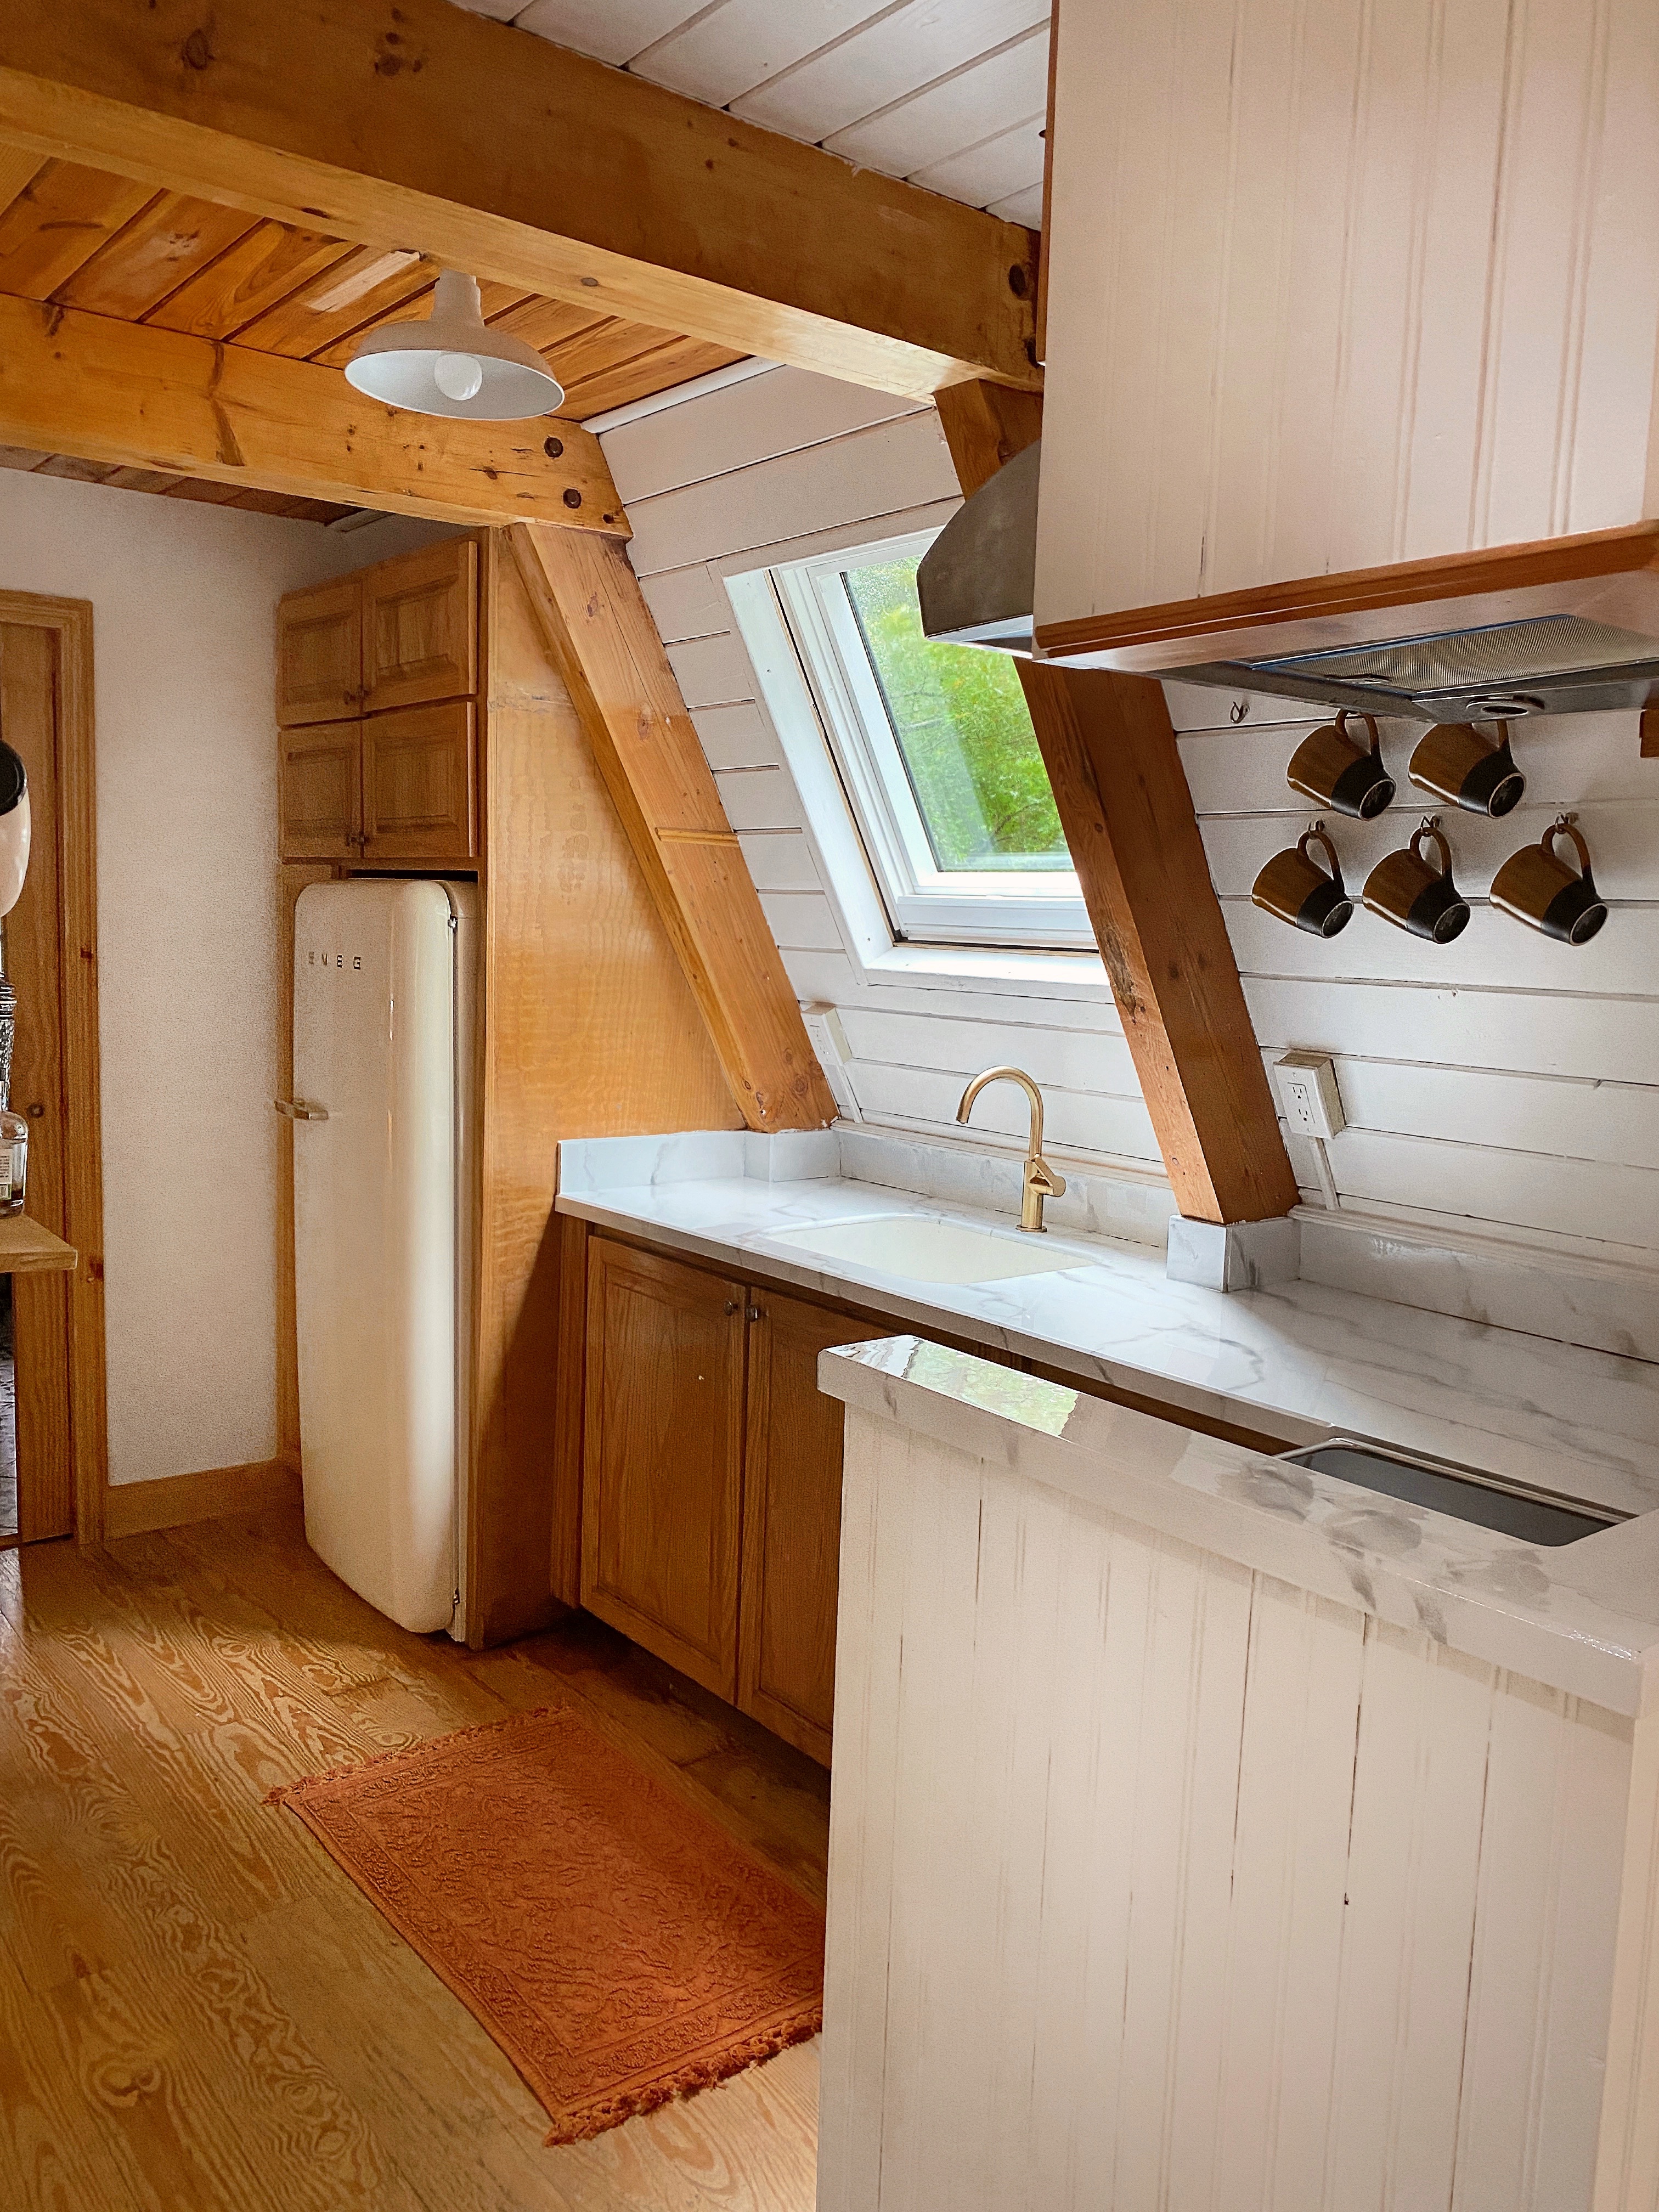
This post has been a LONG time coming, but with the kids home during summer for more hours, and my schedule being all over the place, I sadly neglected this space and have so many posts and ideas I’d love to share + will try to force myself to sit down and write! Over the summer I spent two days repainting the countertops of our Upstate home with the Giani Carrara white marble countertop kit. I had seen them all over Youtube and TikTok, and finally decided to try the kit for myself. There’s a few reasons why we opted to DIY the countertop VS replace it, but the main reason is that we did not want to demo the entire kitchen. The cabinetry in the kitchen is solid, and has been there since 1974, and we were concerned that if we started to rip out “just the countertop” it would create a whole slew of other issues in the kitchen, causing us to have to rip the entire thing out. We know this all to well from other renovation projects, and the cost would go from $180 for the kit, to $15-20K for an entire kitchen remodel. It was just not a price we wanted to spend for our second home, and we felt with some cosmetic fixes, this kitchen could look great and remain fully functional for us. We most likely won’t ever spend more than a few weeks at a time in the A-Frame between the kids in camp, and Matt and my work schedules, and honestly I LOVE the charm the kitchen has, and I am sooo glad we worked with what we had versus ripping it all out. It saved us so much money that we then felt better spending for things like A/C and efficient heating systems, and new windows that the home really craved. The kit was actually SO doable, and can be done in about 2-3 days total if you don’t include the 7 days that the countertops need to cure. Let’s dive into how I made this all happen!
Step 1: (day 1) Clean the countertop extremely well, and use a razor blade to remove all of the current old caulk. This creates a nice and even surface for the new paint to stick to.
Step 2: ( day 1) After taping, the first step is to prime the countertops. I ended up doing two coats to fully cover the countertops, and the paint is fairly quick drying. I used a roller for most of this step, and just cut in the corners with a paintbrush. It is super scary painting on top of your countertops, and feels just plain wrong, but trust in that process!!
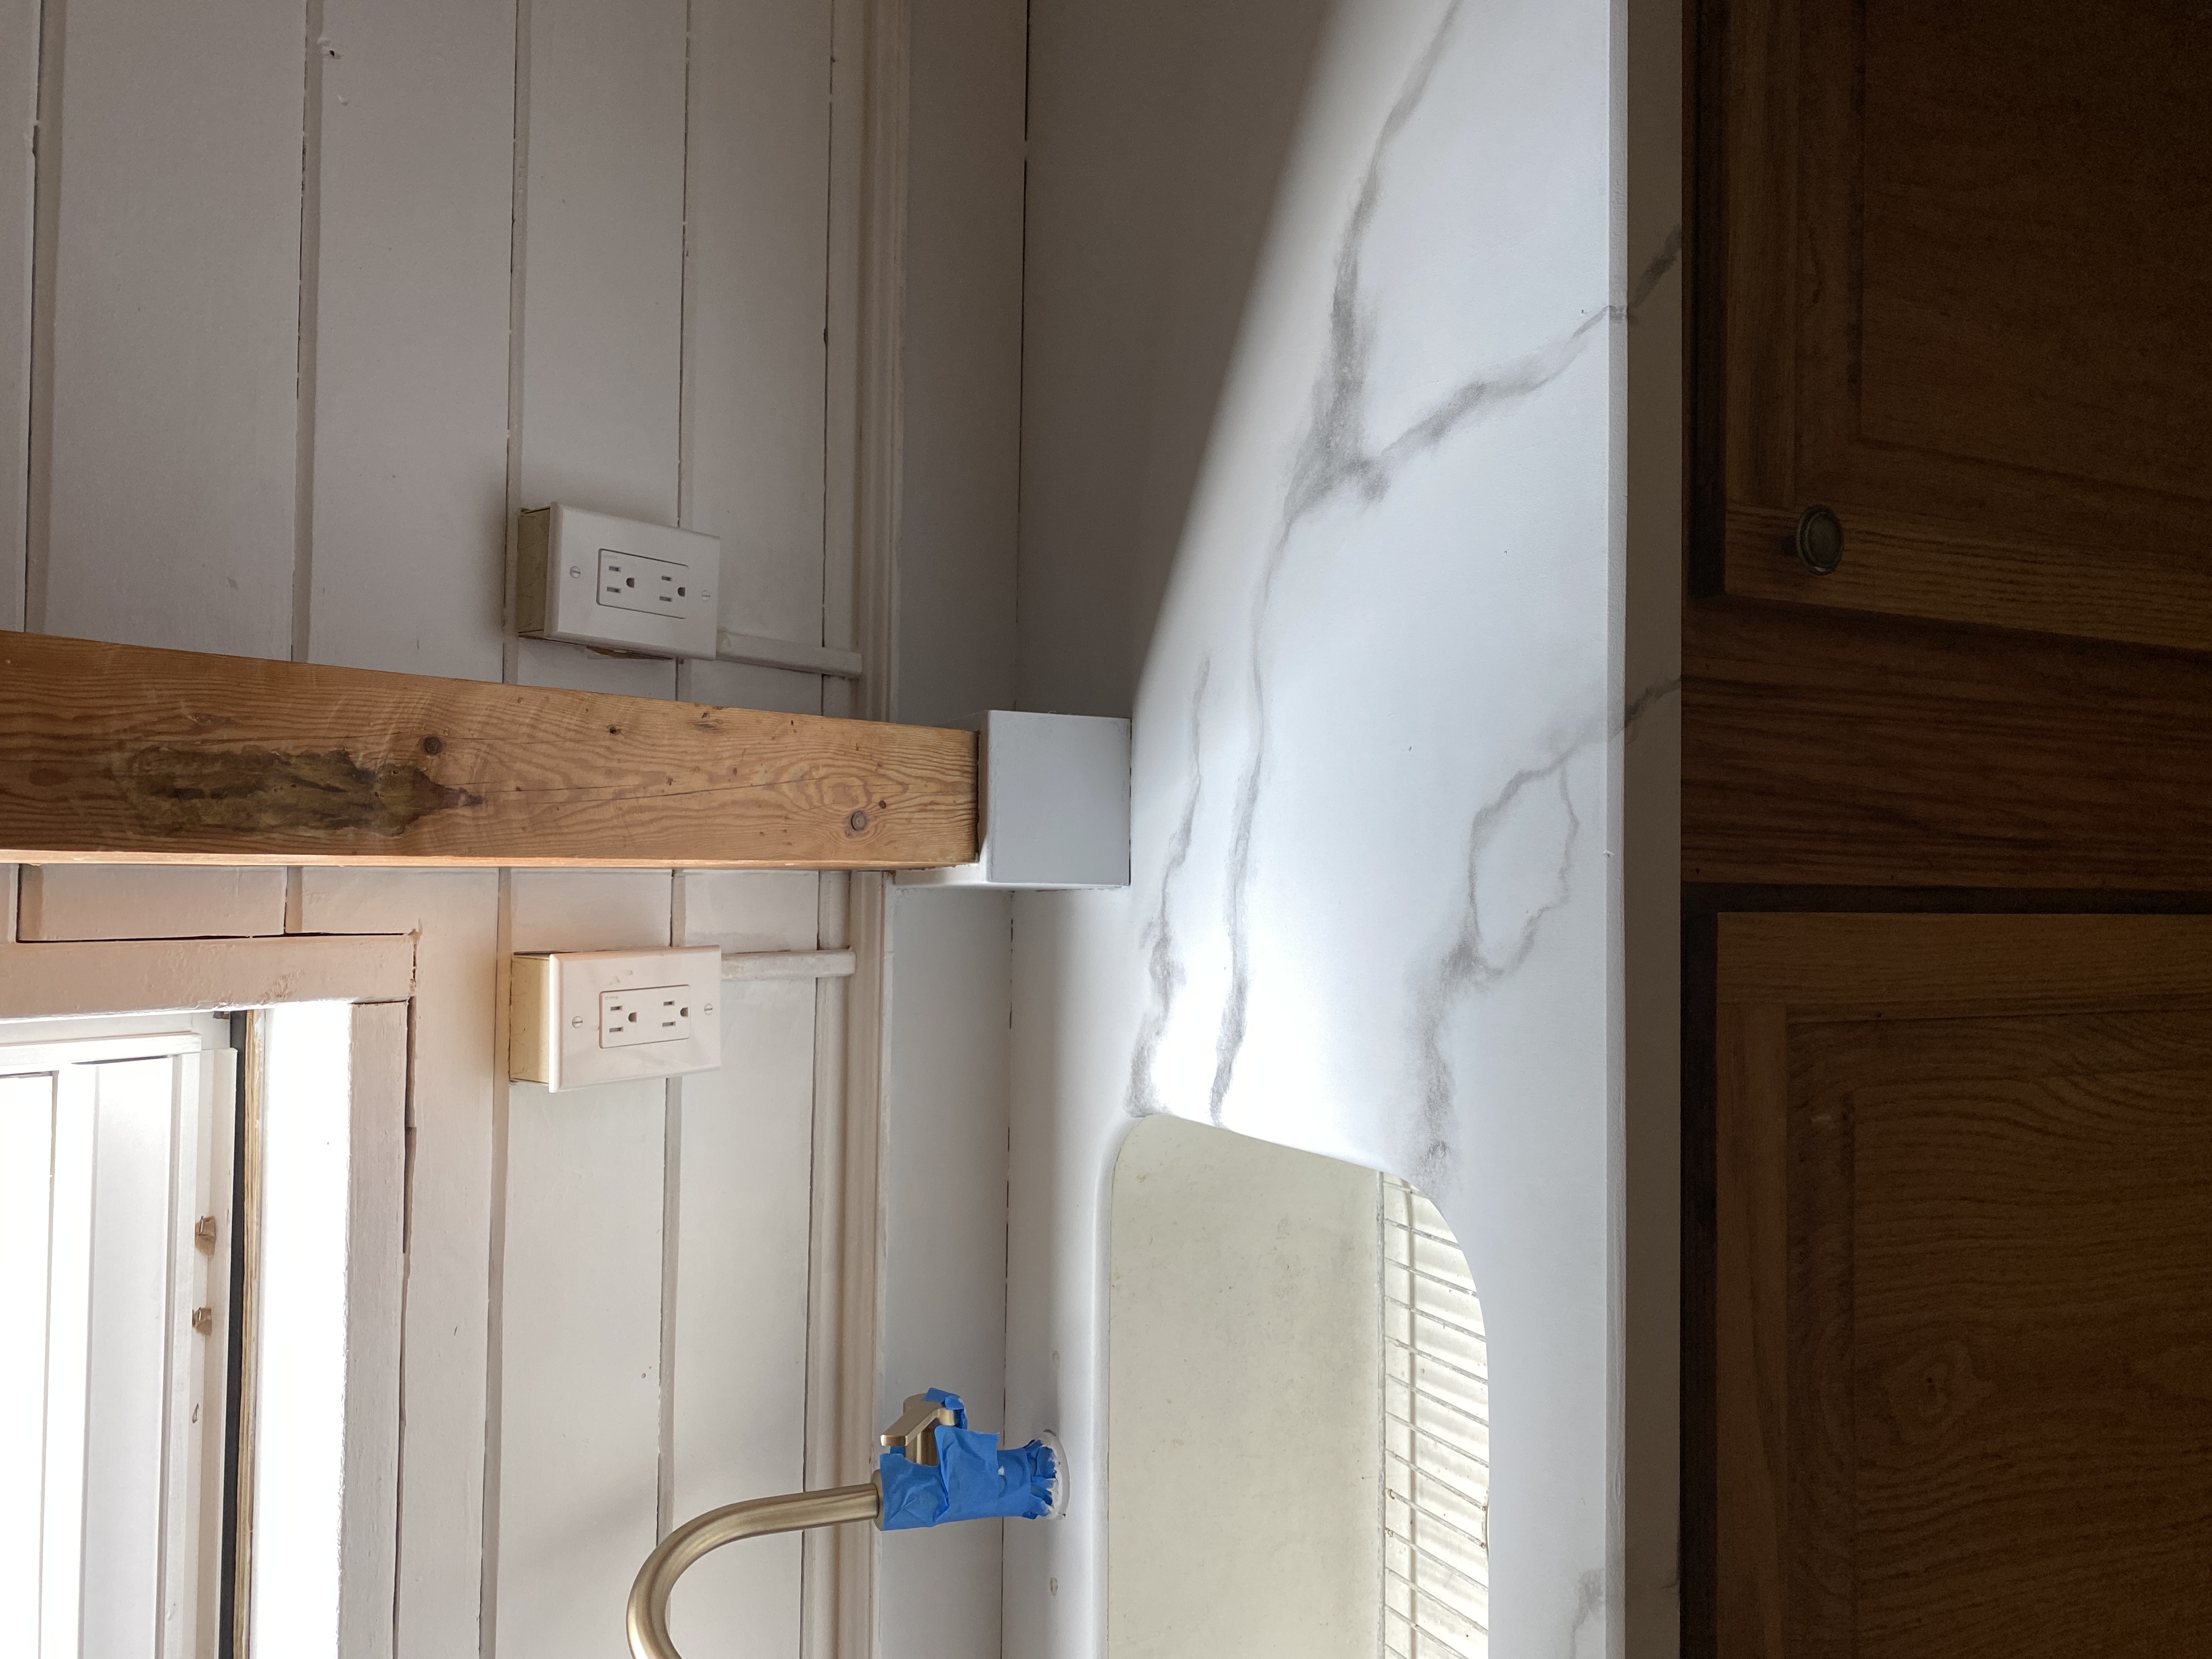
Step 3: (day 2) After letting the primer dry overnight, on the second day I focused on painting the veins onto the countertop! Before I dived in to actually painting, I created a drawing of my countertops, and planned where I would like the veining to go using inspiration from countertops I’ve saved and liked. This made the painting process a lot more smooth. I knew going in to it that I did not want too many veins, I wanted the countertop to look pretty white from a far, so I only created about 3 large veins, and had some smaller ones running off of them. Once I had my plan in place, I used a small paintbrush provided by the kit, and painted on grey lines in a very imperfect fashion to mimic the veins. Working in sections, I sprayed the lines I had just painted with water (the mister is provided by the kit), and then dabbed over the line with a 2 inch paintbrush. The biggest piece to keep in mind is that the paint is extremely quick drying, so you have to work quickly, and make sure to spray the sections with water before they dry. The water helps to create the translucent dripping effect that fans out the veins, and makes them seem more realistic. This step took about an hour or two – it goes very quickly, and once you start to work on it, you realize it is in’t intimidating at all!
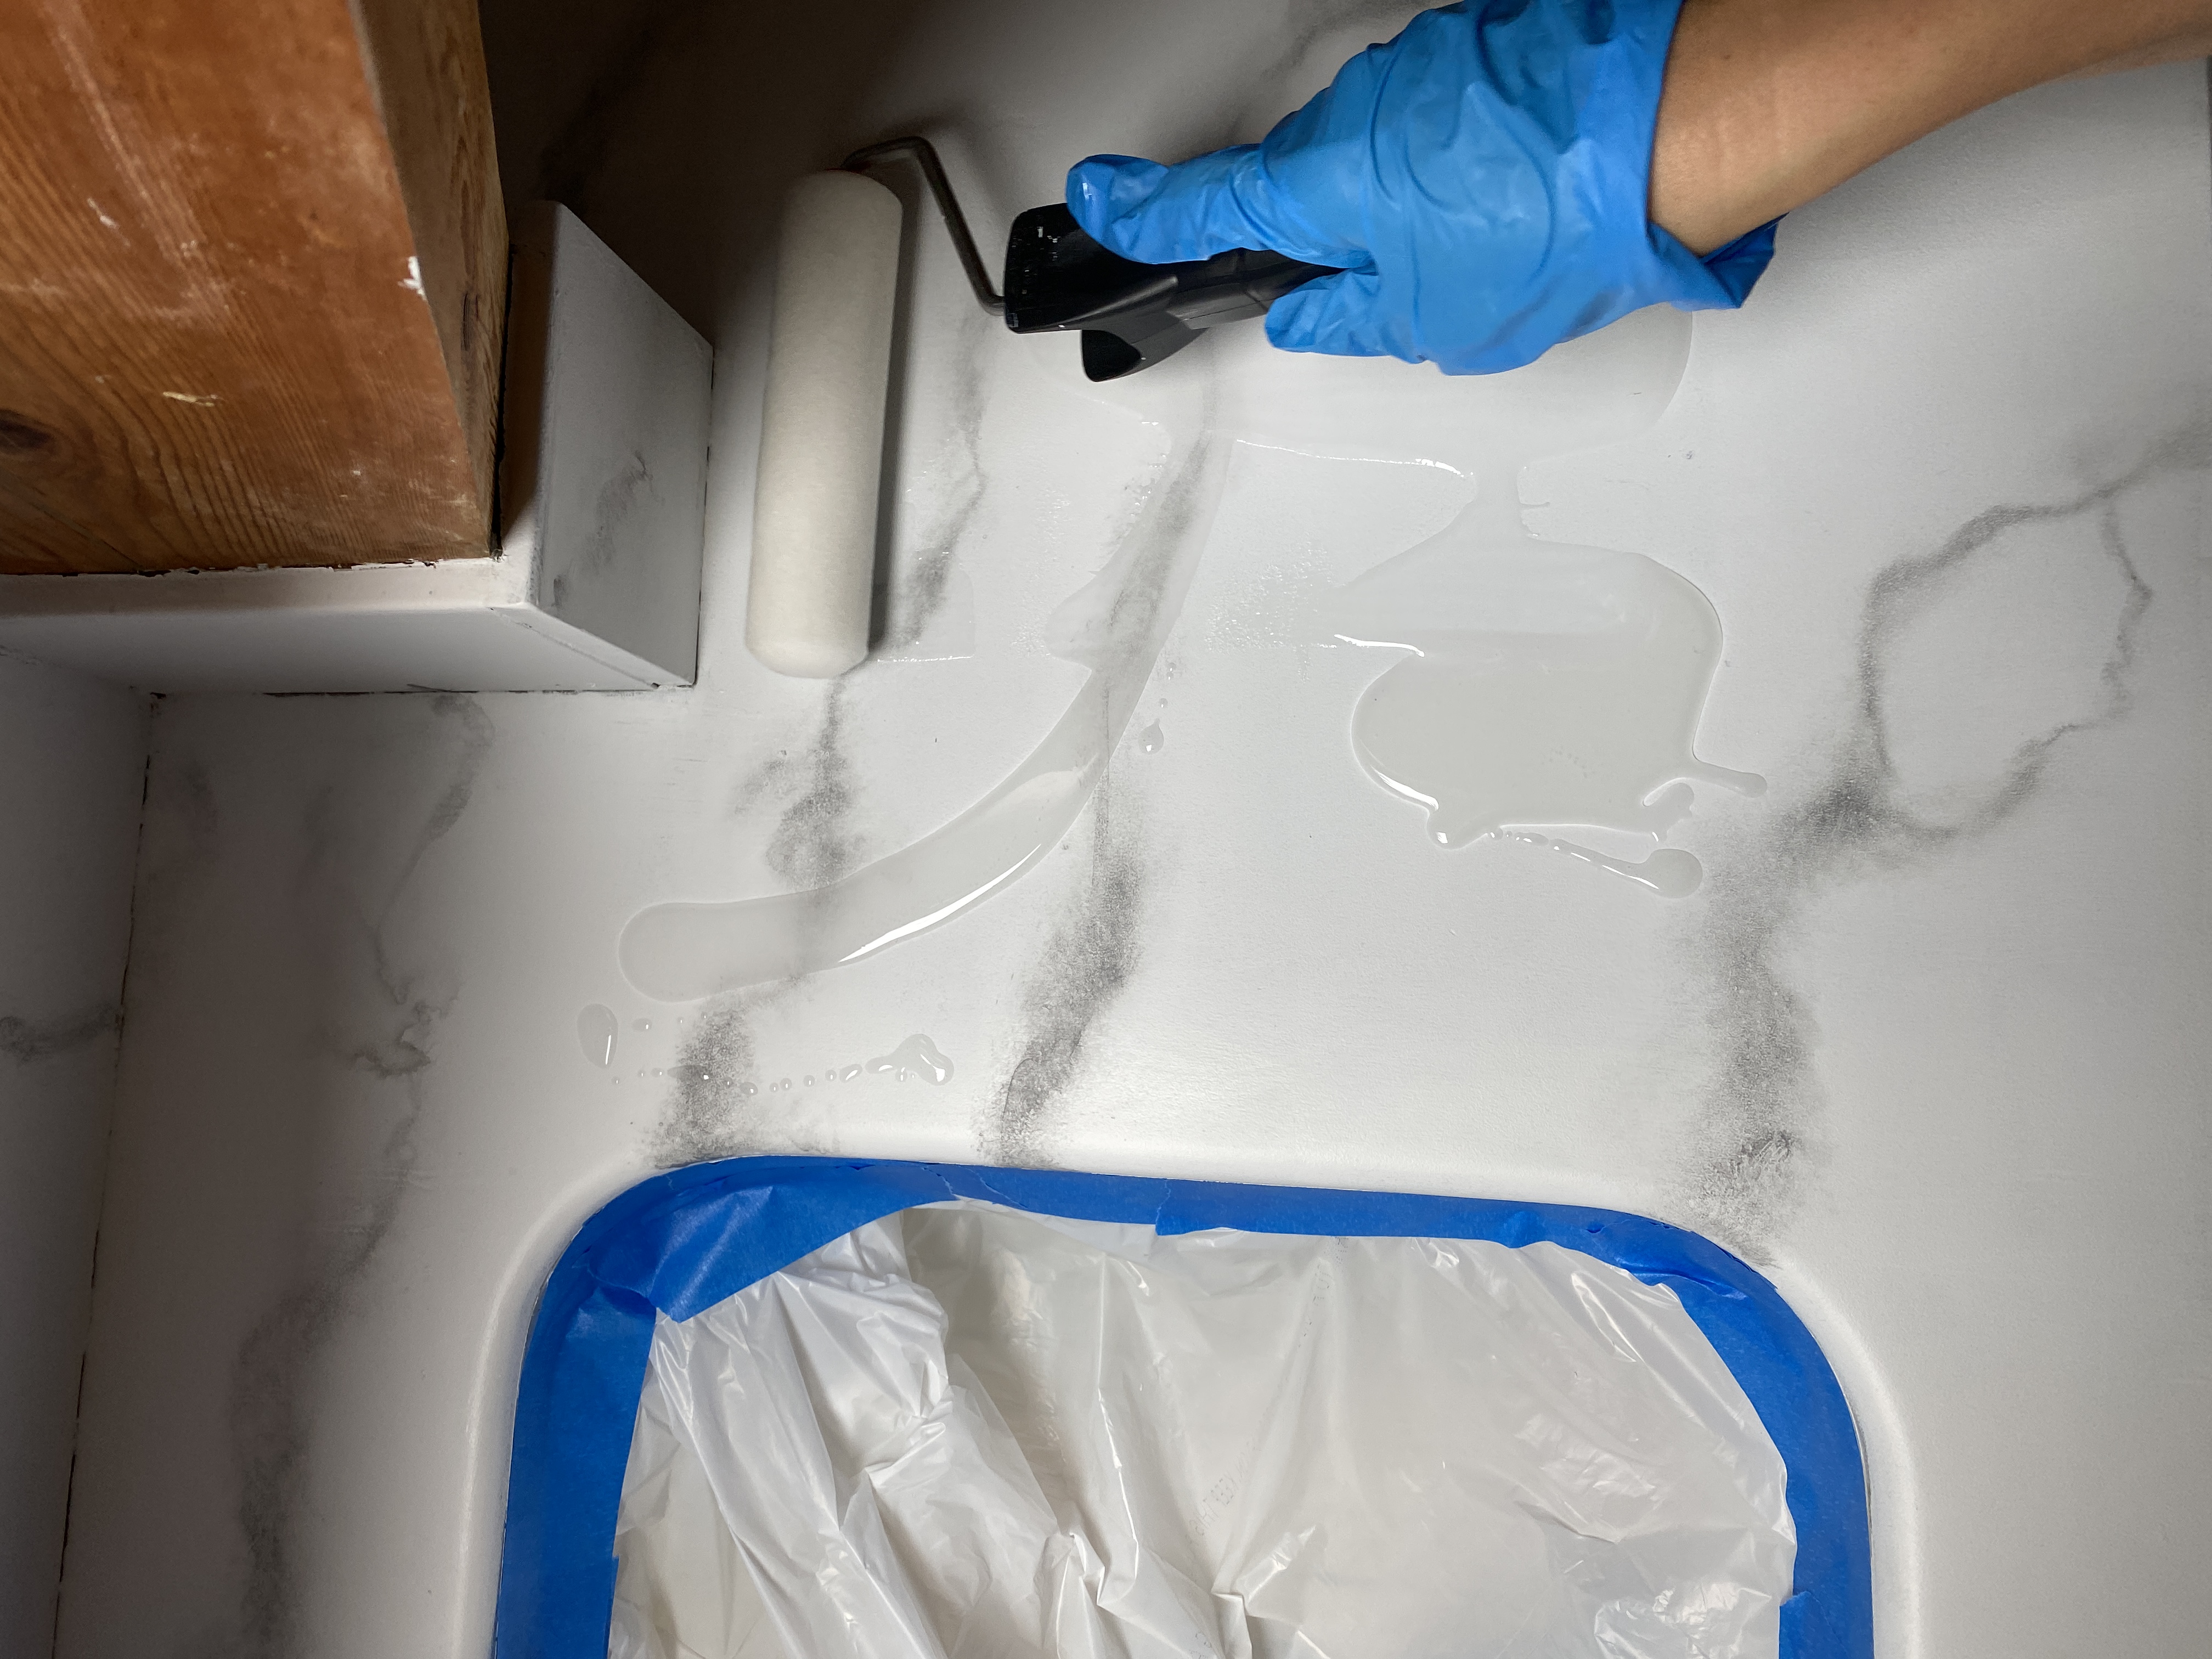

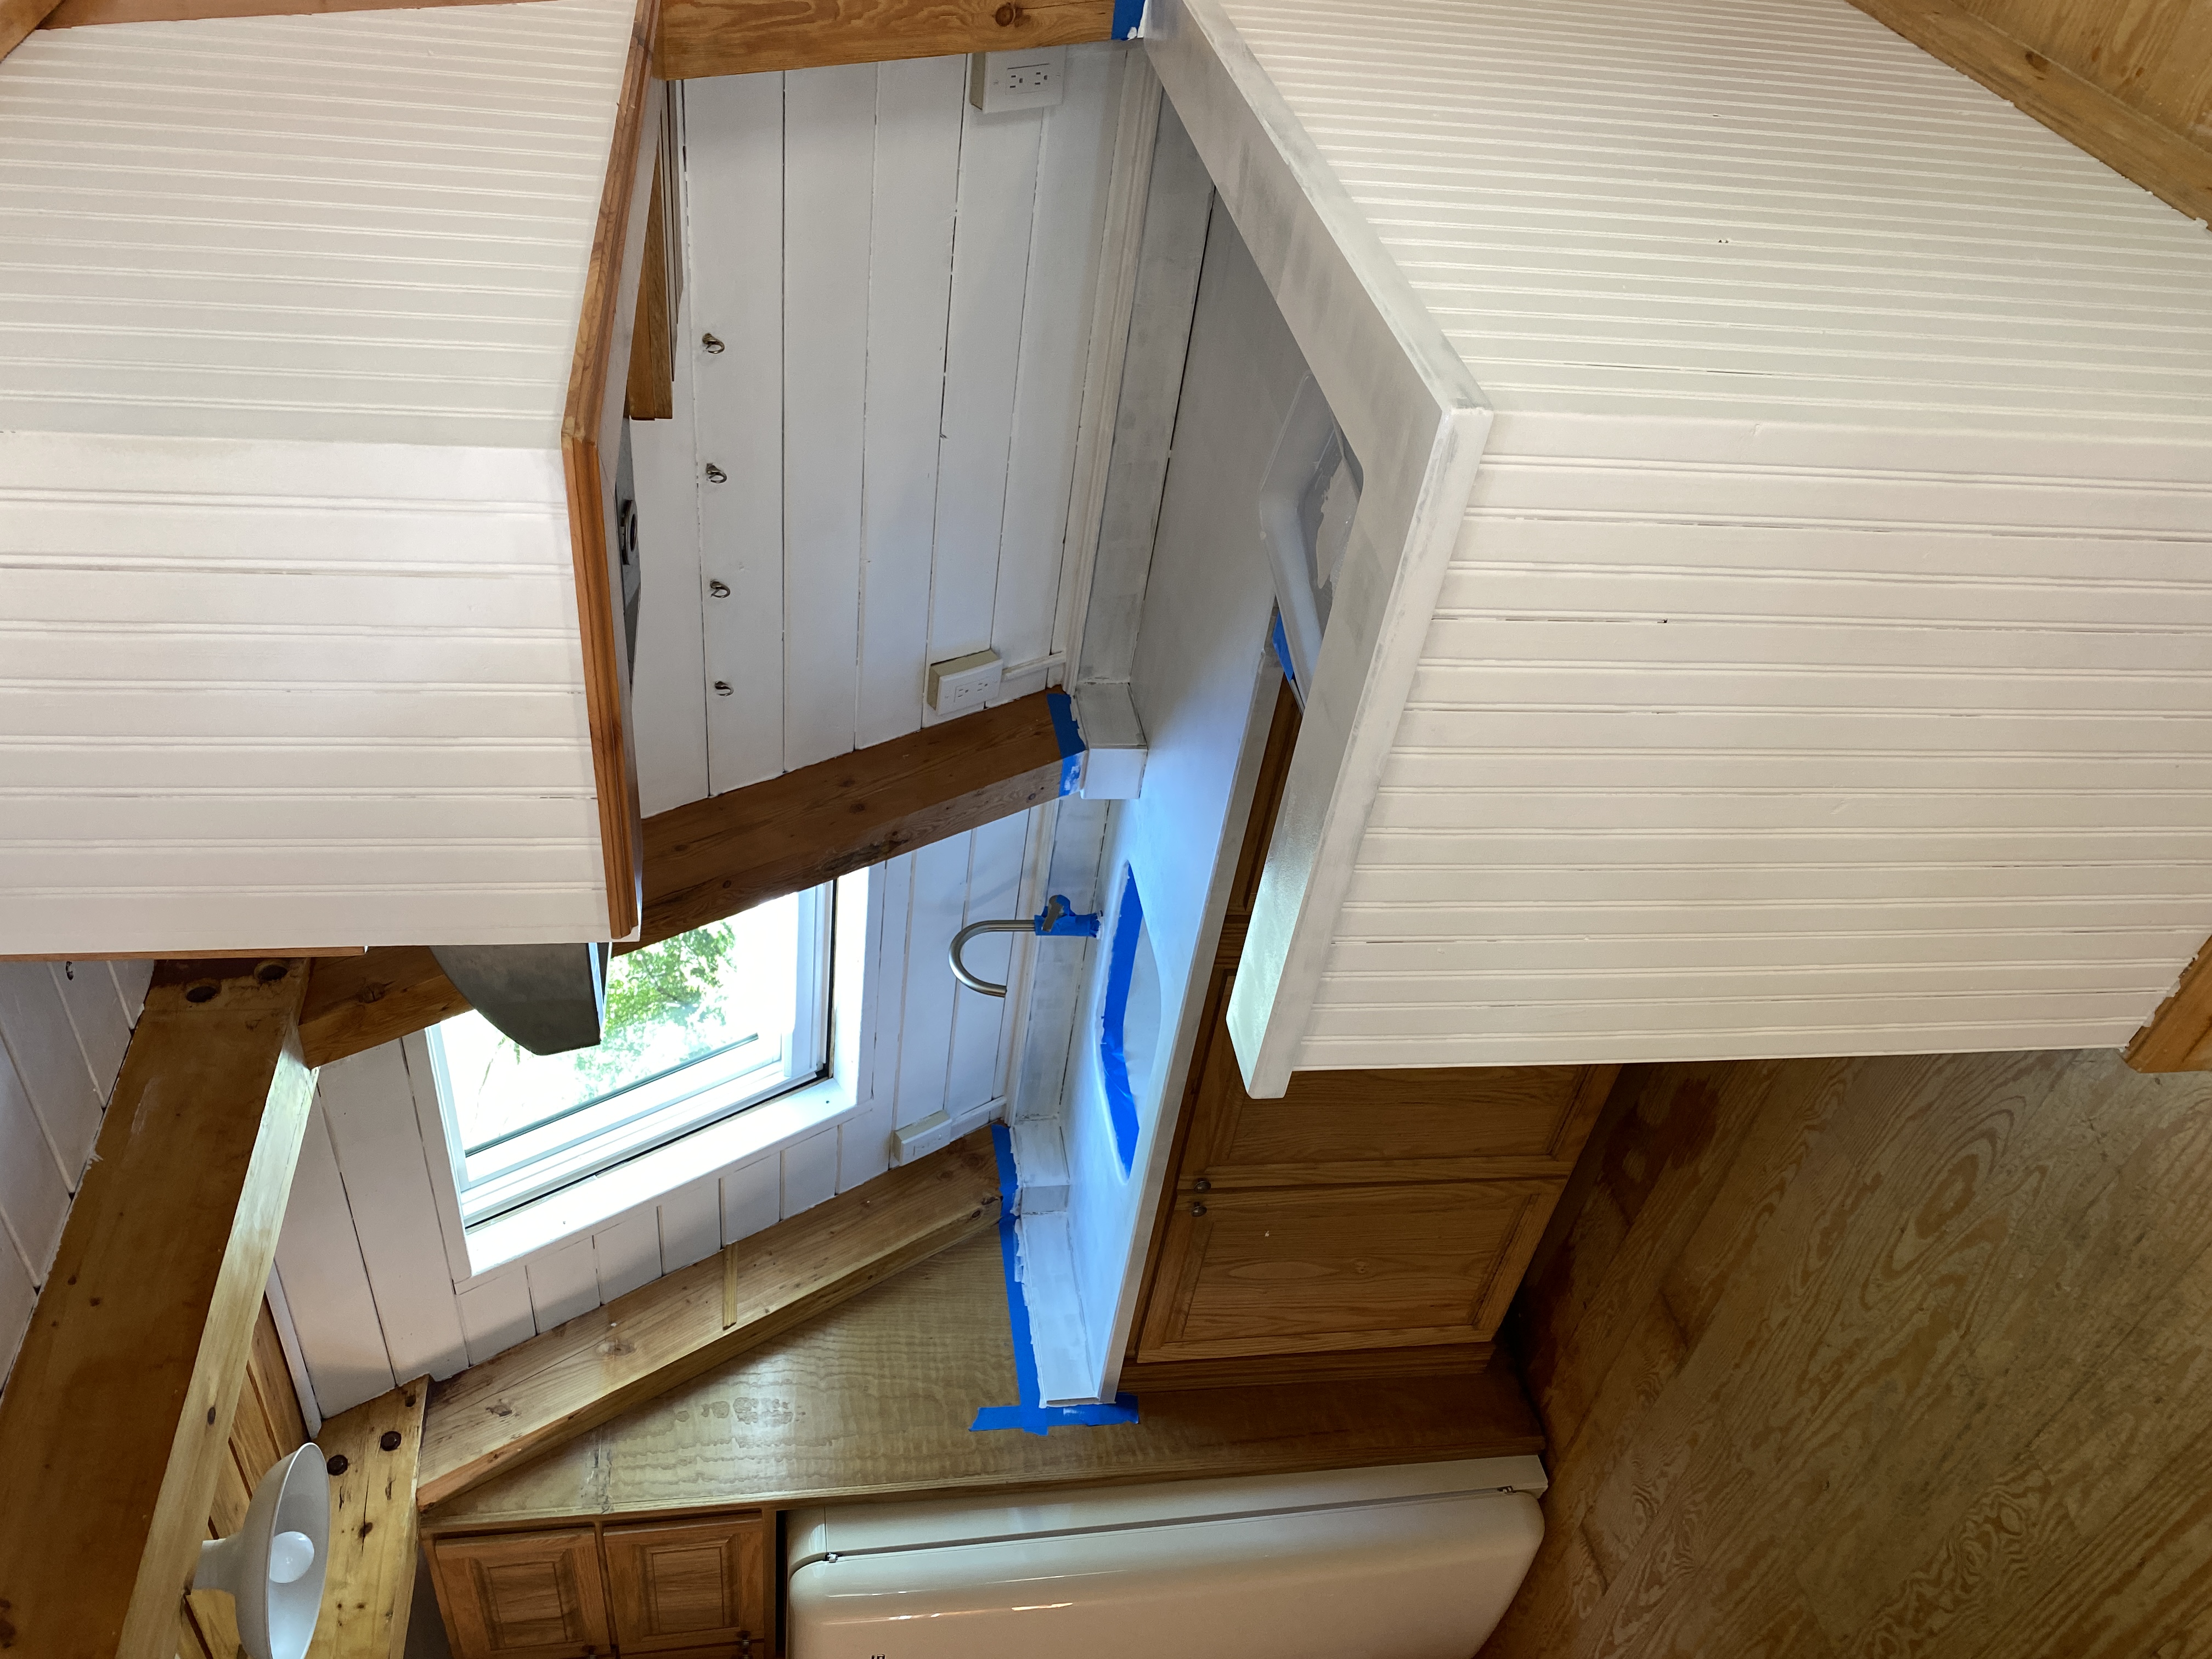
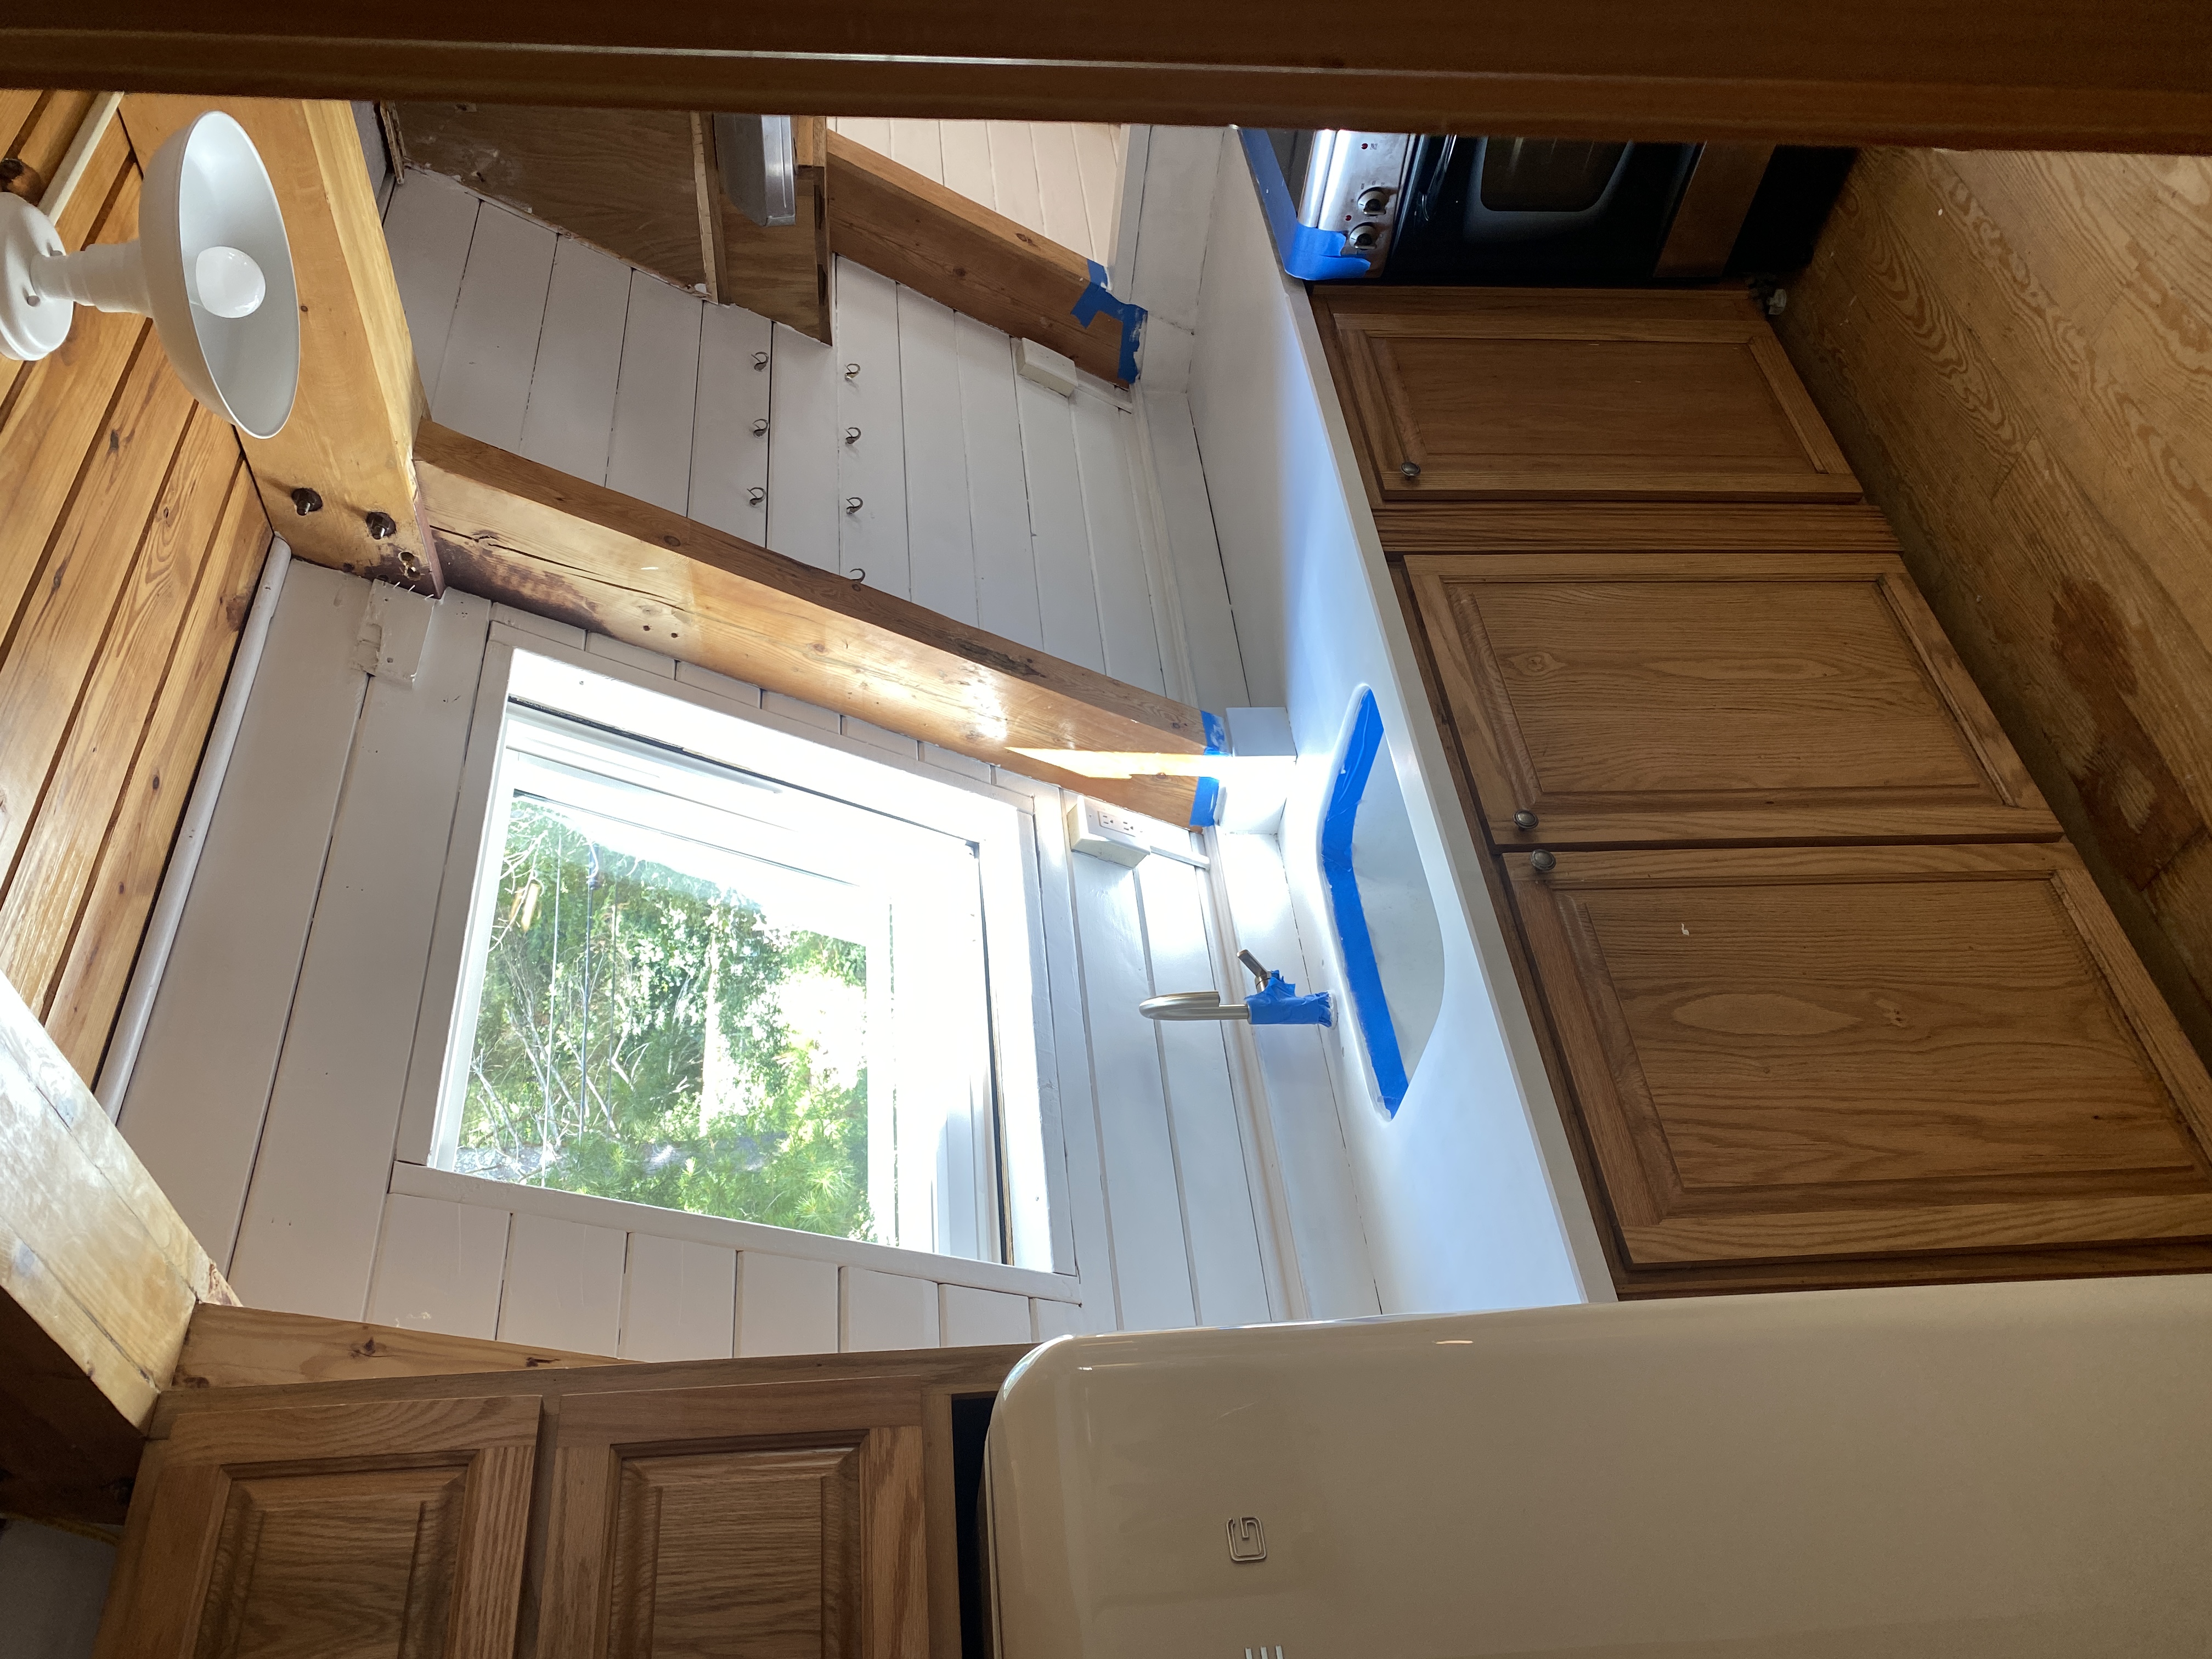
Step 4: (day 3) After letting the veins dry overnight, I taped everything extremely well before the epoxy step, which to me was the most intimidating. It can be SO messy, and one of the key factors in it’s success is allowing the epoxy to drip over the edges of the countertop. I taped plastic all underneath the countertops to cover the cabinetry, and I taped into the sink, so the epoxy would not drip inside of it. I also have to tape over the gap between my stove and the countertop. Prep work is HUGE in the success of this step. Once everything is taped, I started on one side of the countertop, pouring a large amount of epoxy out, and then slowly guiding it with a foam roller. It was my first time working with epoxy, but after the first pour, I started to catch on. The trick is not to try to paint it on, but to let it level itself out, and just guide it to where you want it to go. Also, once I realized pouring more epoxy also helped to fill gaps, that made things easier. To cover the backsplash, I did use a paintbrush, and paint some epoxy on. The epoxy is also pretty quick drying, so it’s key to move quickly as you work.
Once step 4 is complete, the countertops cannot be used for around 5-7 days. This allows them to cure and harden. Once they had cured, I went back in with clear caulk and caulked everything. Then voila! As far as cleaning goes, windex is fine to use on the counters. I try to not put anything too hot on the surface, like a hot pan or coffee, etc. So far its been about 3 months, and they’ve held up great – I would recommend the kit to anyone!