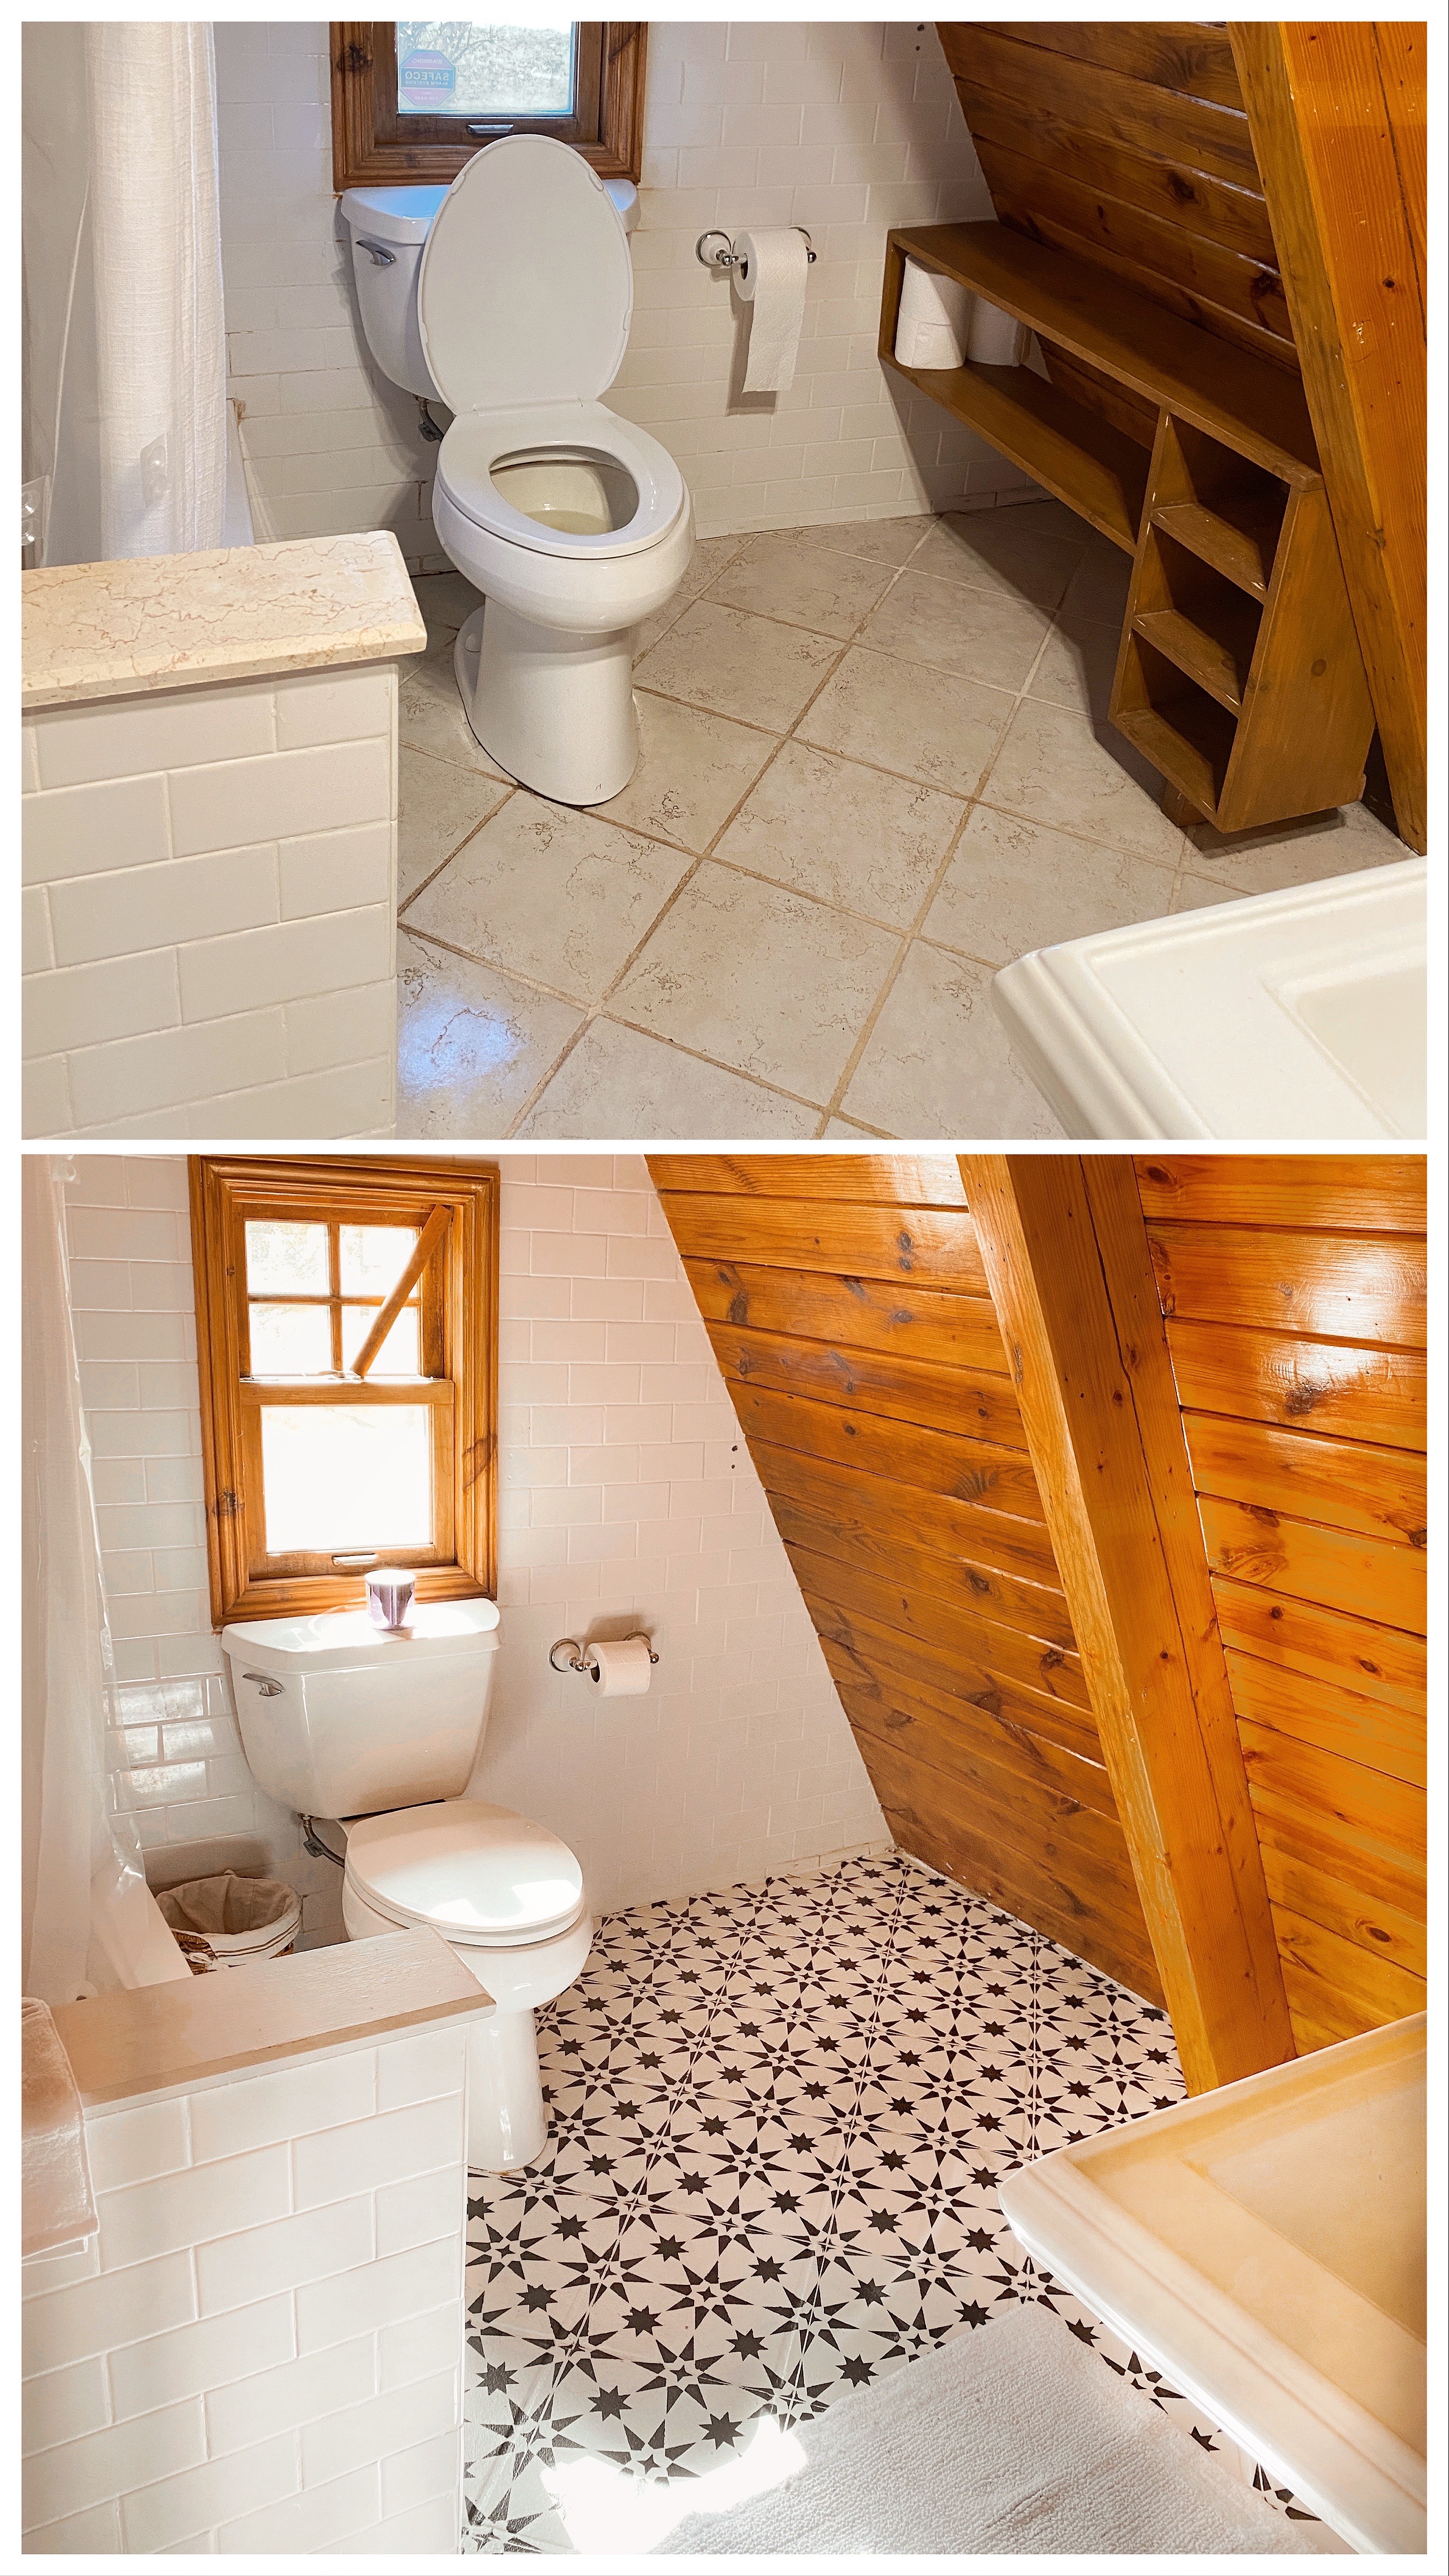
BEFORE + AFTER
I am such a slow poke on the blog front lately, and for that I apologize! Between figuring out my kids new summer schedules, to seeing family as things re-open and managing the renovation of the A-Frame, I’ve had so much less time to actually sit down, write my thoughts out, and share the process of things as I go! But because so many of you have asked detailed questions about this DIY that I did a month or so ago, I wanted to get it all out in a post, so you could reference it in the future!
In our A-Frame, the only bathroom that we had was not terrible looking, but it also wasn’t a space I would walk into and feel excited about. I like to create my universe in a way that brings me joy, in order to make my houses feel like homes, so I brainstormed on what we could do to the space. Demoing tile is NOT FUN, and if we did decide to demo the tile, we would also probably end up demoing the tub, the toilet and all of the wall tile, and to be honest I didn’t feel like the wall tile or shower were in poor enough condition to shell out the cash on all of that. Now that is not to say that in 5-10 years from now, we will feel the same way, but as of right now the bathroom was not top on our list at all, and we wanted to do as many small changes as we could to it to make it feel nicer. Some other fixes I made happen were removing all of the clutter/ shelving that was in the space when we purchased it. We then swapped out the light fixtures, the mirror, and we are in the process of having custom glassing put in on an awkward ledge in the shower. To me, the main eye sore was the bathroom tile, which was not a tile choice I would pick, so when I saw people on the internet painting their tile, I thought “hey, I can do this too!”
Here’s the steps I took to make this happen, and some thoughts and lessons I learned along the way:
Step 1: Clean with Krud Kutter: This step is so important, because in order for the paint to correctly stick to the floor, it has to be dust/ dirt free. I was shocked by how dirty my floors were!
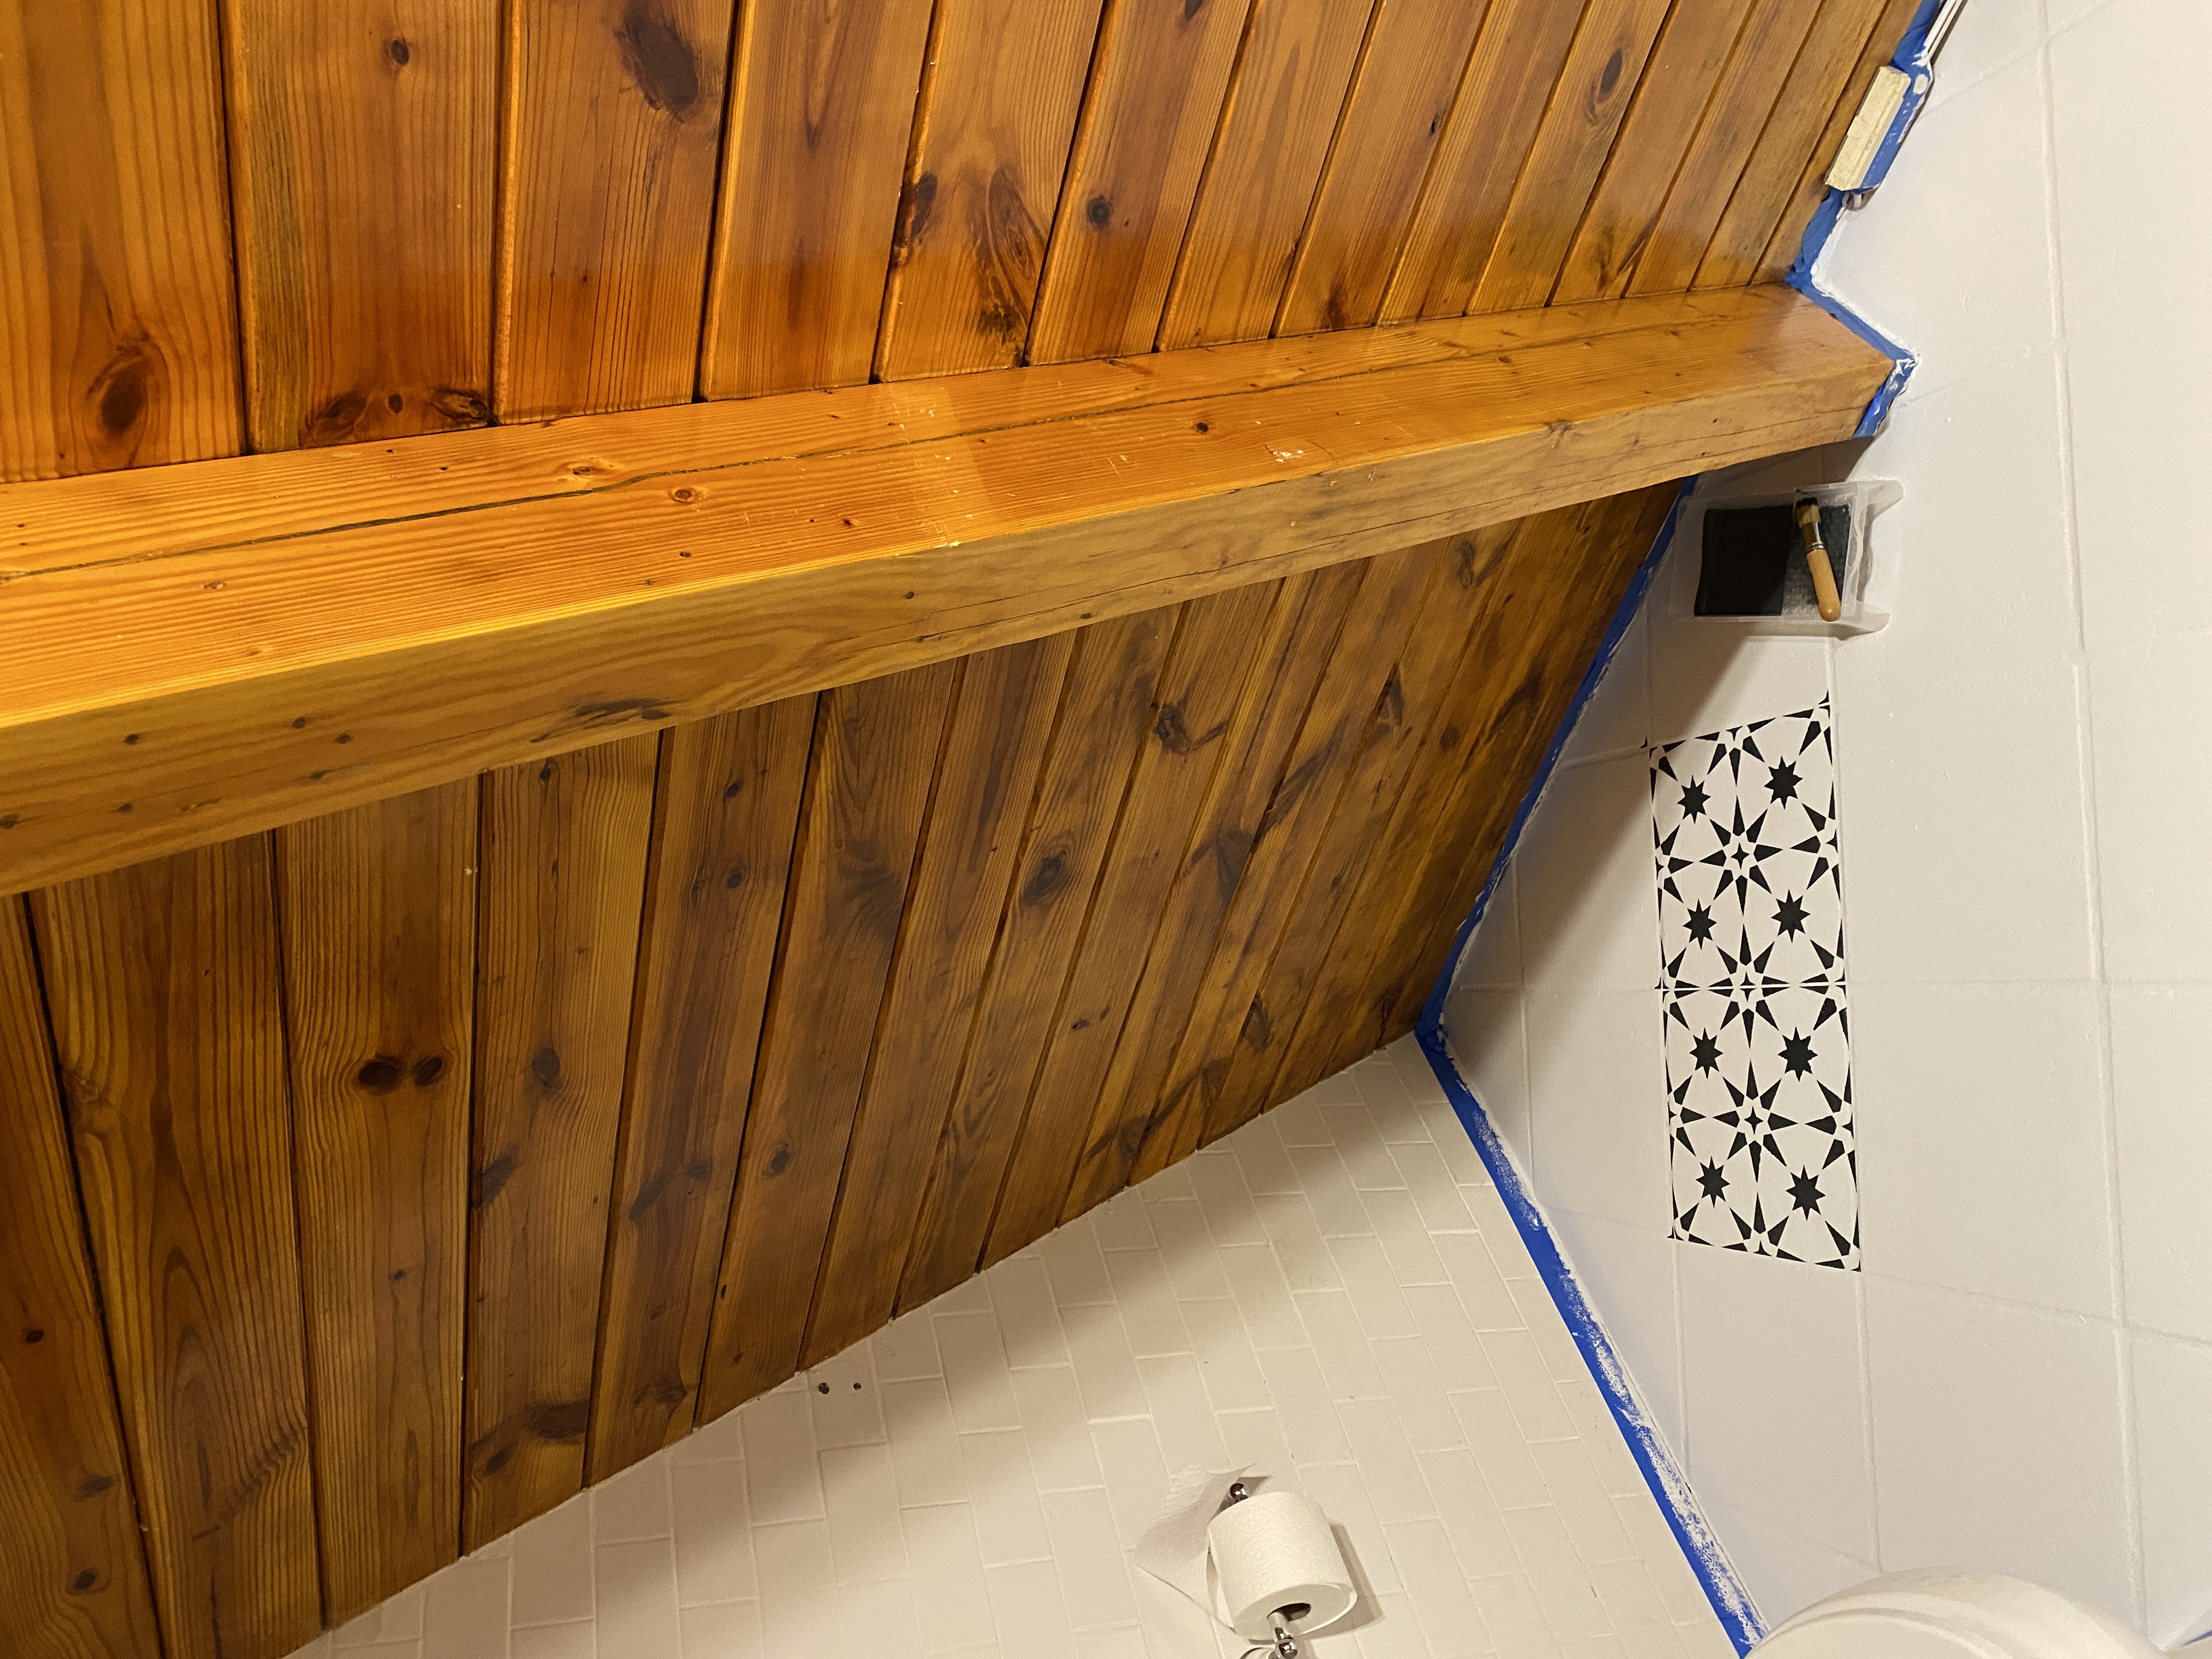
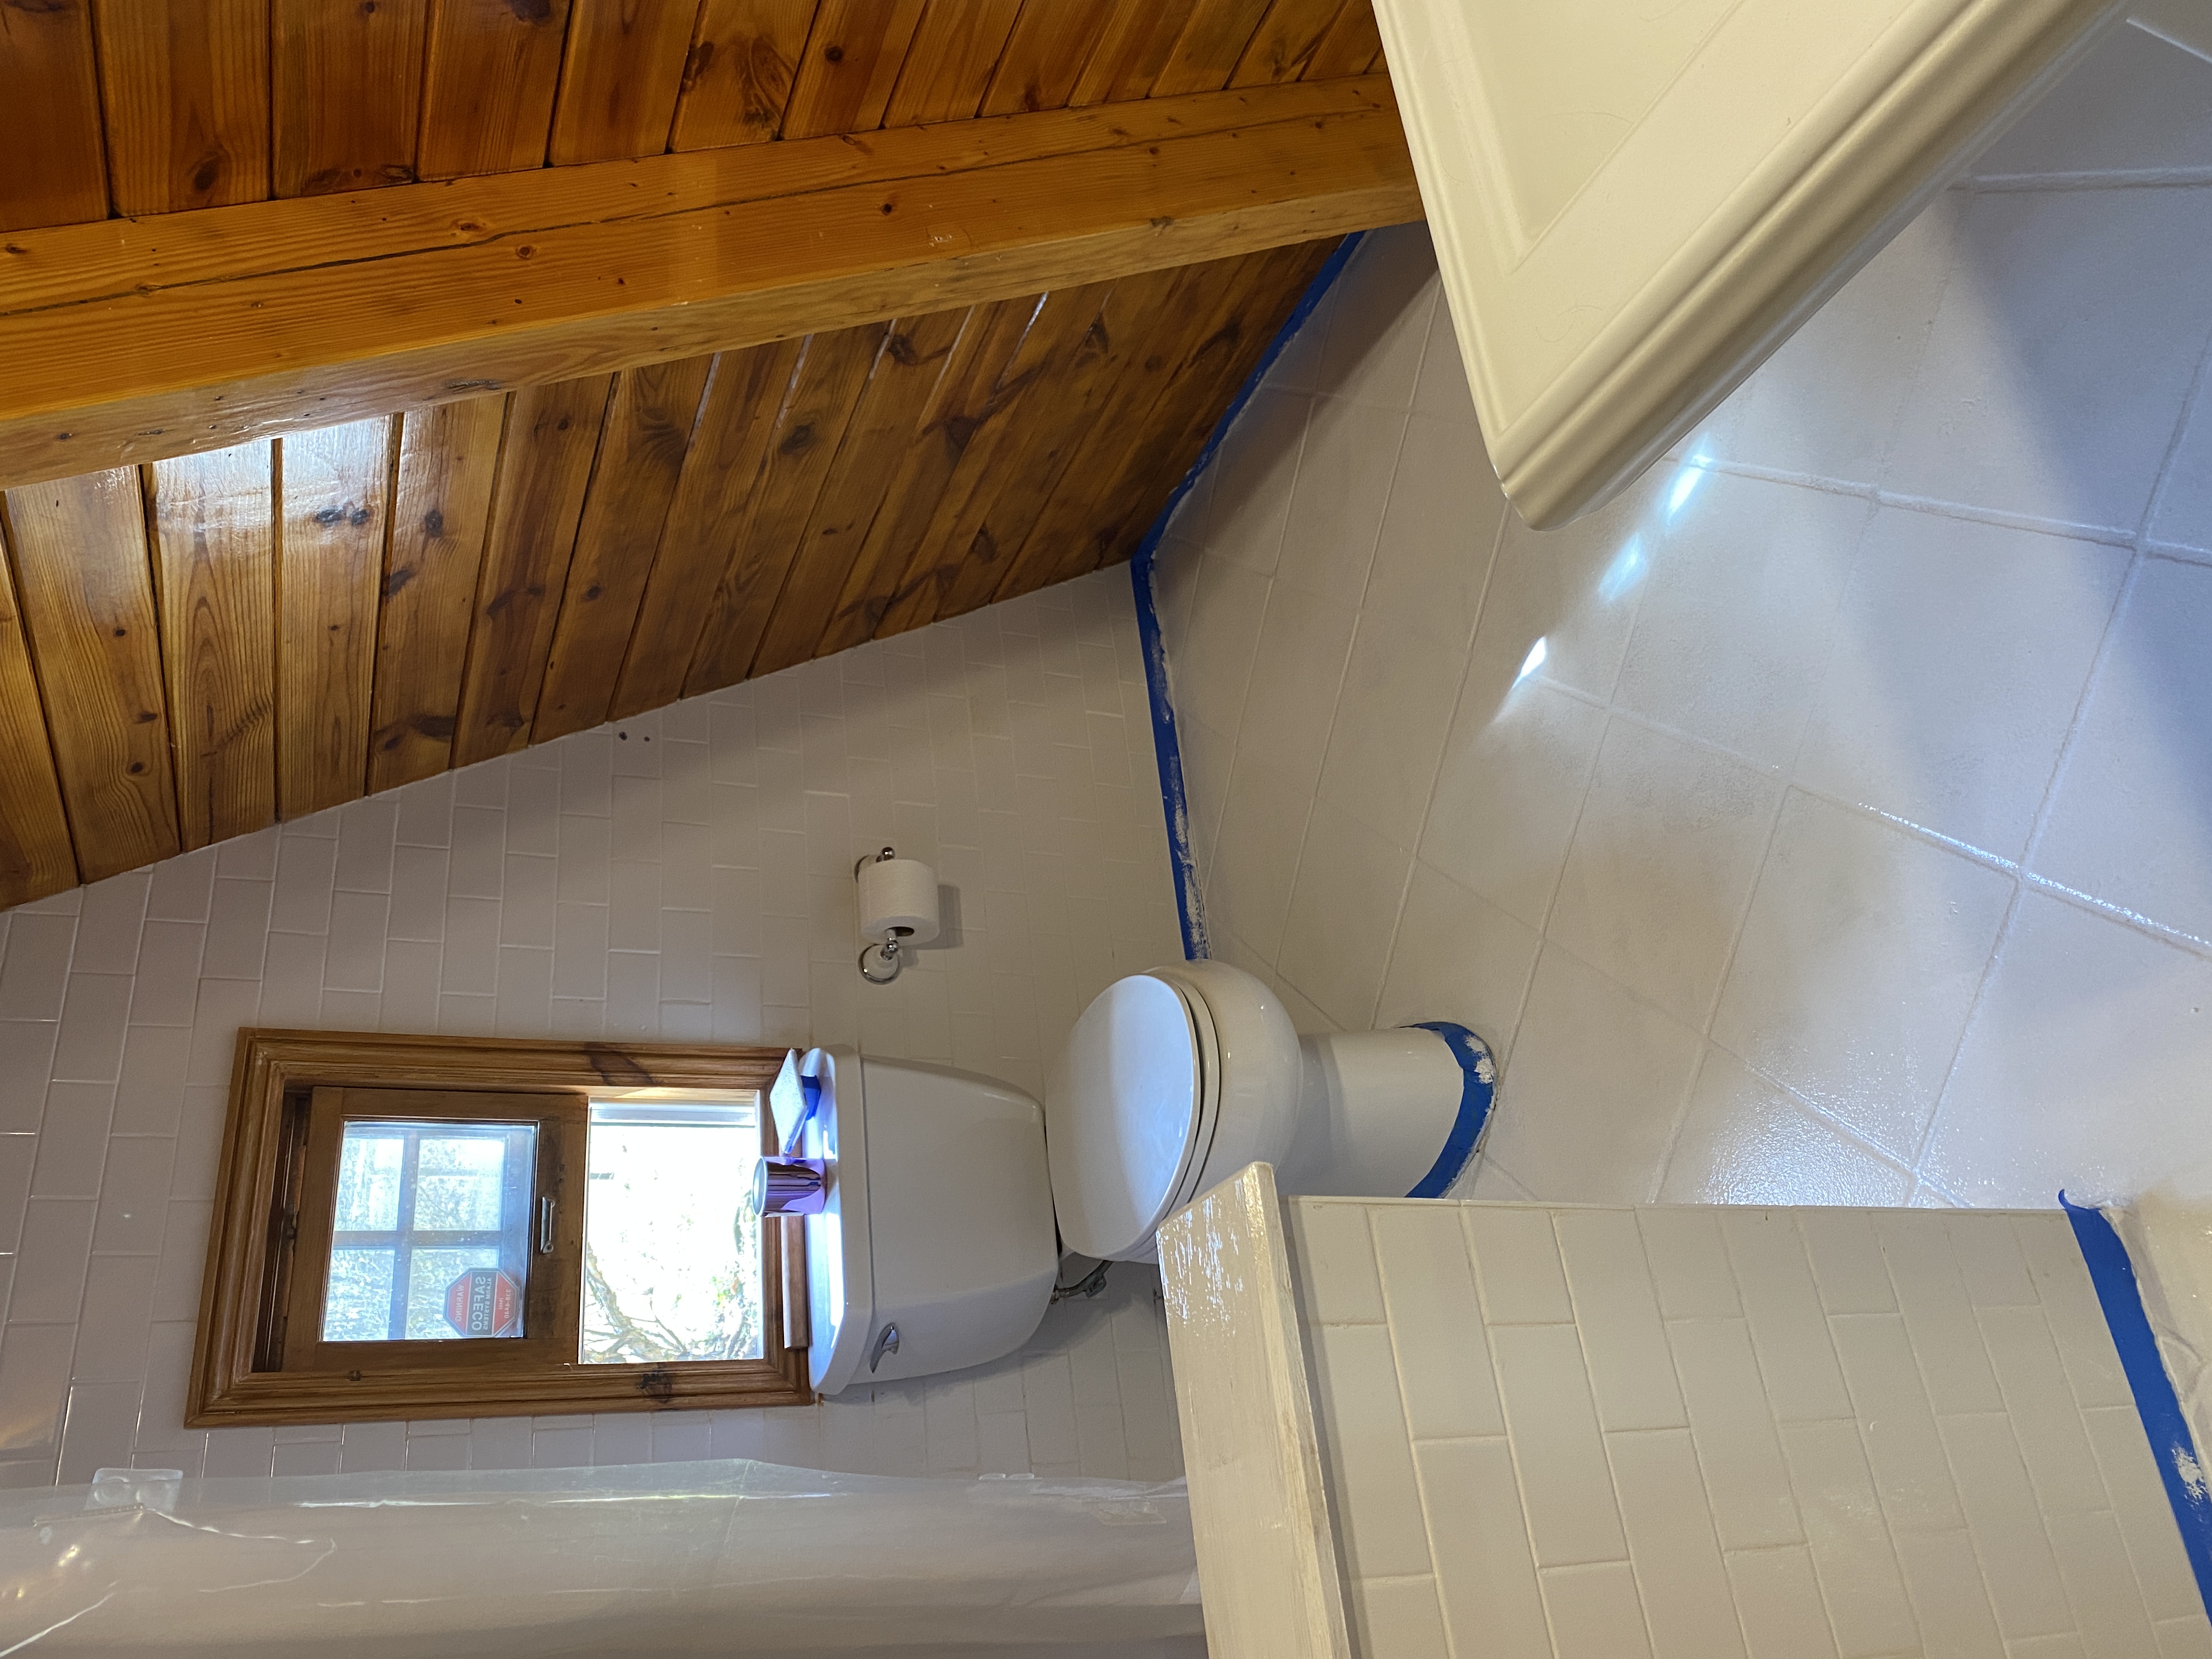
Step 2: Tape everything! I taped all along the walls, beams and around the toilet to make sure the job wasn’t super messy!
Step 3: Prime the floor with Zinsser. 1.2.3 Primer. I did two coats of primer for full coverage, and I used a regular paint roller for this step! The primer did take longer to dry than I expected, so you will have to wait a few hours in between coats, and then let it dry overnight before you begin the next step.
Step 4: Paint two coats of white Chalked paint (or whatever color you choose!) I chose this paint because it has amazing coverage, it is quick drying and the finish is very gritty and matte. It worked wonderfully. I painted two full coats with a regular roller, and then let it dry for hours before starting to stencil on top of it.
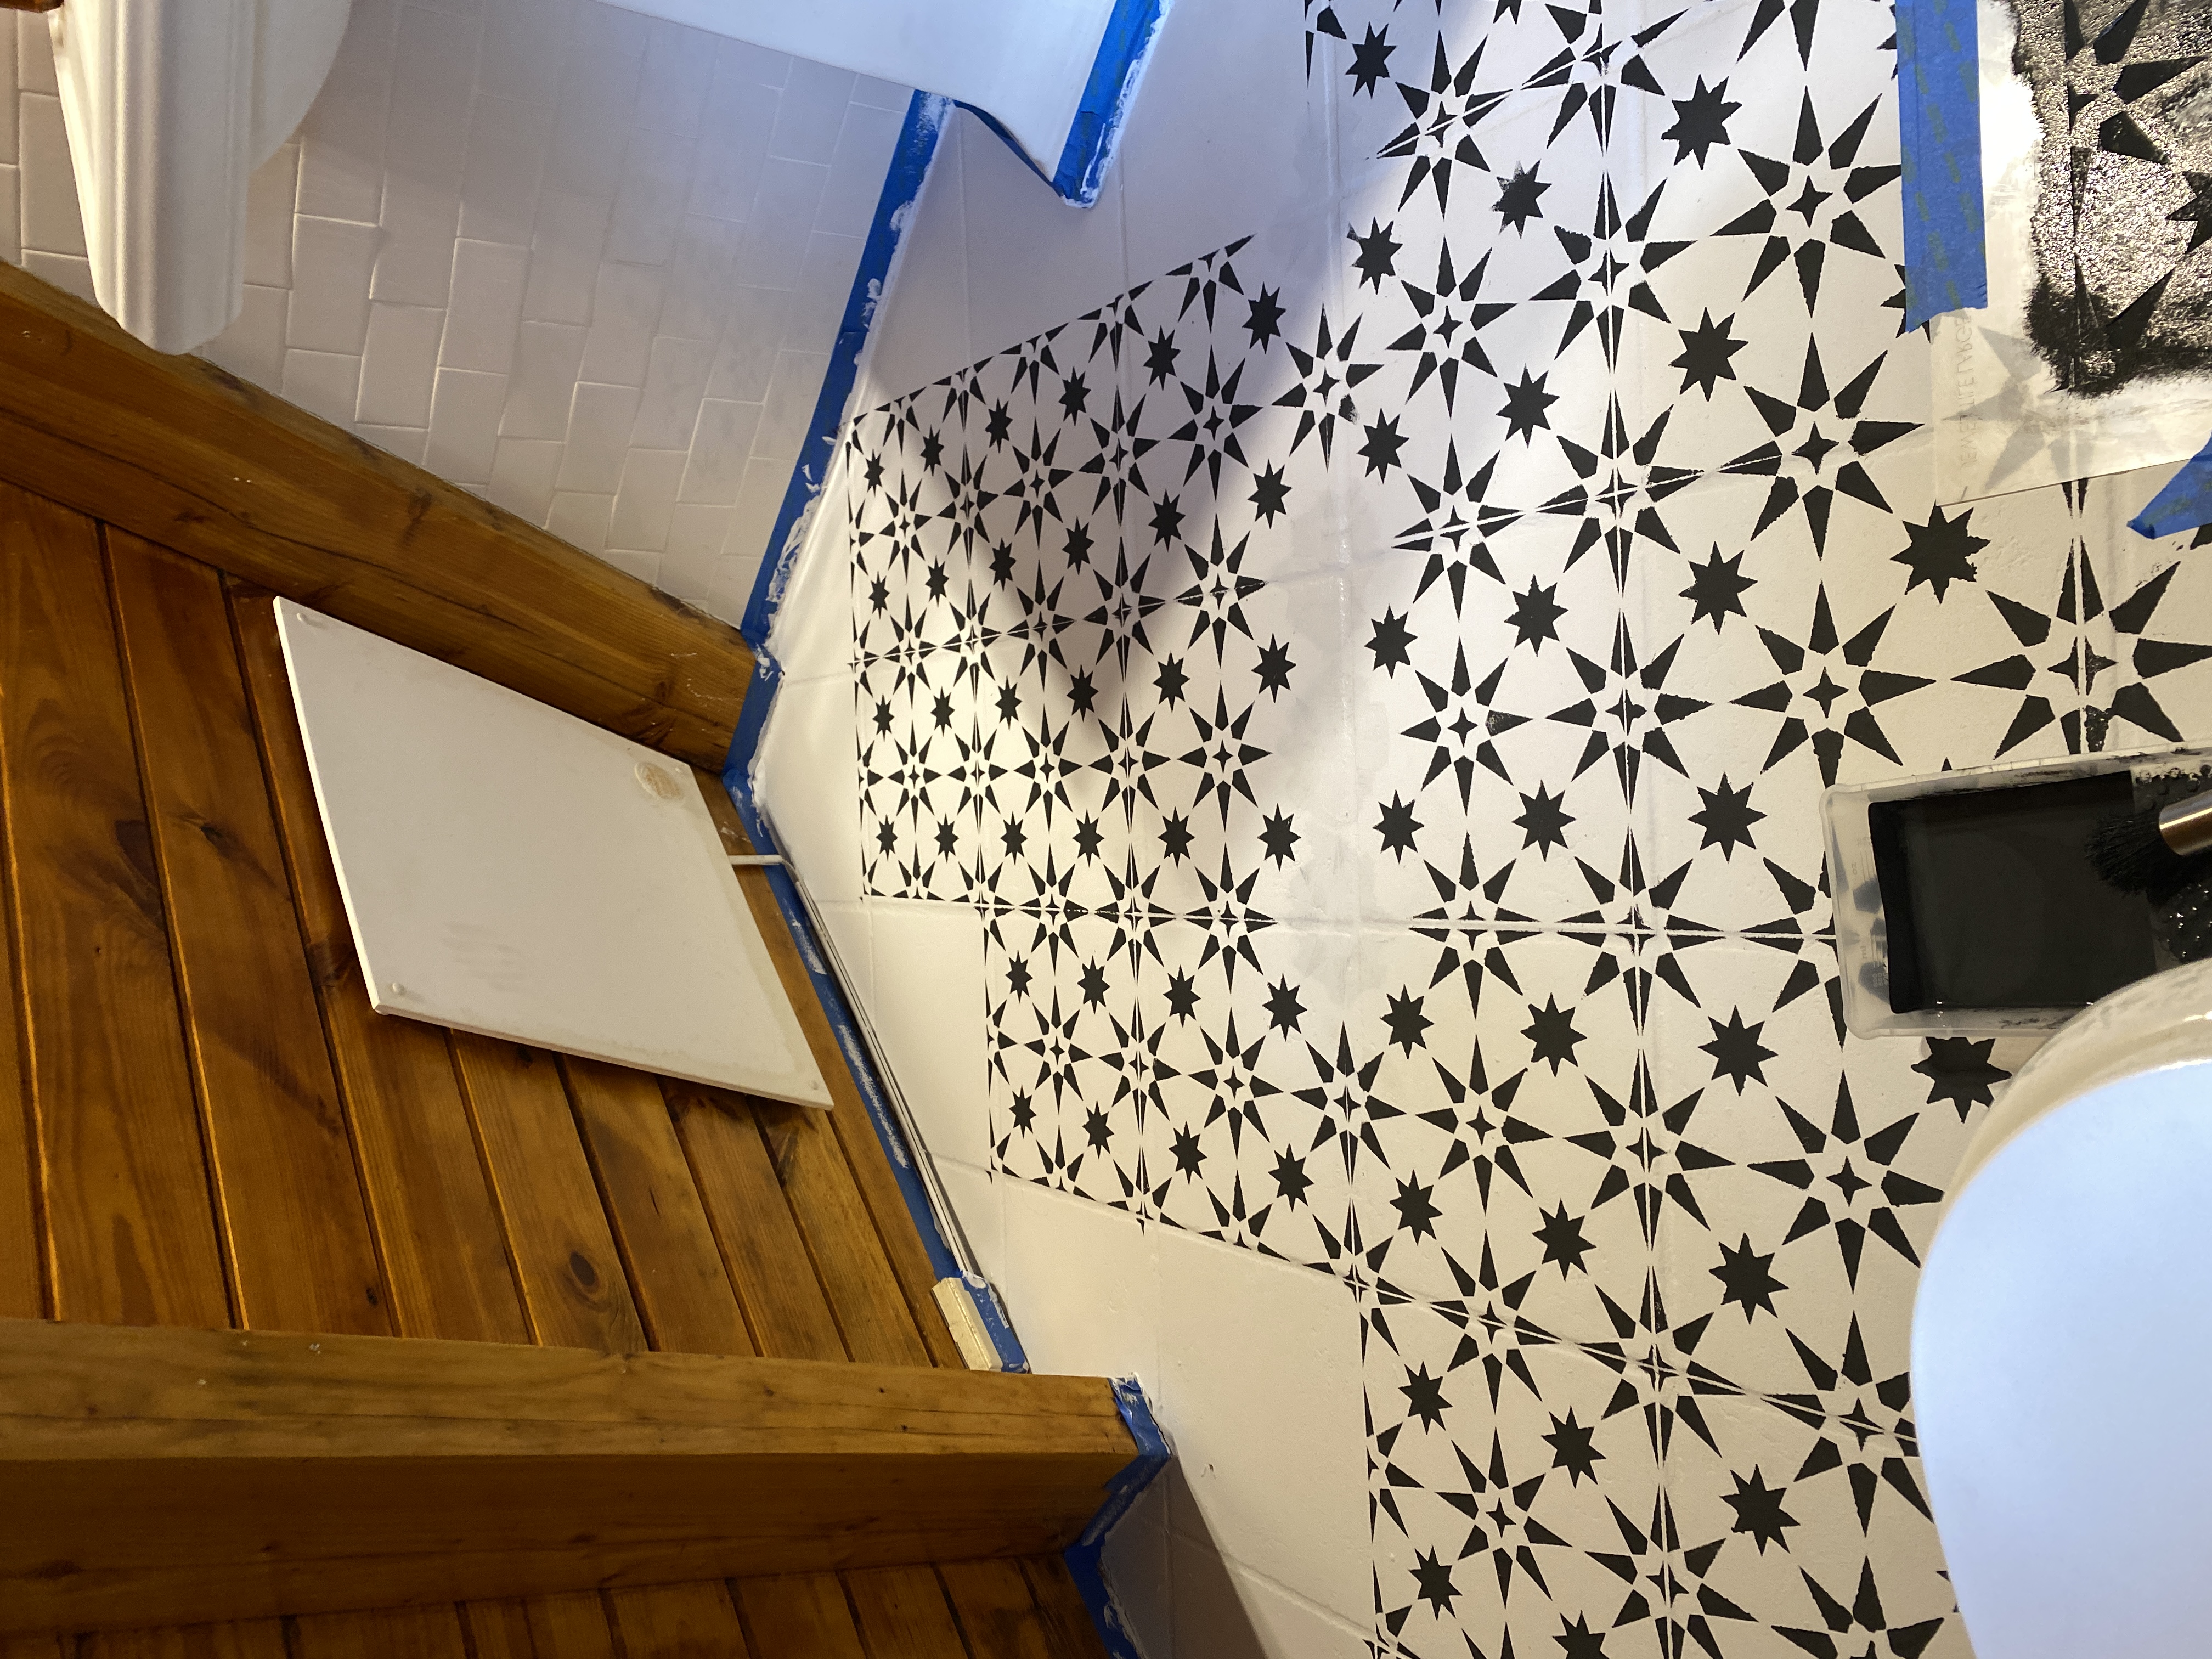
Now before I dive in to Step 5, I wanted to point out a few things I learned. First, make sure you order about 3-4 stencils. This makes it much easier, and it is even better if someone can help you out by washing your stencils after they’ve been used in between uses. After each time you paint a tile, the stencil will need to be cleaned off so it doesn’t create any smudging. I also tested the method I felt most comfortable using – there’s two ways to stencil: by blotting the brush, or by rolling with a foam roller. I personally felt like the foam roller had more paint spillover, so I used to blotting method. I used a blotting brush similar to this one, and I used this 12 inch jewel style stencil.
Step 5: Stencil! The trick that I learned after I started is to start stenciling in the center of the room, and then paint in a circular motion around that center tile. Do not stencil in a line, because if you have an empty tile with two already painted surrounding tiles, there’s a chance the empty tile will not fit perfectly. I made this mistake, and wanted to cry, but ended up painting over a few things and going back over it again. Just remember, you can always paint things white and start again! I also taped the stencil at the top and the bottom to hold it in place as I stenciled. I would clean off my stencil after each time. Once you complete all of the full sized tiles, you are then tasked with the annoying, terrible, horrible half tiles. For the larger half tiles, I just bent my stencil and did the best I could, and then went back in with a smaller brush. For the teeny tiny tiles, I ended up cutting my full sized stencil and using bits and pieces of it. The entire stenciling process is tedious and time consuming, and I would expect for it to take a few days, depending on the size of your space. The paint is quick-drying, so if you need to use that bathroom toilet, it should be fine in an hour or so after stenciling. I would not recommend using the shower.
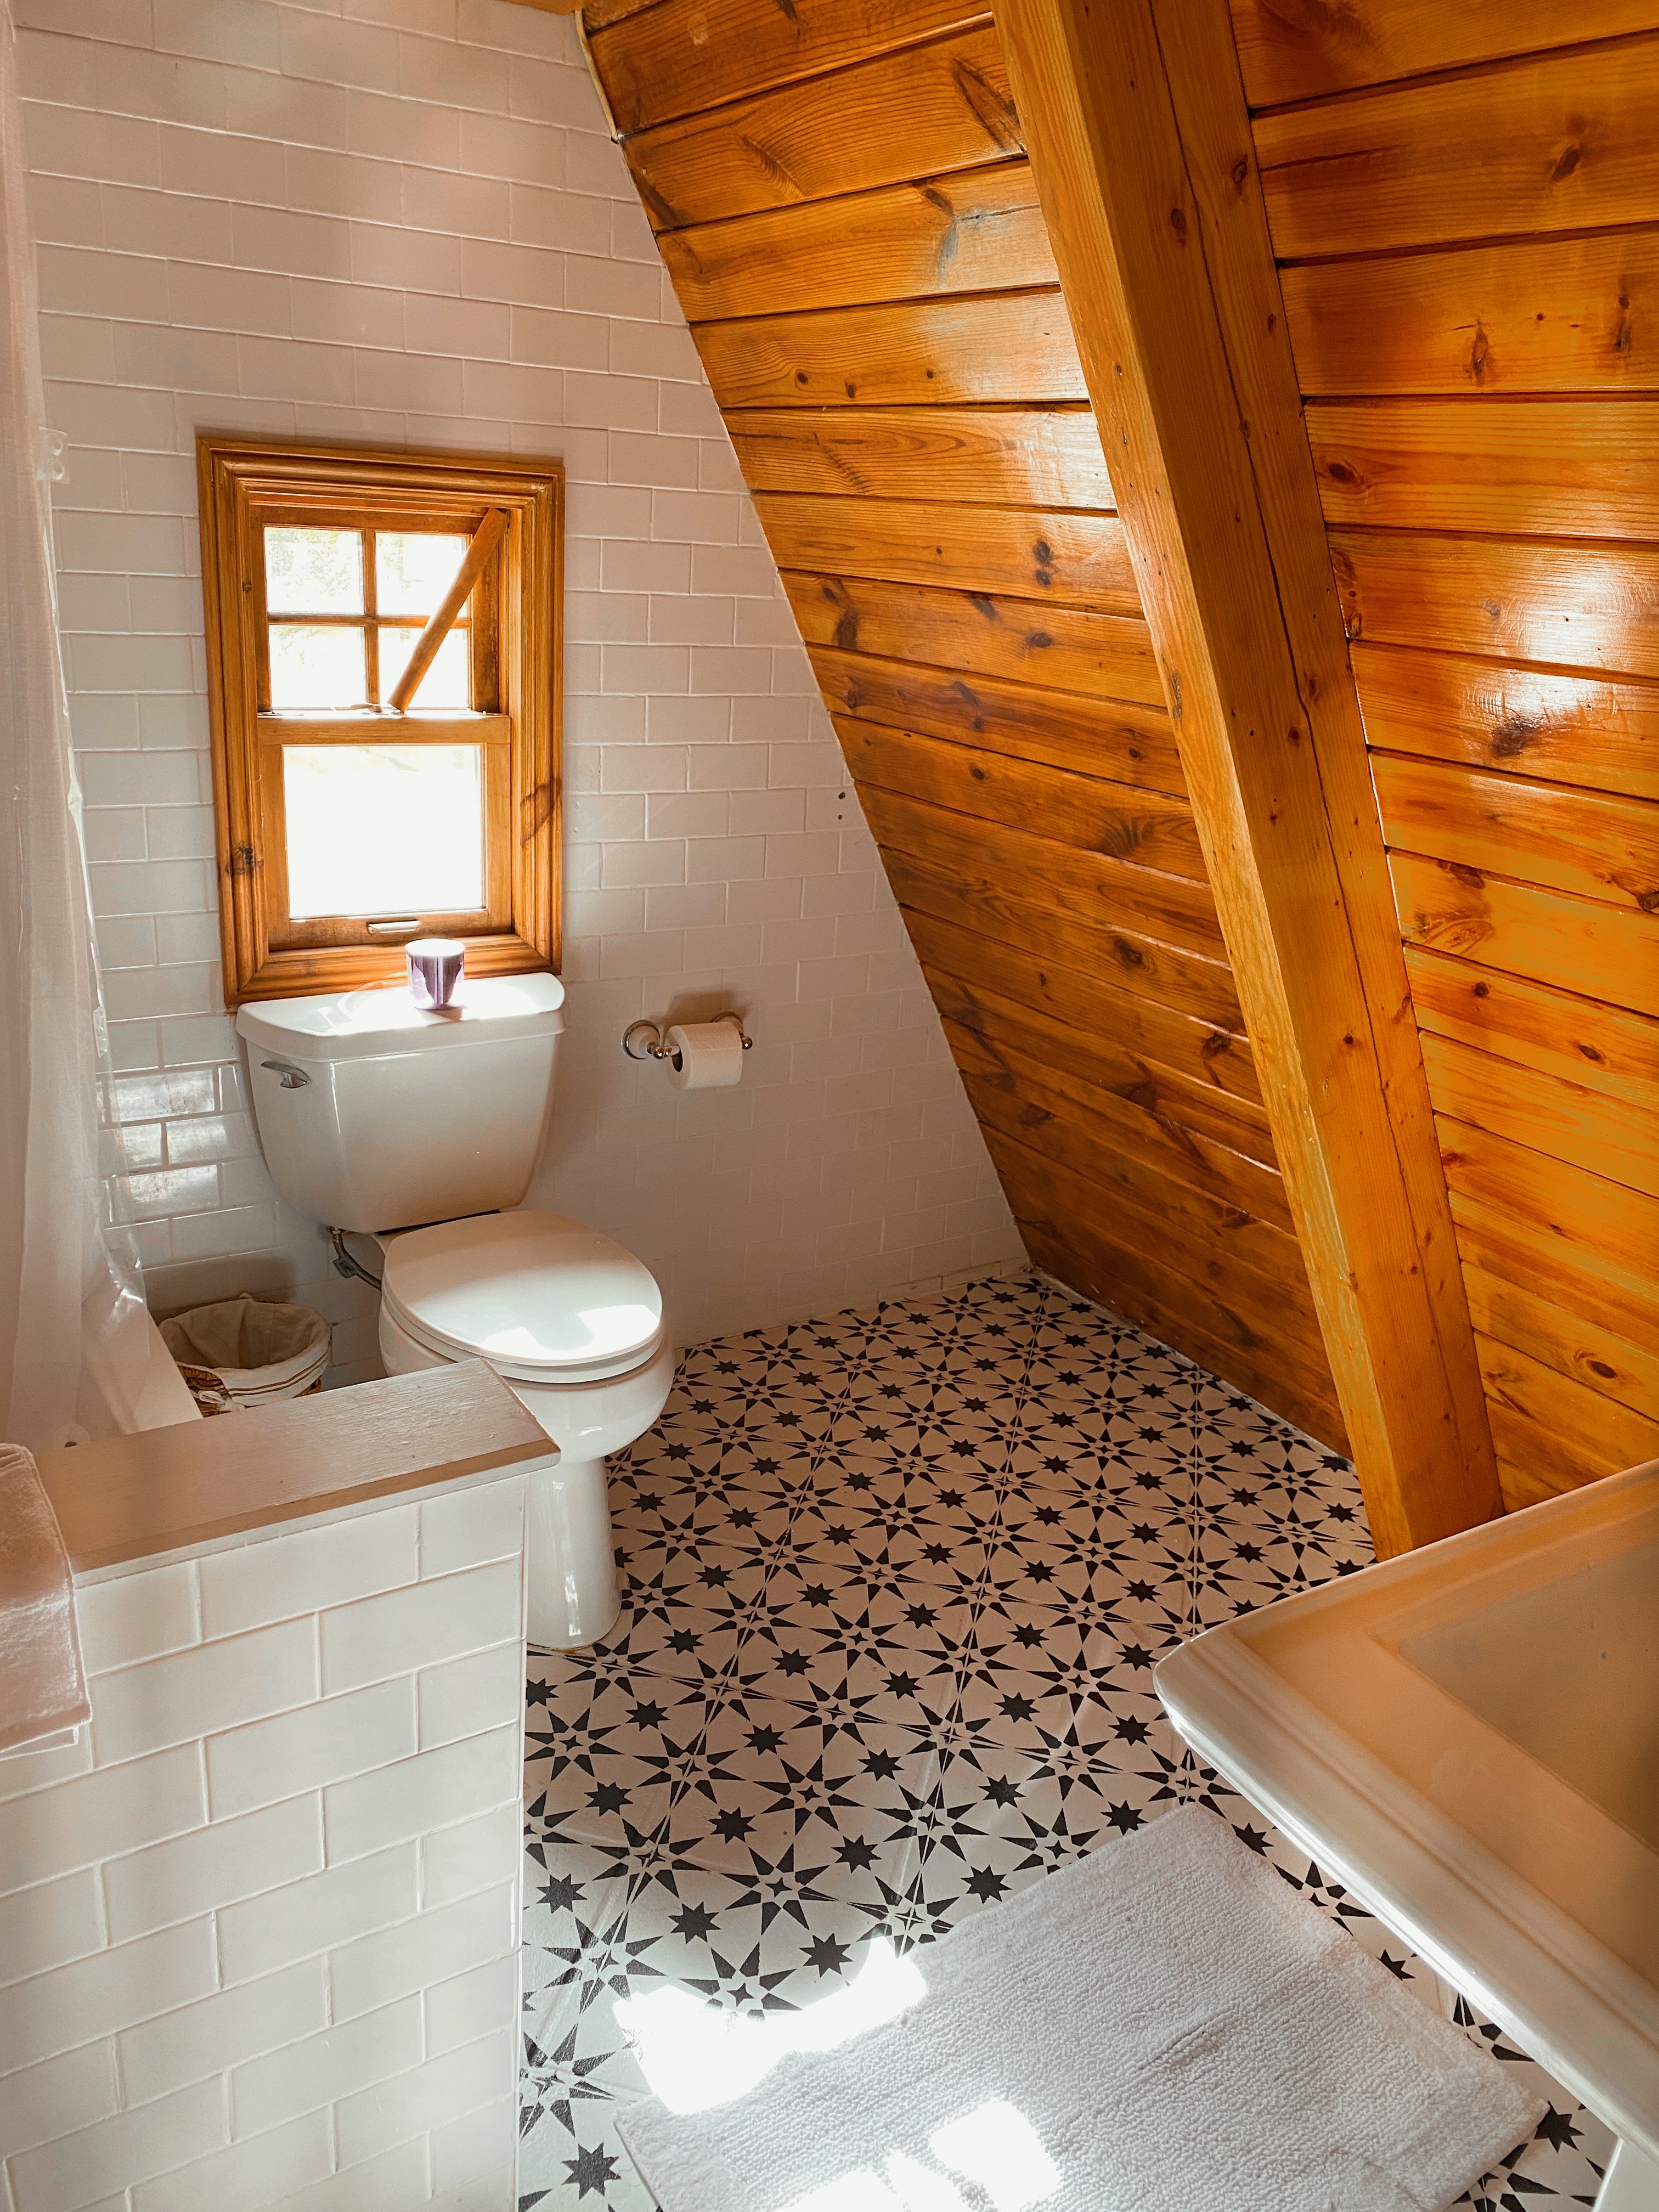
Step 6: Wait a full day for the stenciling to dry, and then seal your floors with Polycrylic Minwax. I picked this sealant because it was less hi-gloss, and the woman at Lowe’s / the internet seemed to recommend it the most. I used a regular paint roller and rolled two coats of it on, and then I let it dry for days before stepping on it again.
It has been a month or two since this project, and it has held up amazing so far! No chips or anything of the sort, and we’ve also mopped and swept the floors, and showered multiple times! I would highly recommend this if you have lots of patience!