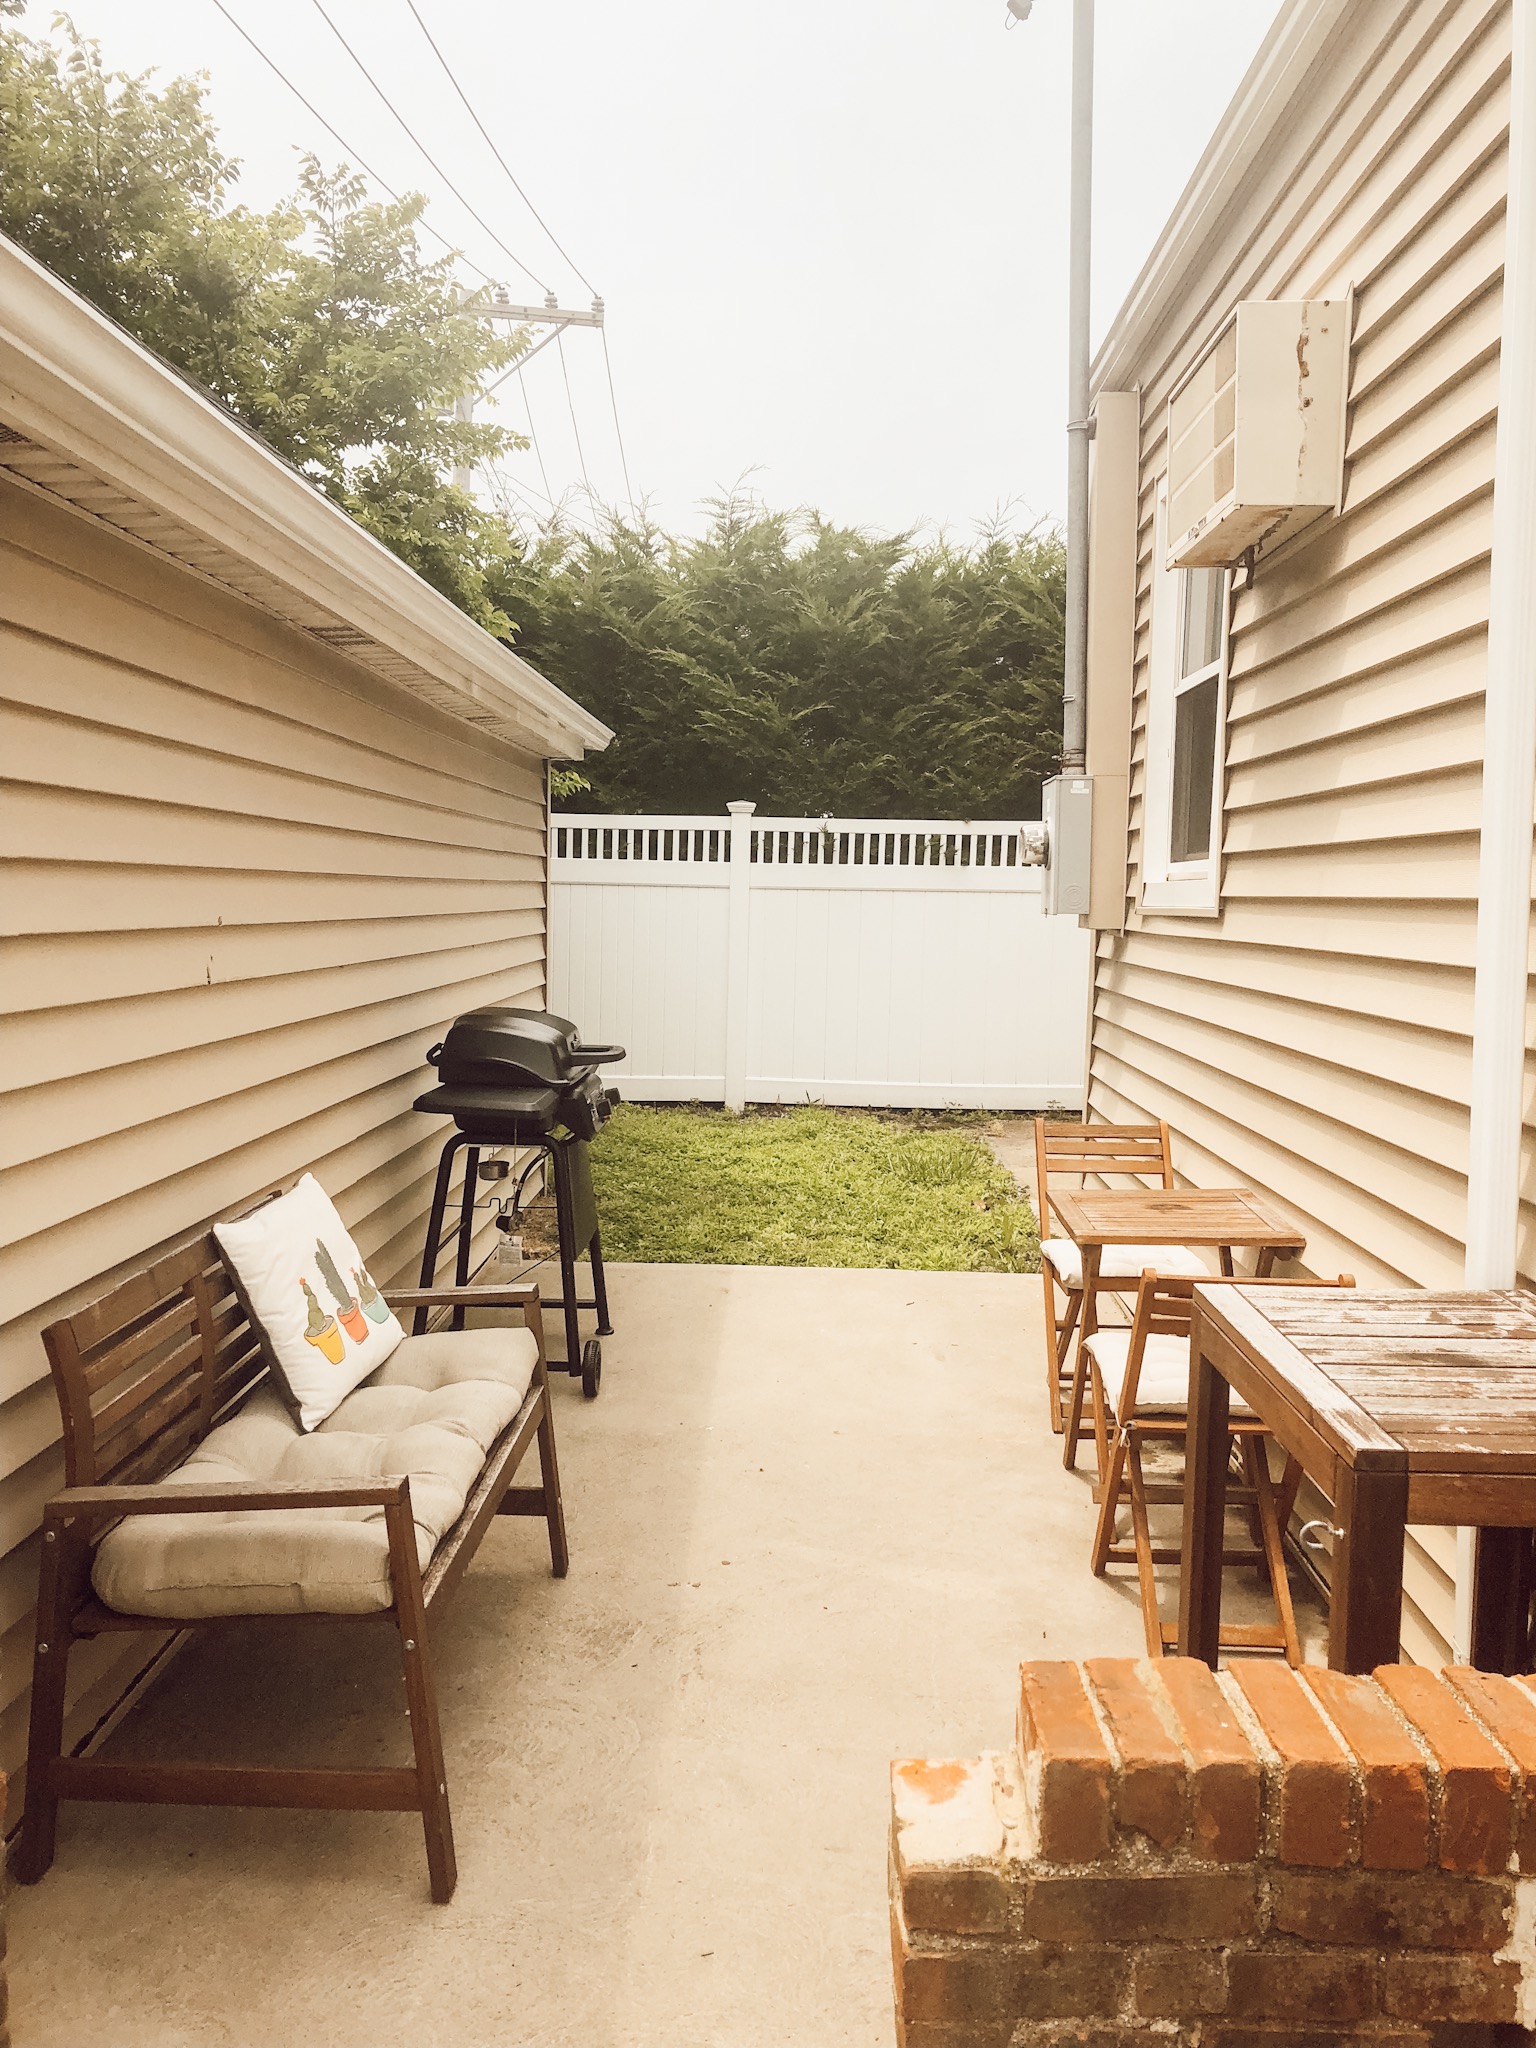
This is phase 1 in a two-part before + after series I’ve been working on all summer long! We have this adorable little side-yard, that sat empty all winter long, and I knew I wanted to paint the cement and make it a little oasis where we could grill, play outside, and spend time together as a family. The first phase was to paint the cement, and the second phase was to source furniture and redesign and reimagine the space, so stay tuned for phase 2 coming soon! I got the idea to paint the floors from A Beautiful Mess’ DIY tile painting tutorial. I love how Laura’s tile came out, and I also love that it wasn’t a super new project, so I was able to get an idea of how it holds up through time, and her patio still looks super fresh! I knew right off the bat that I didn’t want my tiles to be rectangular like hers, and that square was more the look I was going for, even if it meant that some tiles would be half. This is definitely the first big decision you have to make in this project! I’ll break down my process step-by-step and link everything I used below!
BEFORE:
Step 1: Pick up all of your products. We got everything we needed from Lowe’s, but I am going to link it all here – this is everything I used to complete this project. Make sure to purchase the cement floor paint in white (I think it’s called tint 2) and then to have the black mixed up. They made it darker, and more true black for us at Lowe’s.

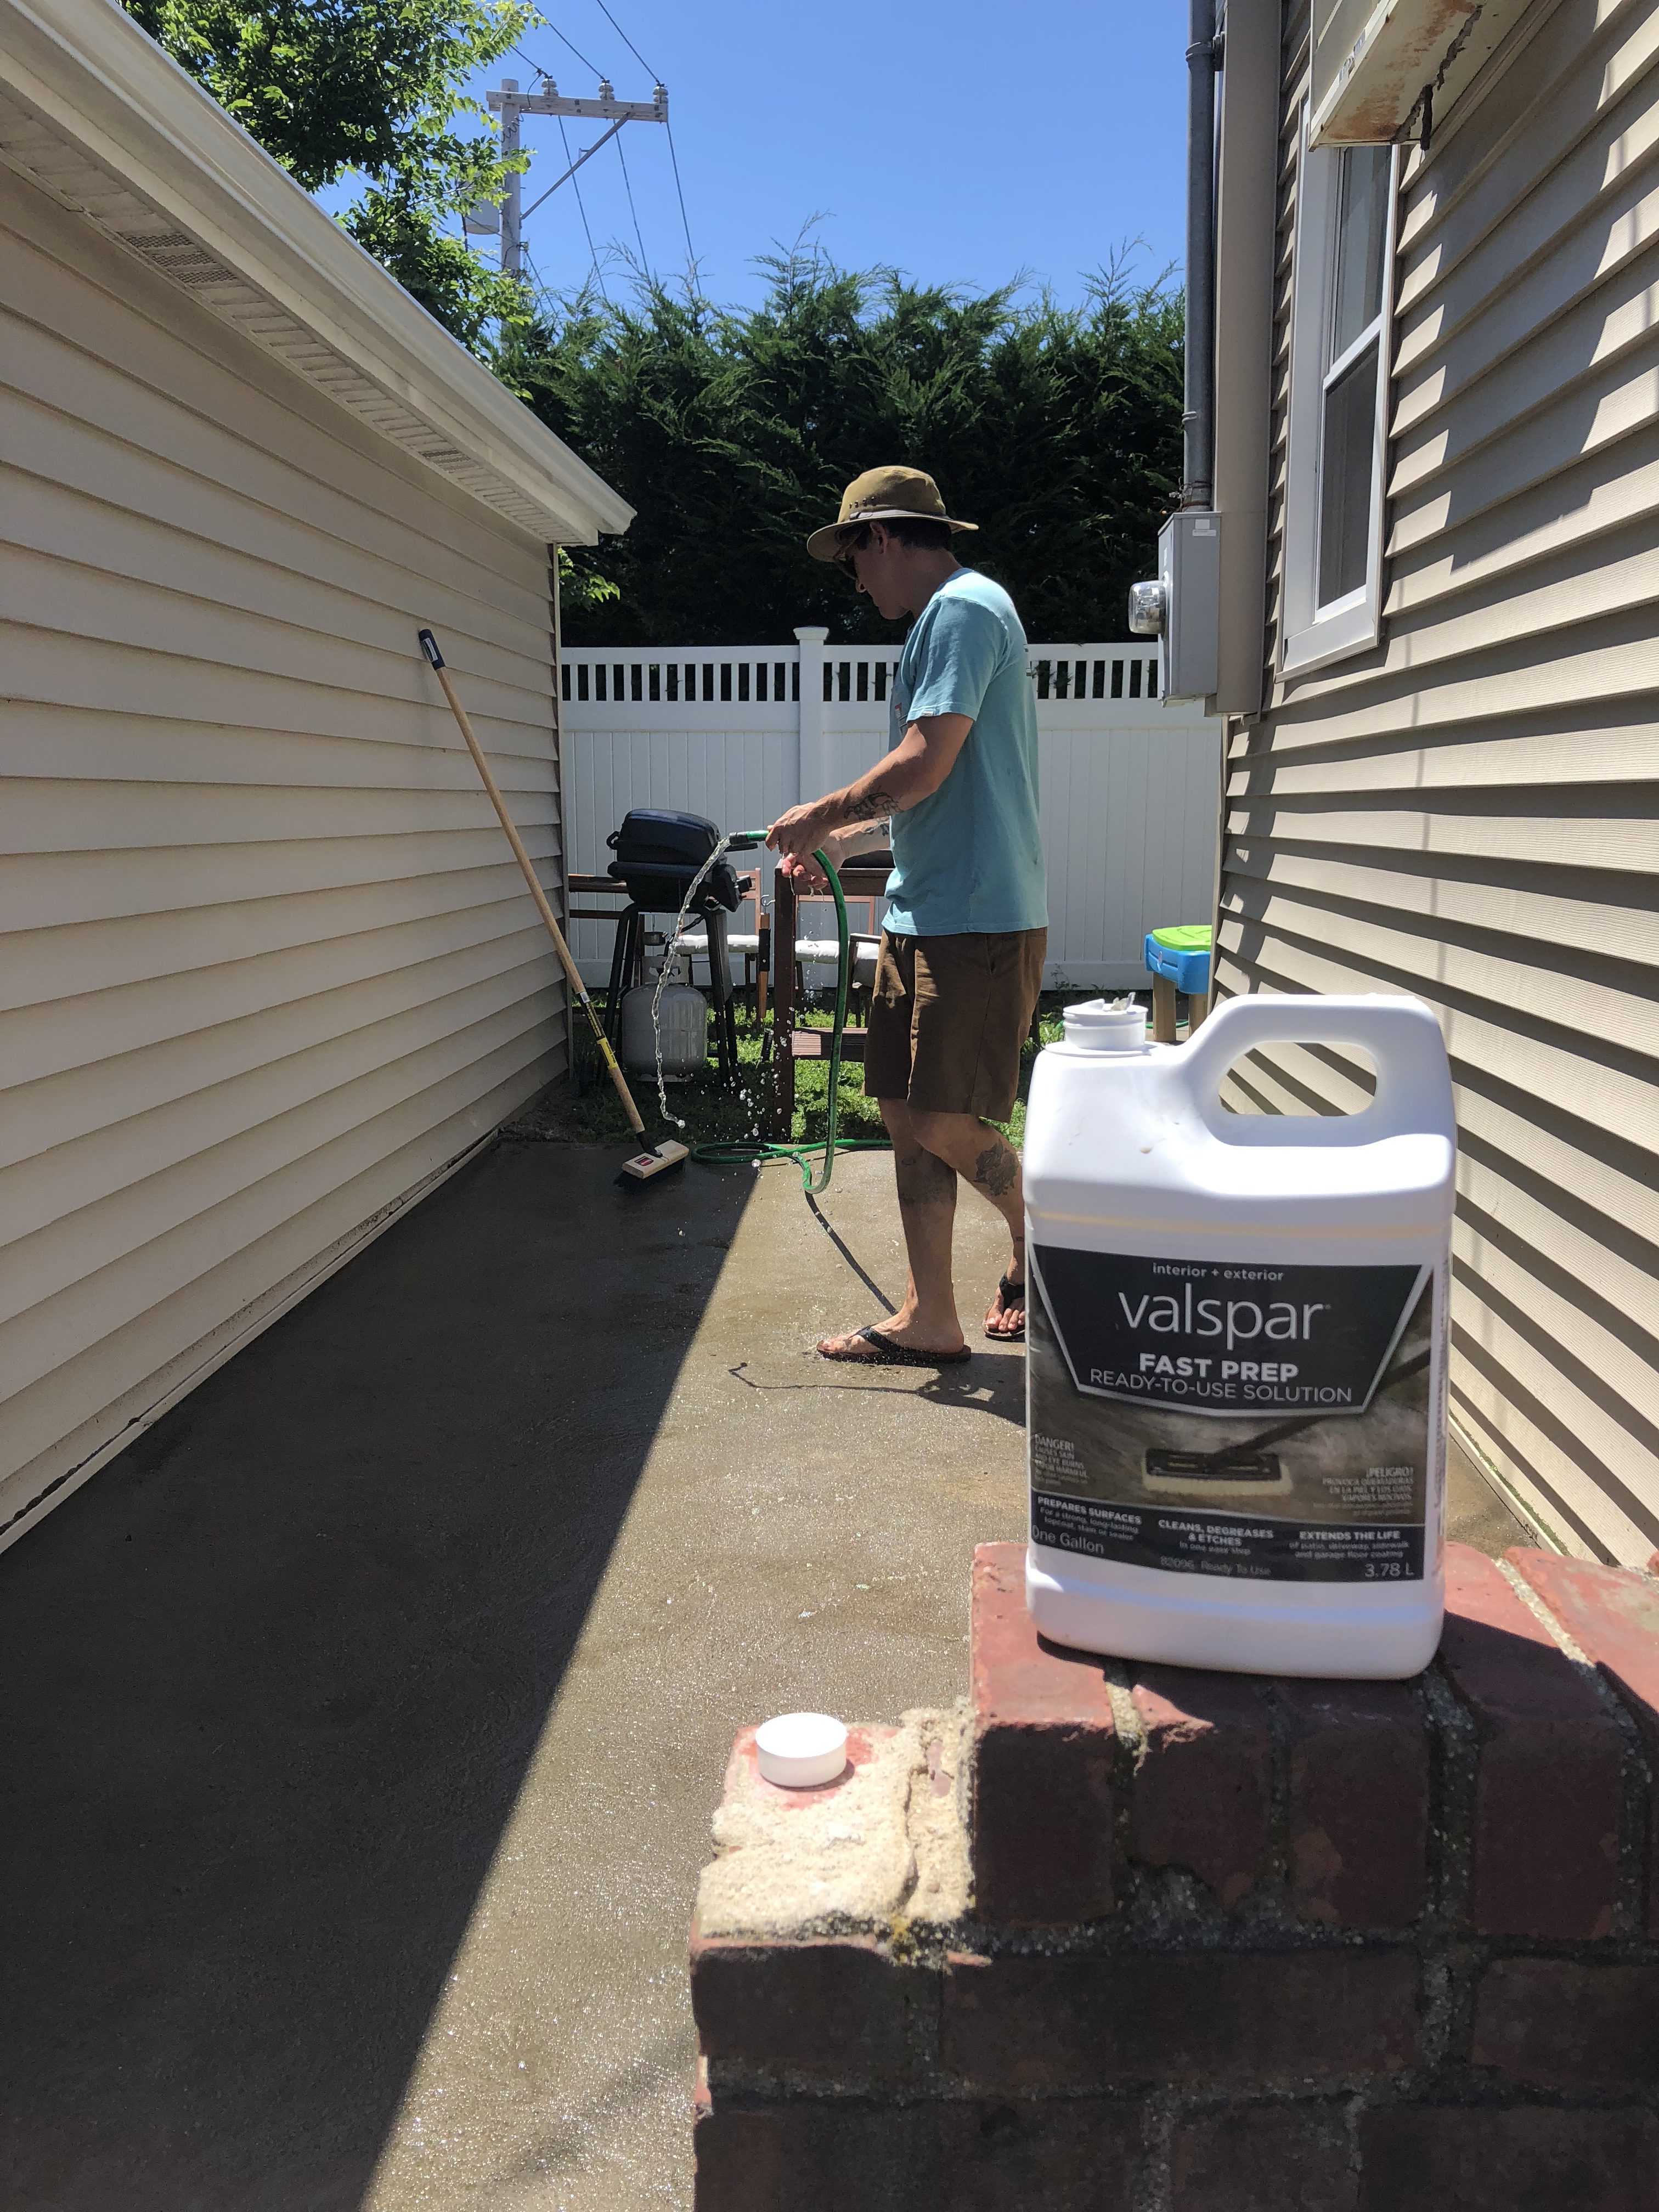
Step 2: Hose down the area, and scrub it with the Vaslpar fast prep, and a stiff broom. After this step, make sure the surface is very very dry before you paint the first white layer on. We waited a few hours before continuing. We were able to complete this step, and paint the surface white on day 1, and the rest on day 2. So yes, it was a two day project!
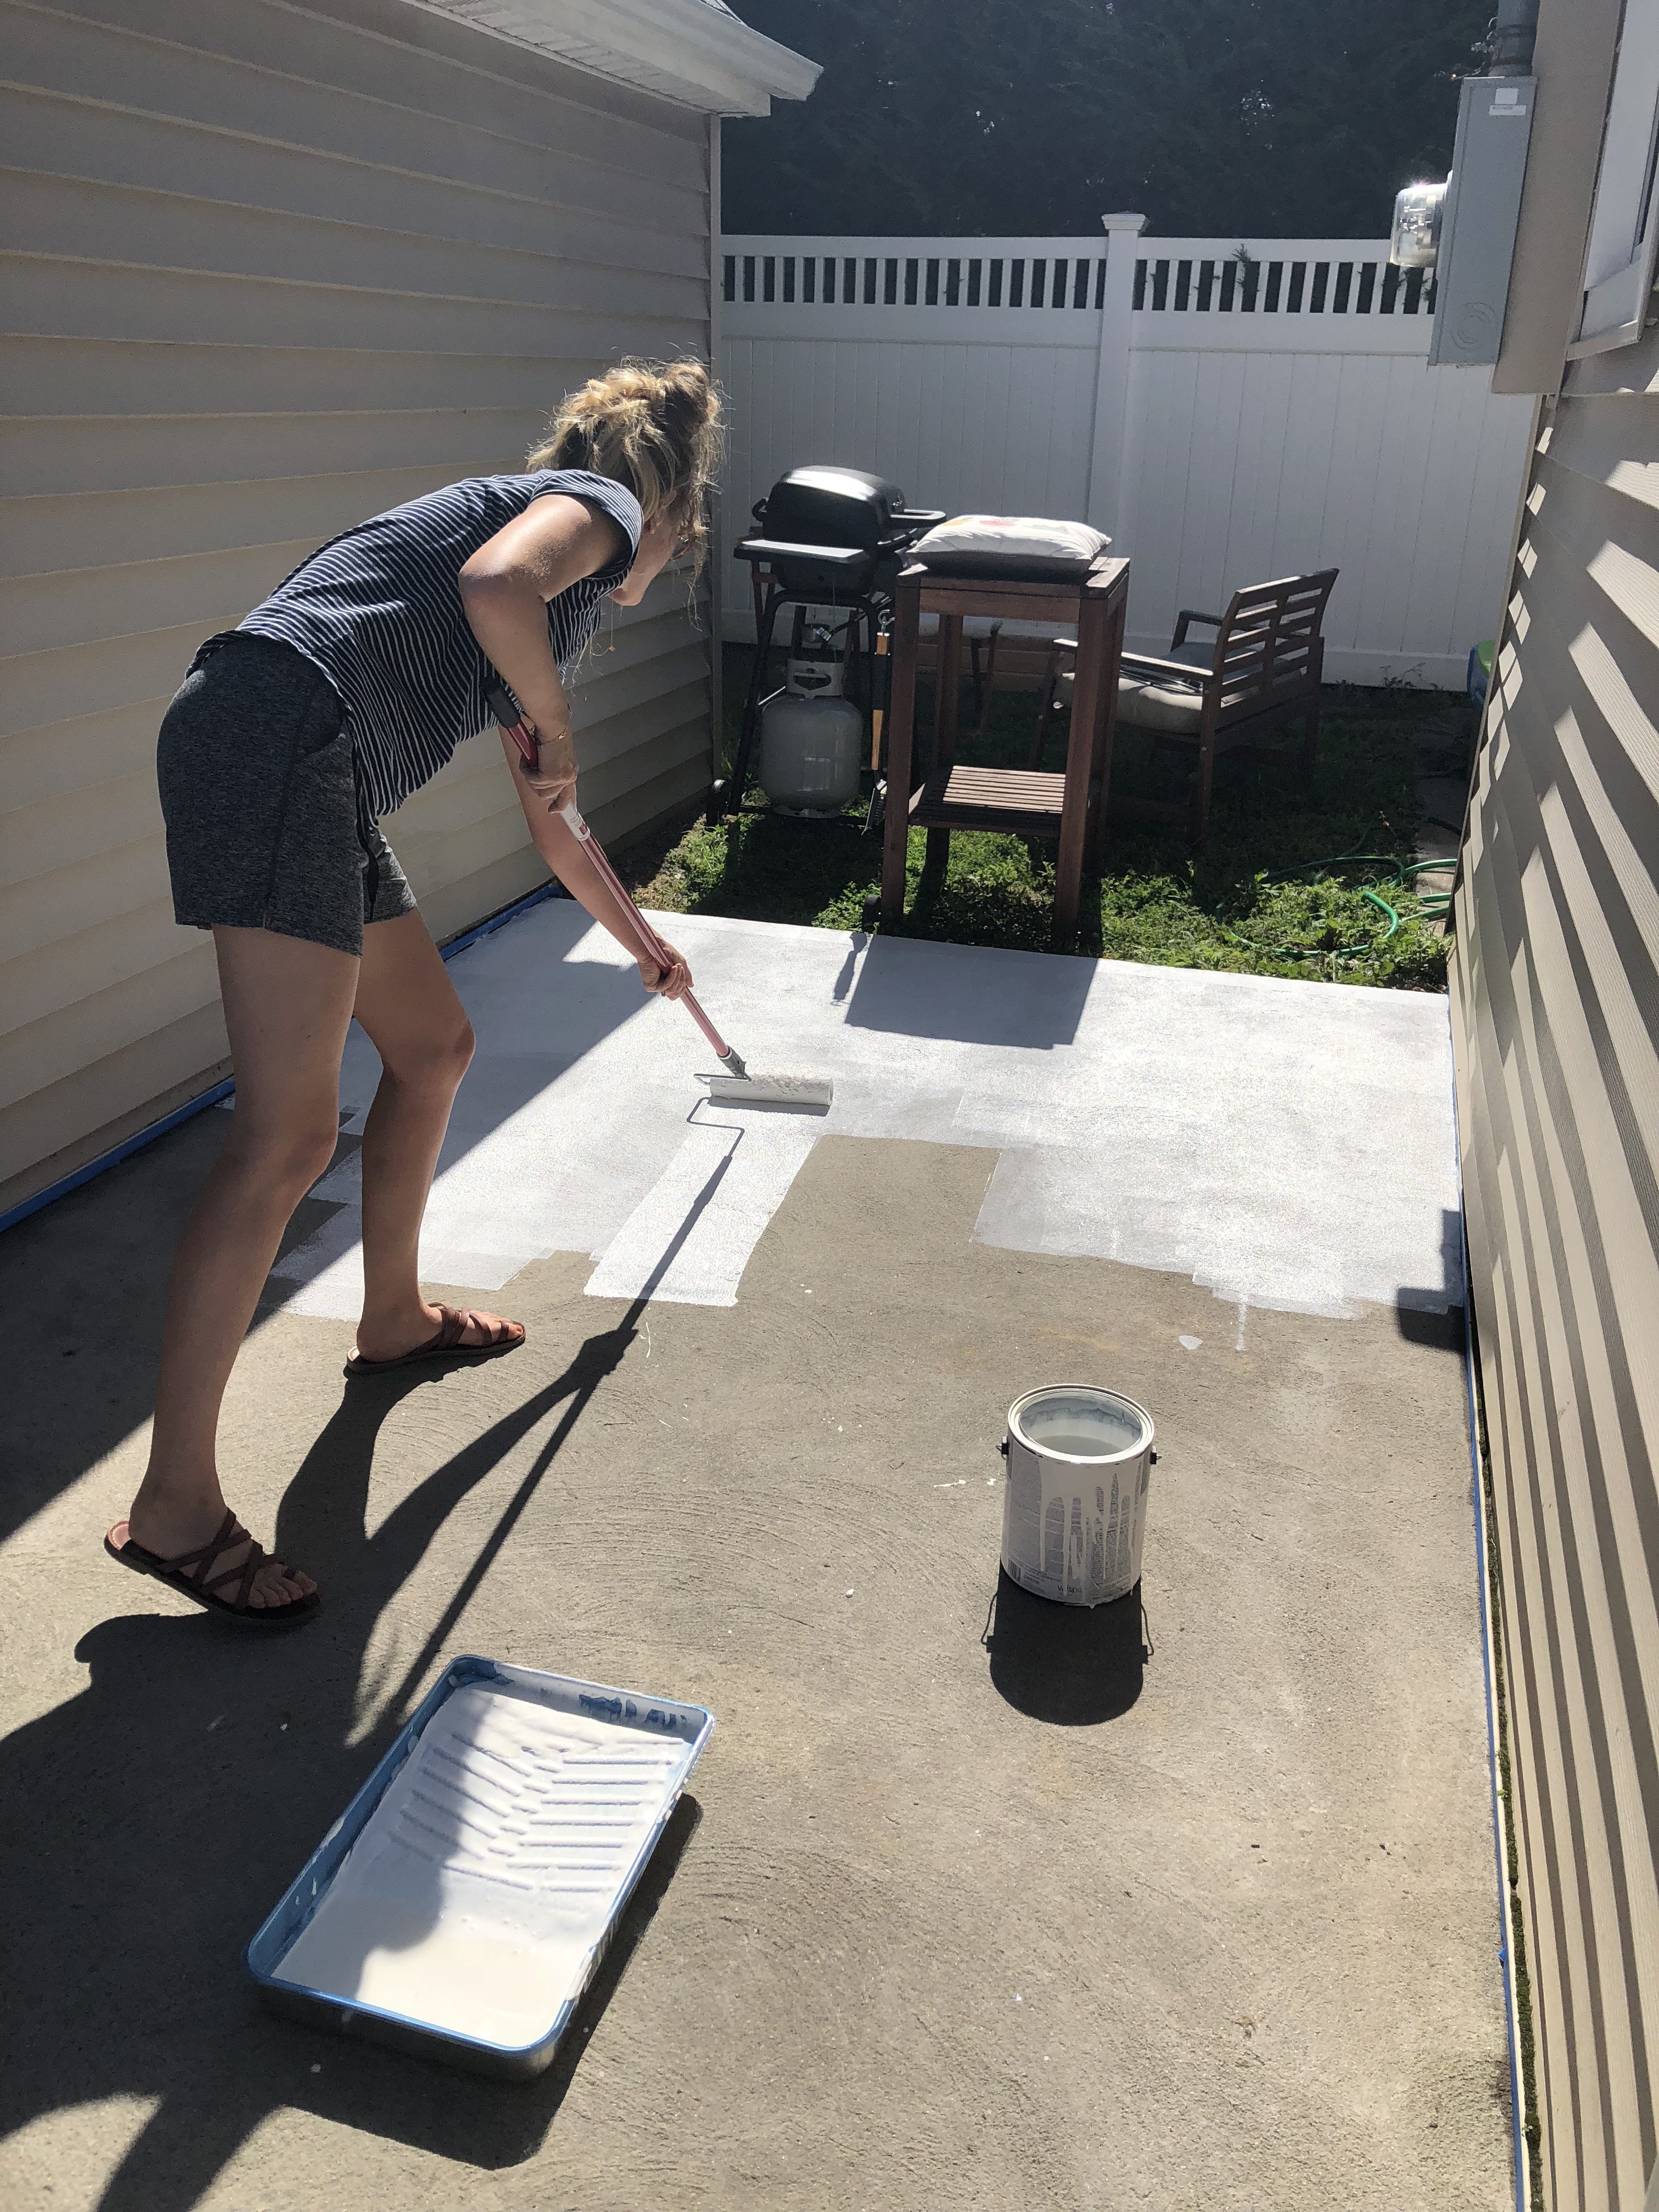
Step 3: Paint the entire surface white with the Valsapar porch + floor paint in white, I couldn’t find the white online, but we picked ours up at Lowe’s. I painted two coats, just to make sure it was true white.
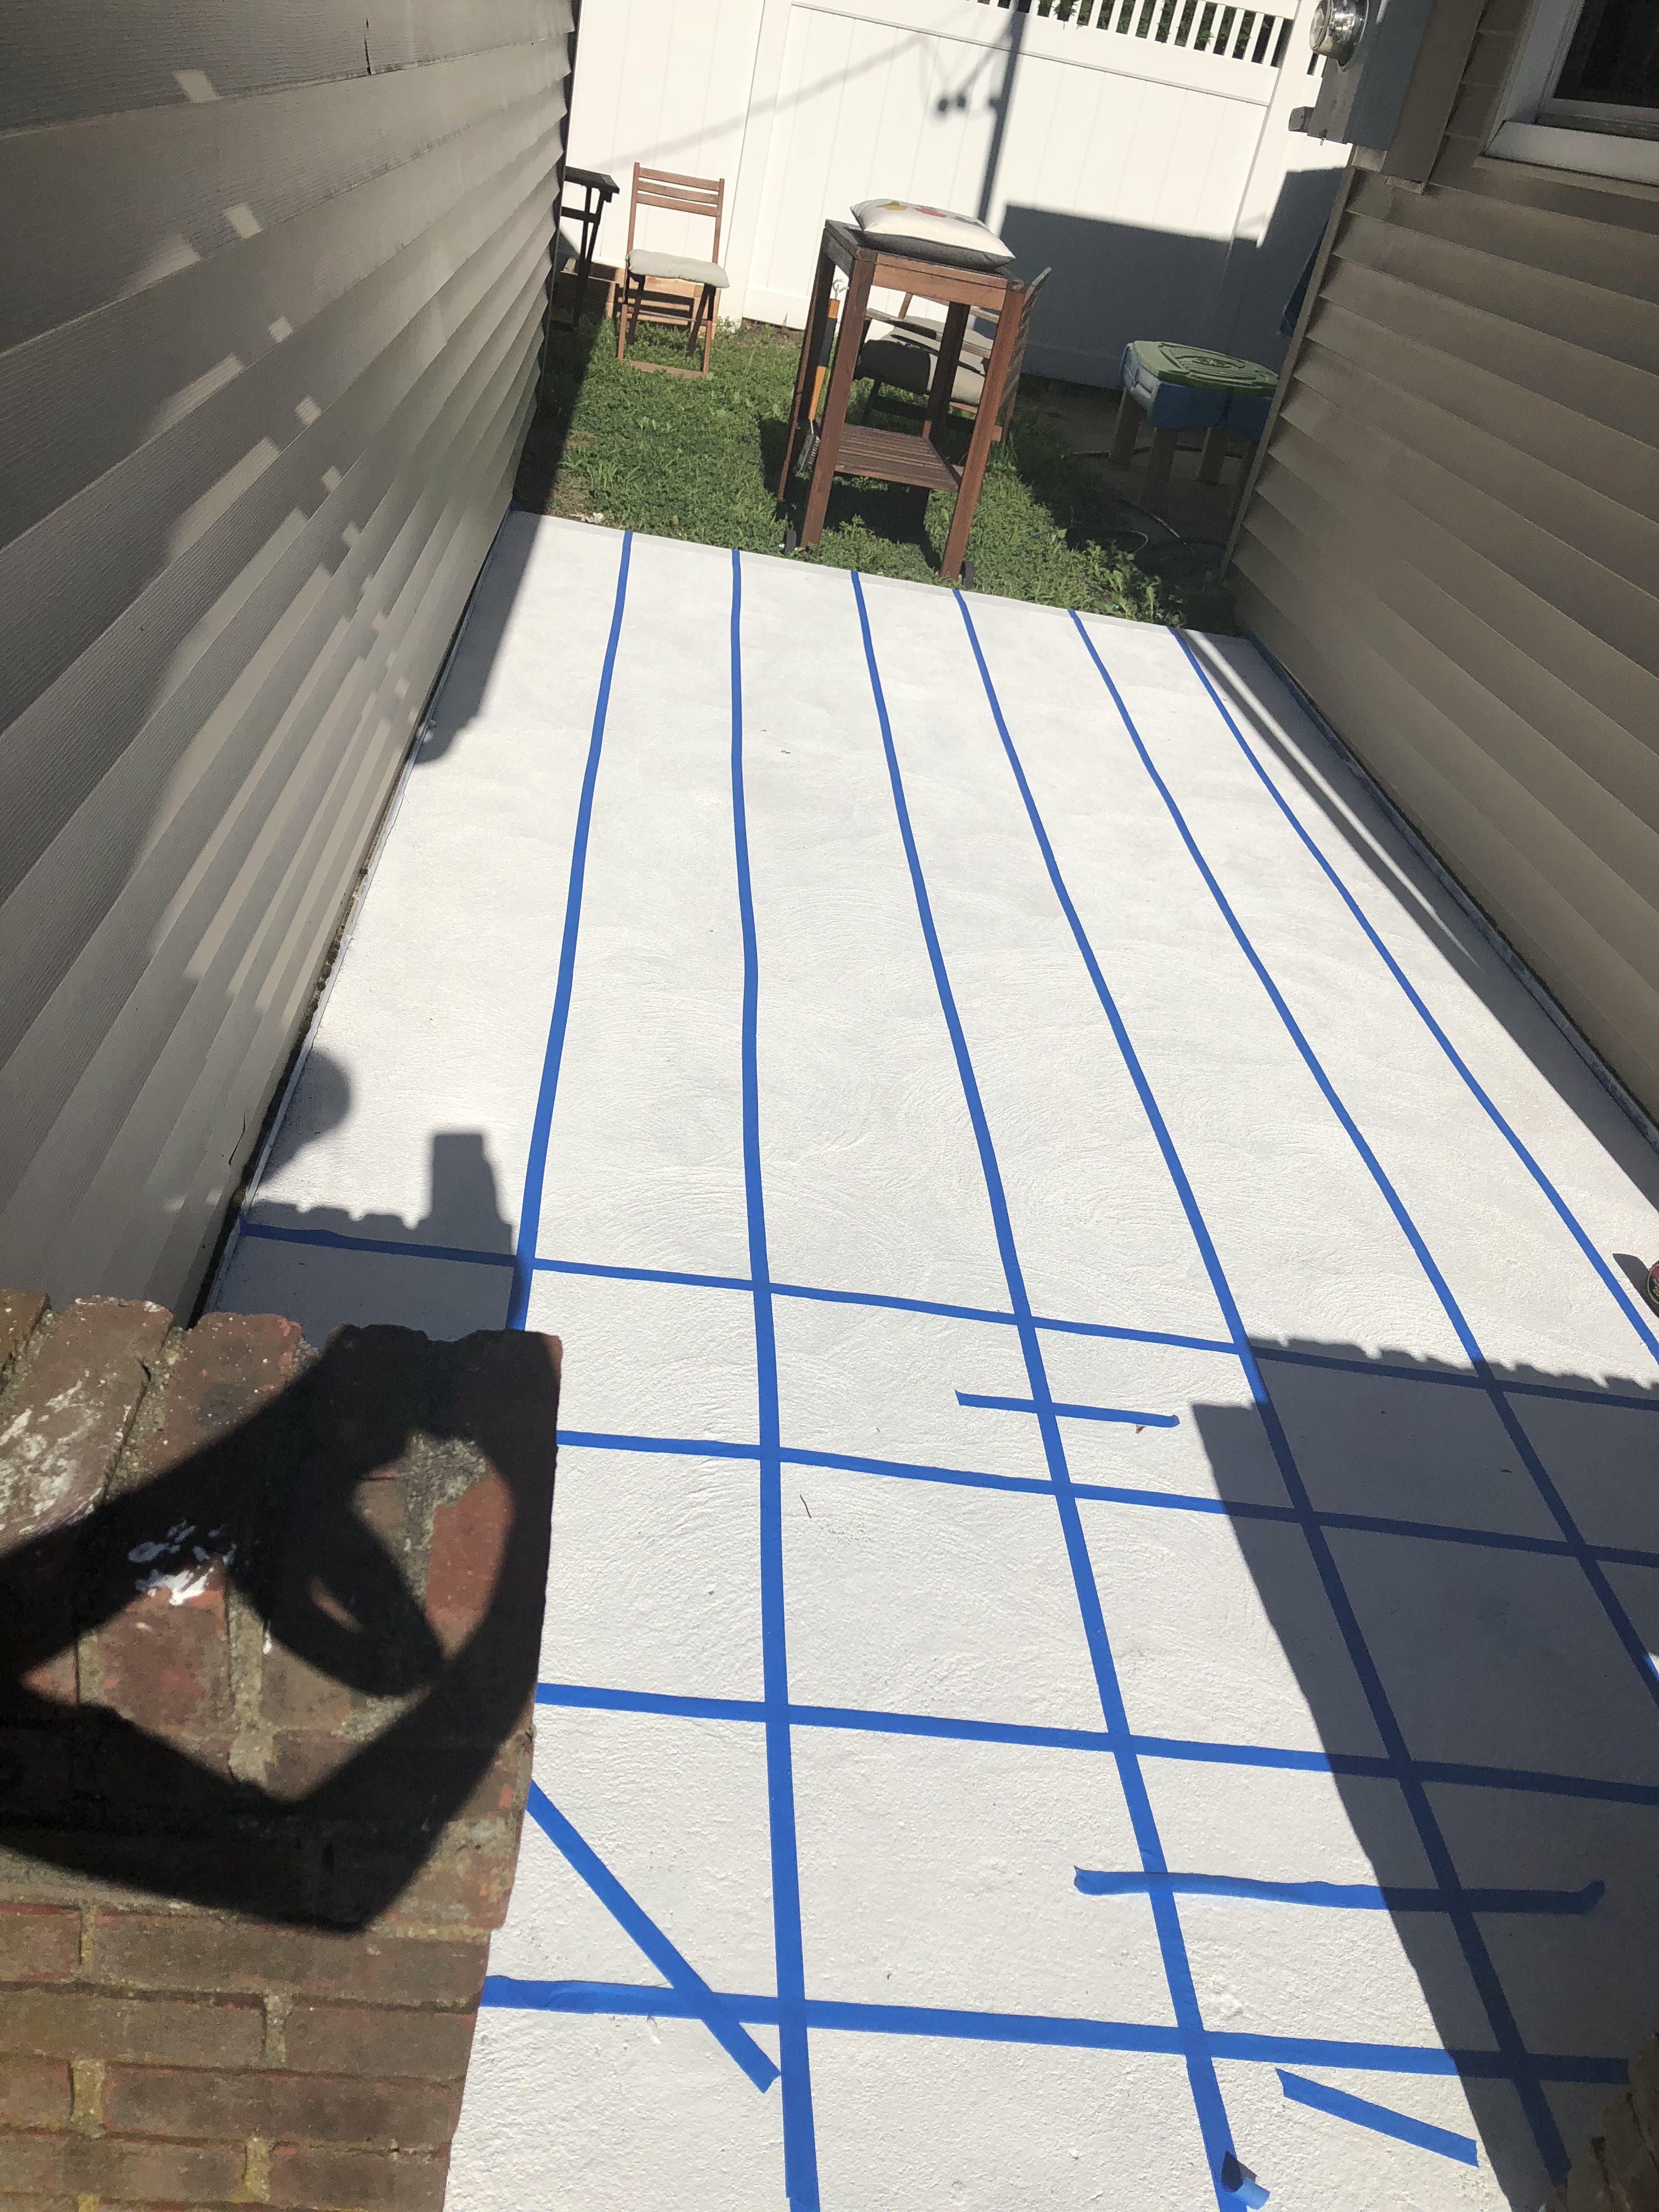
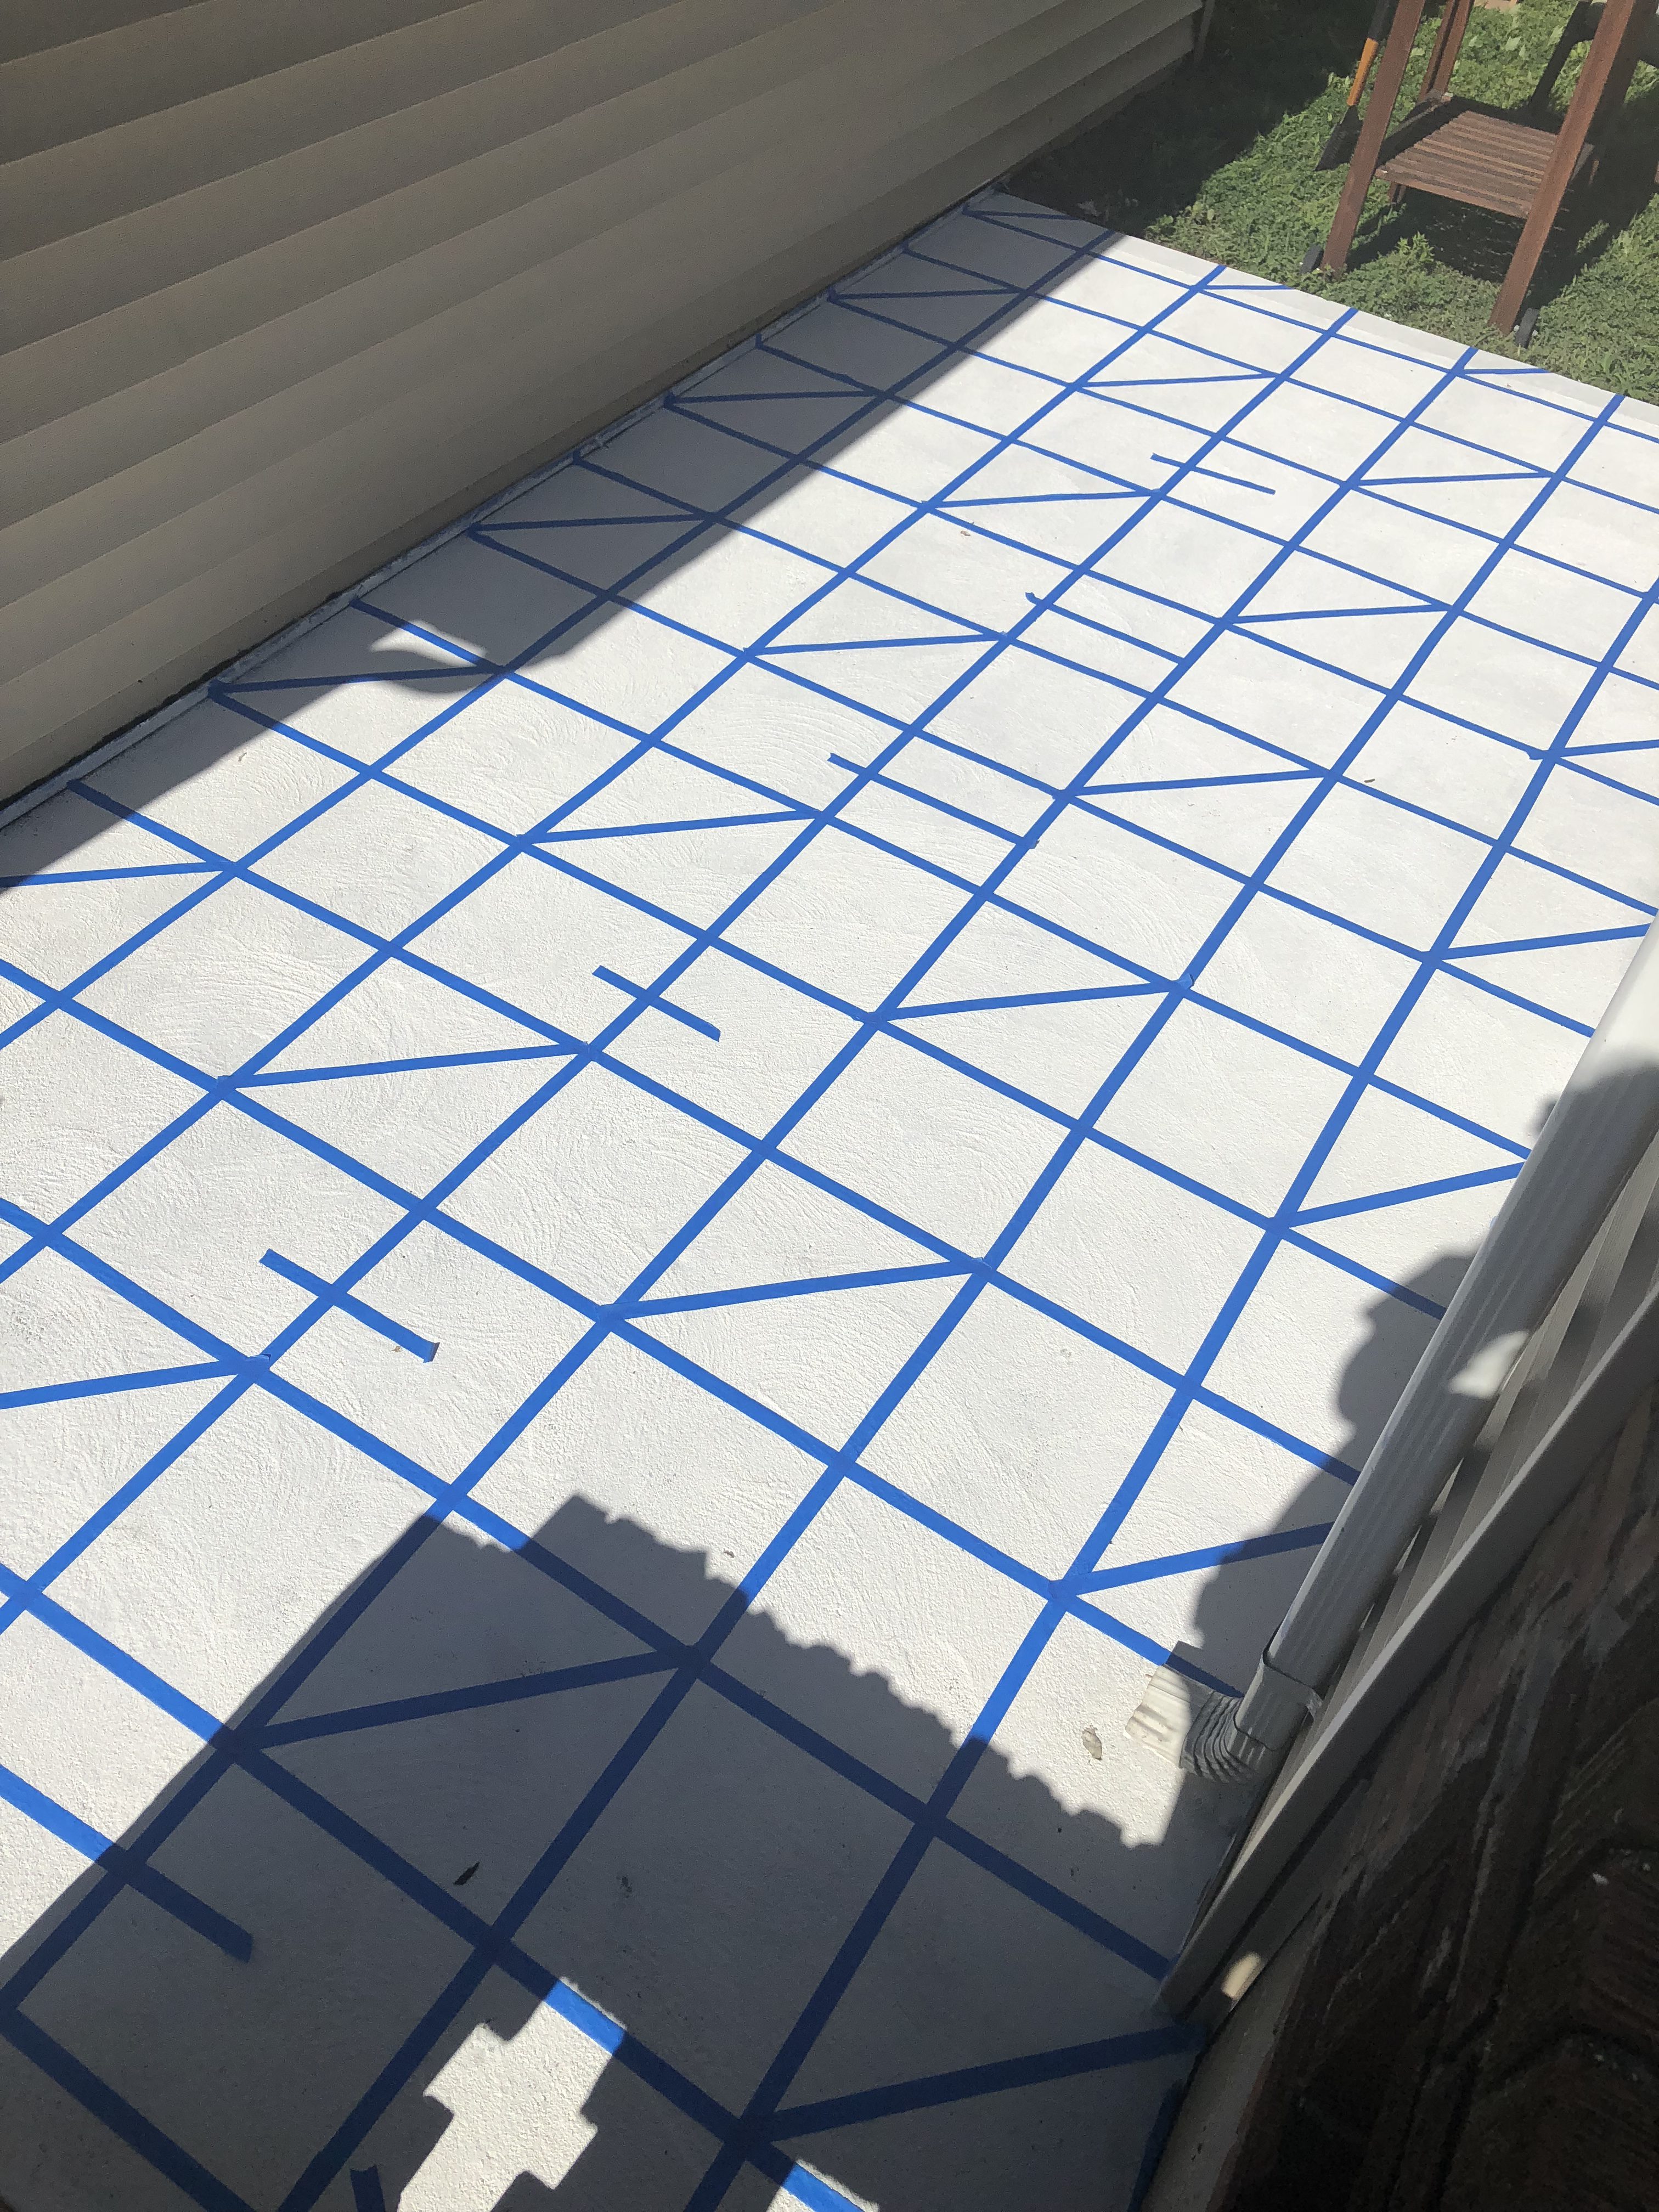
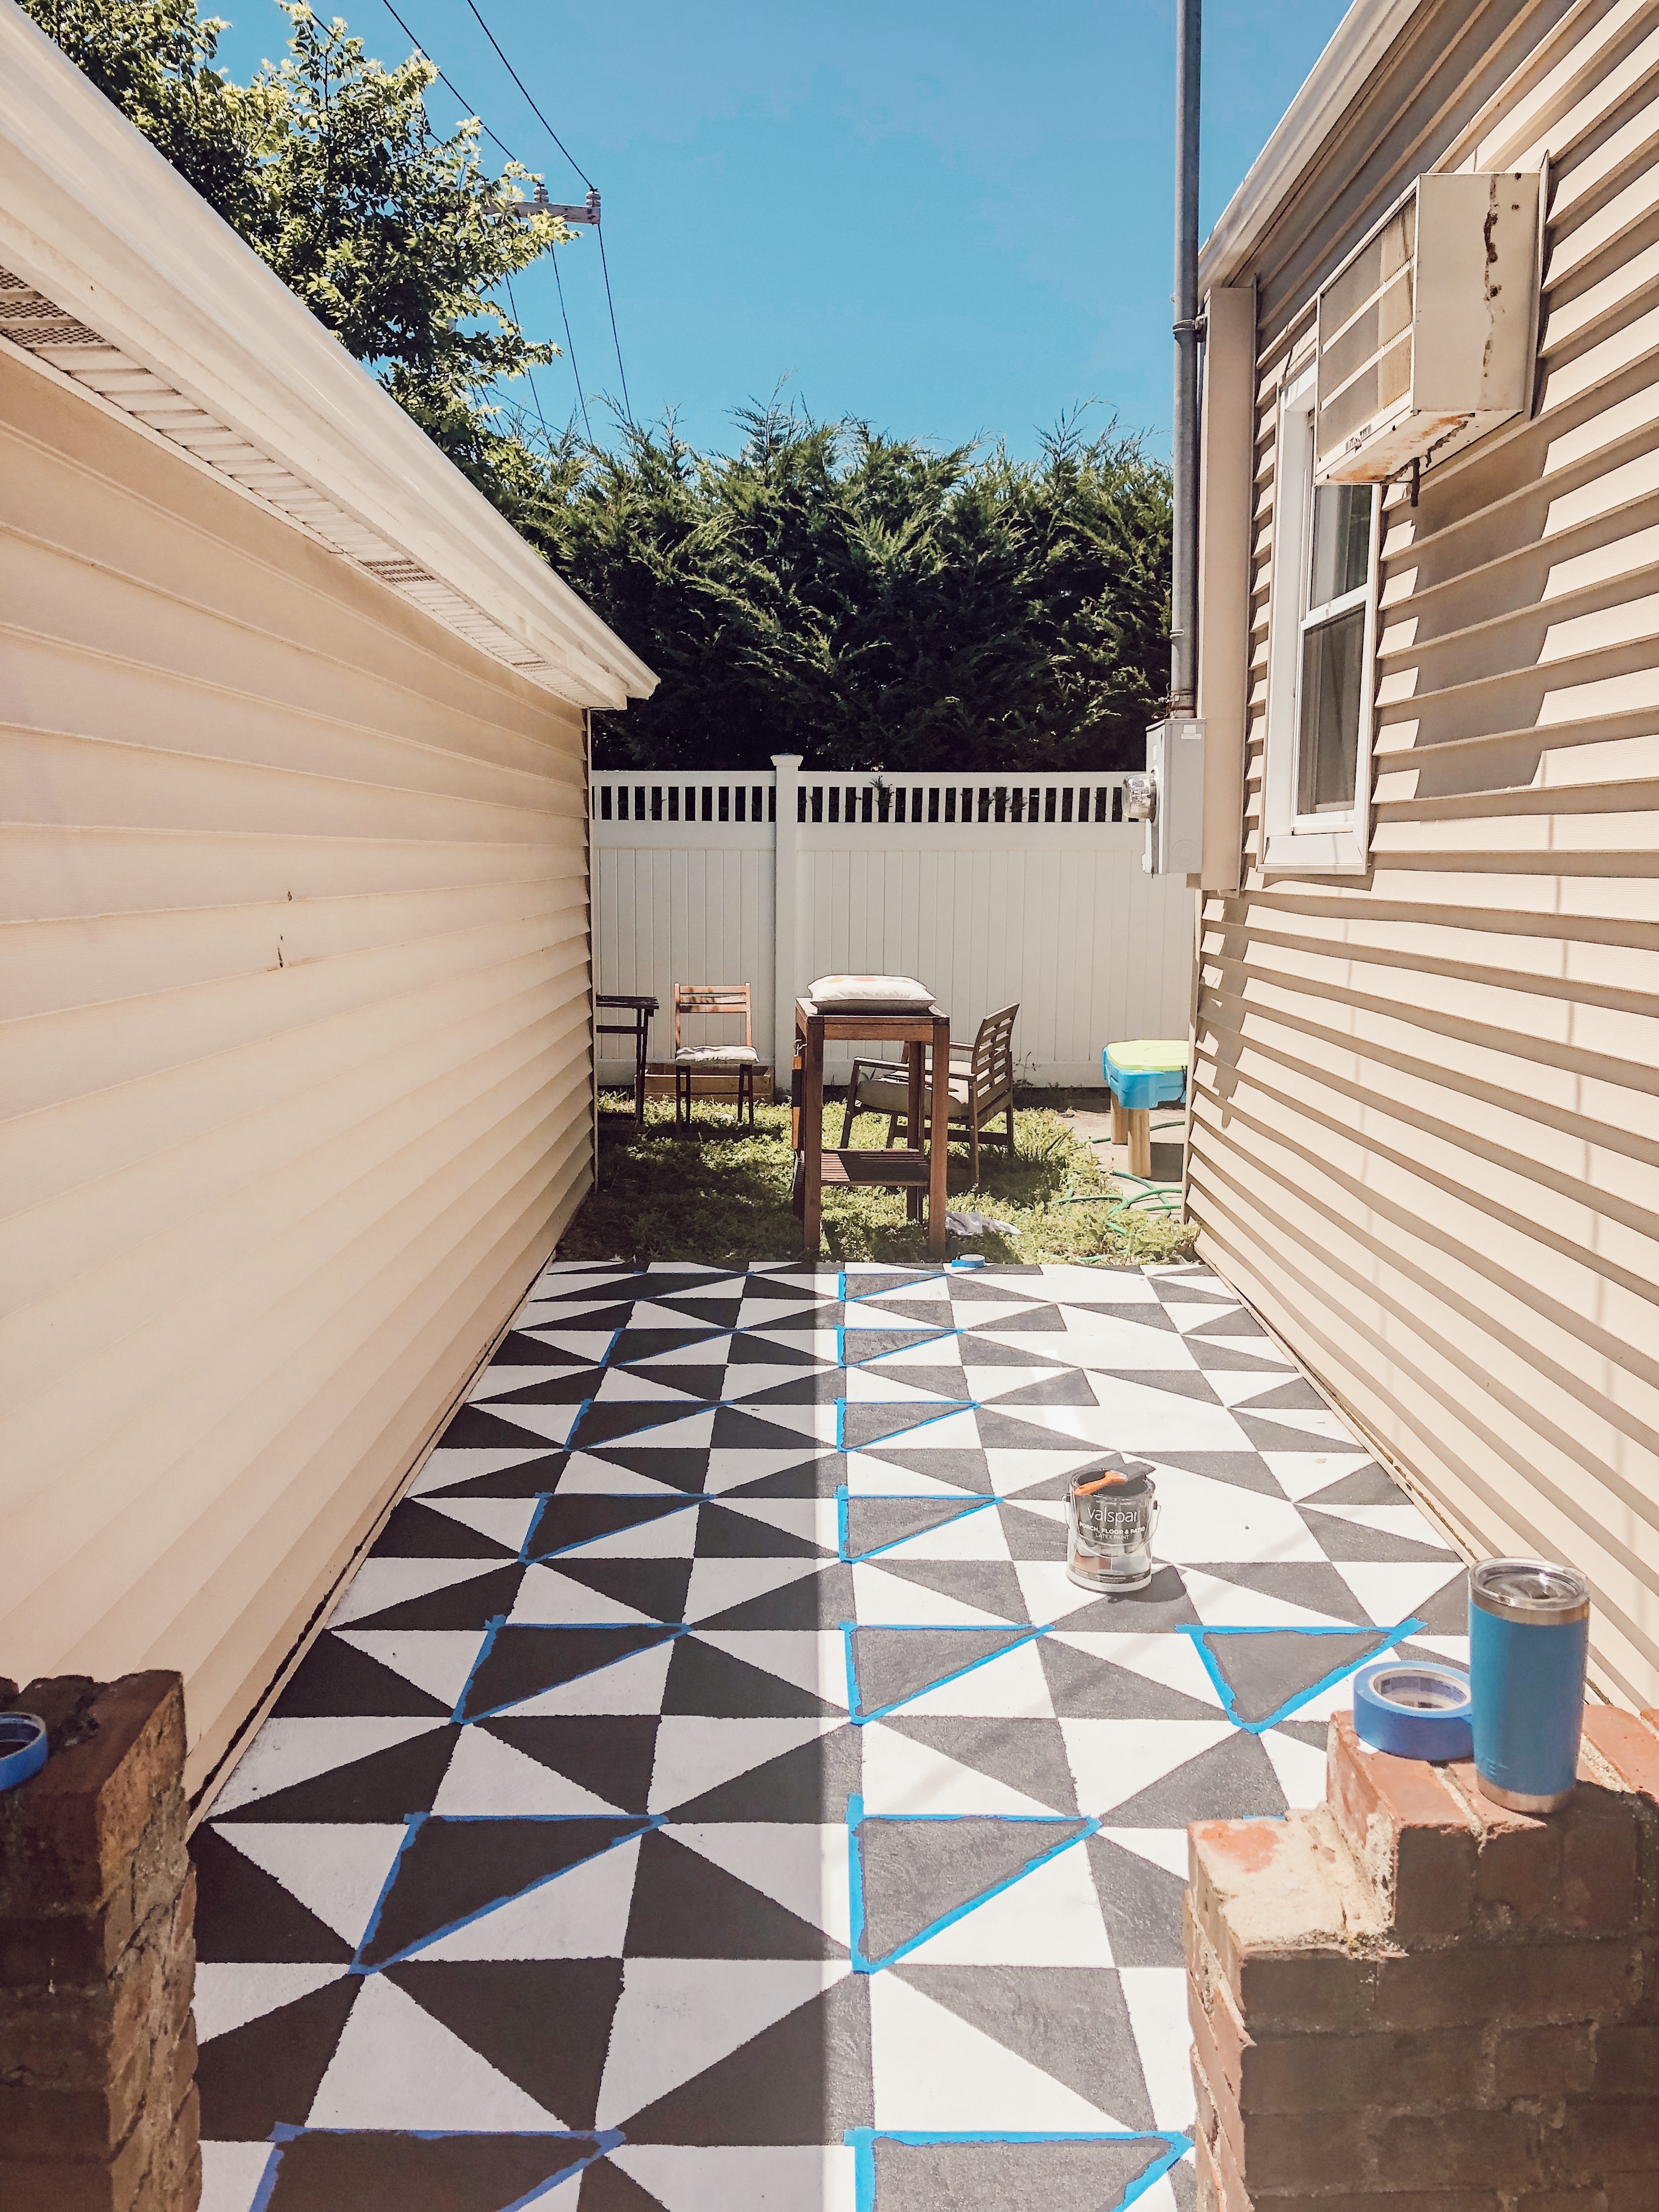
Step 4: On the following day, I started by measuring the entire perimeter of our space, and figuring out the math on how many squares I would be able to fit, and the dimensions of each. My squares are all 13 inches X 13 inches, and then theres a few on the side that are a bit less, but I let them run off of the side and it doesn’t bother me visually.
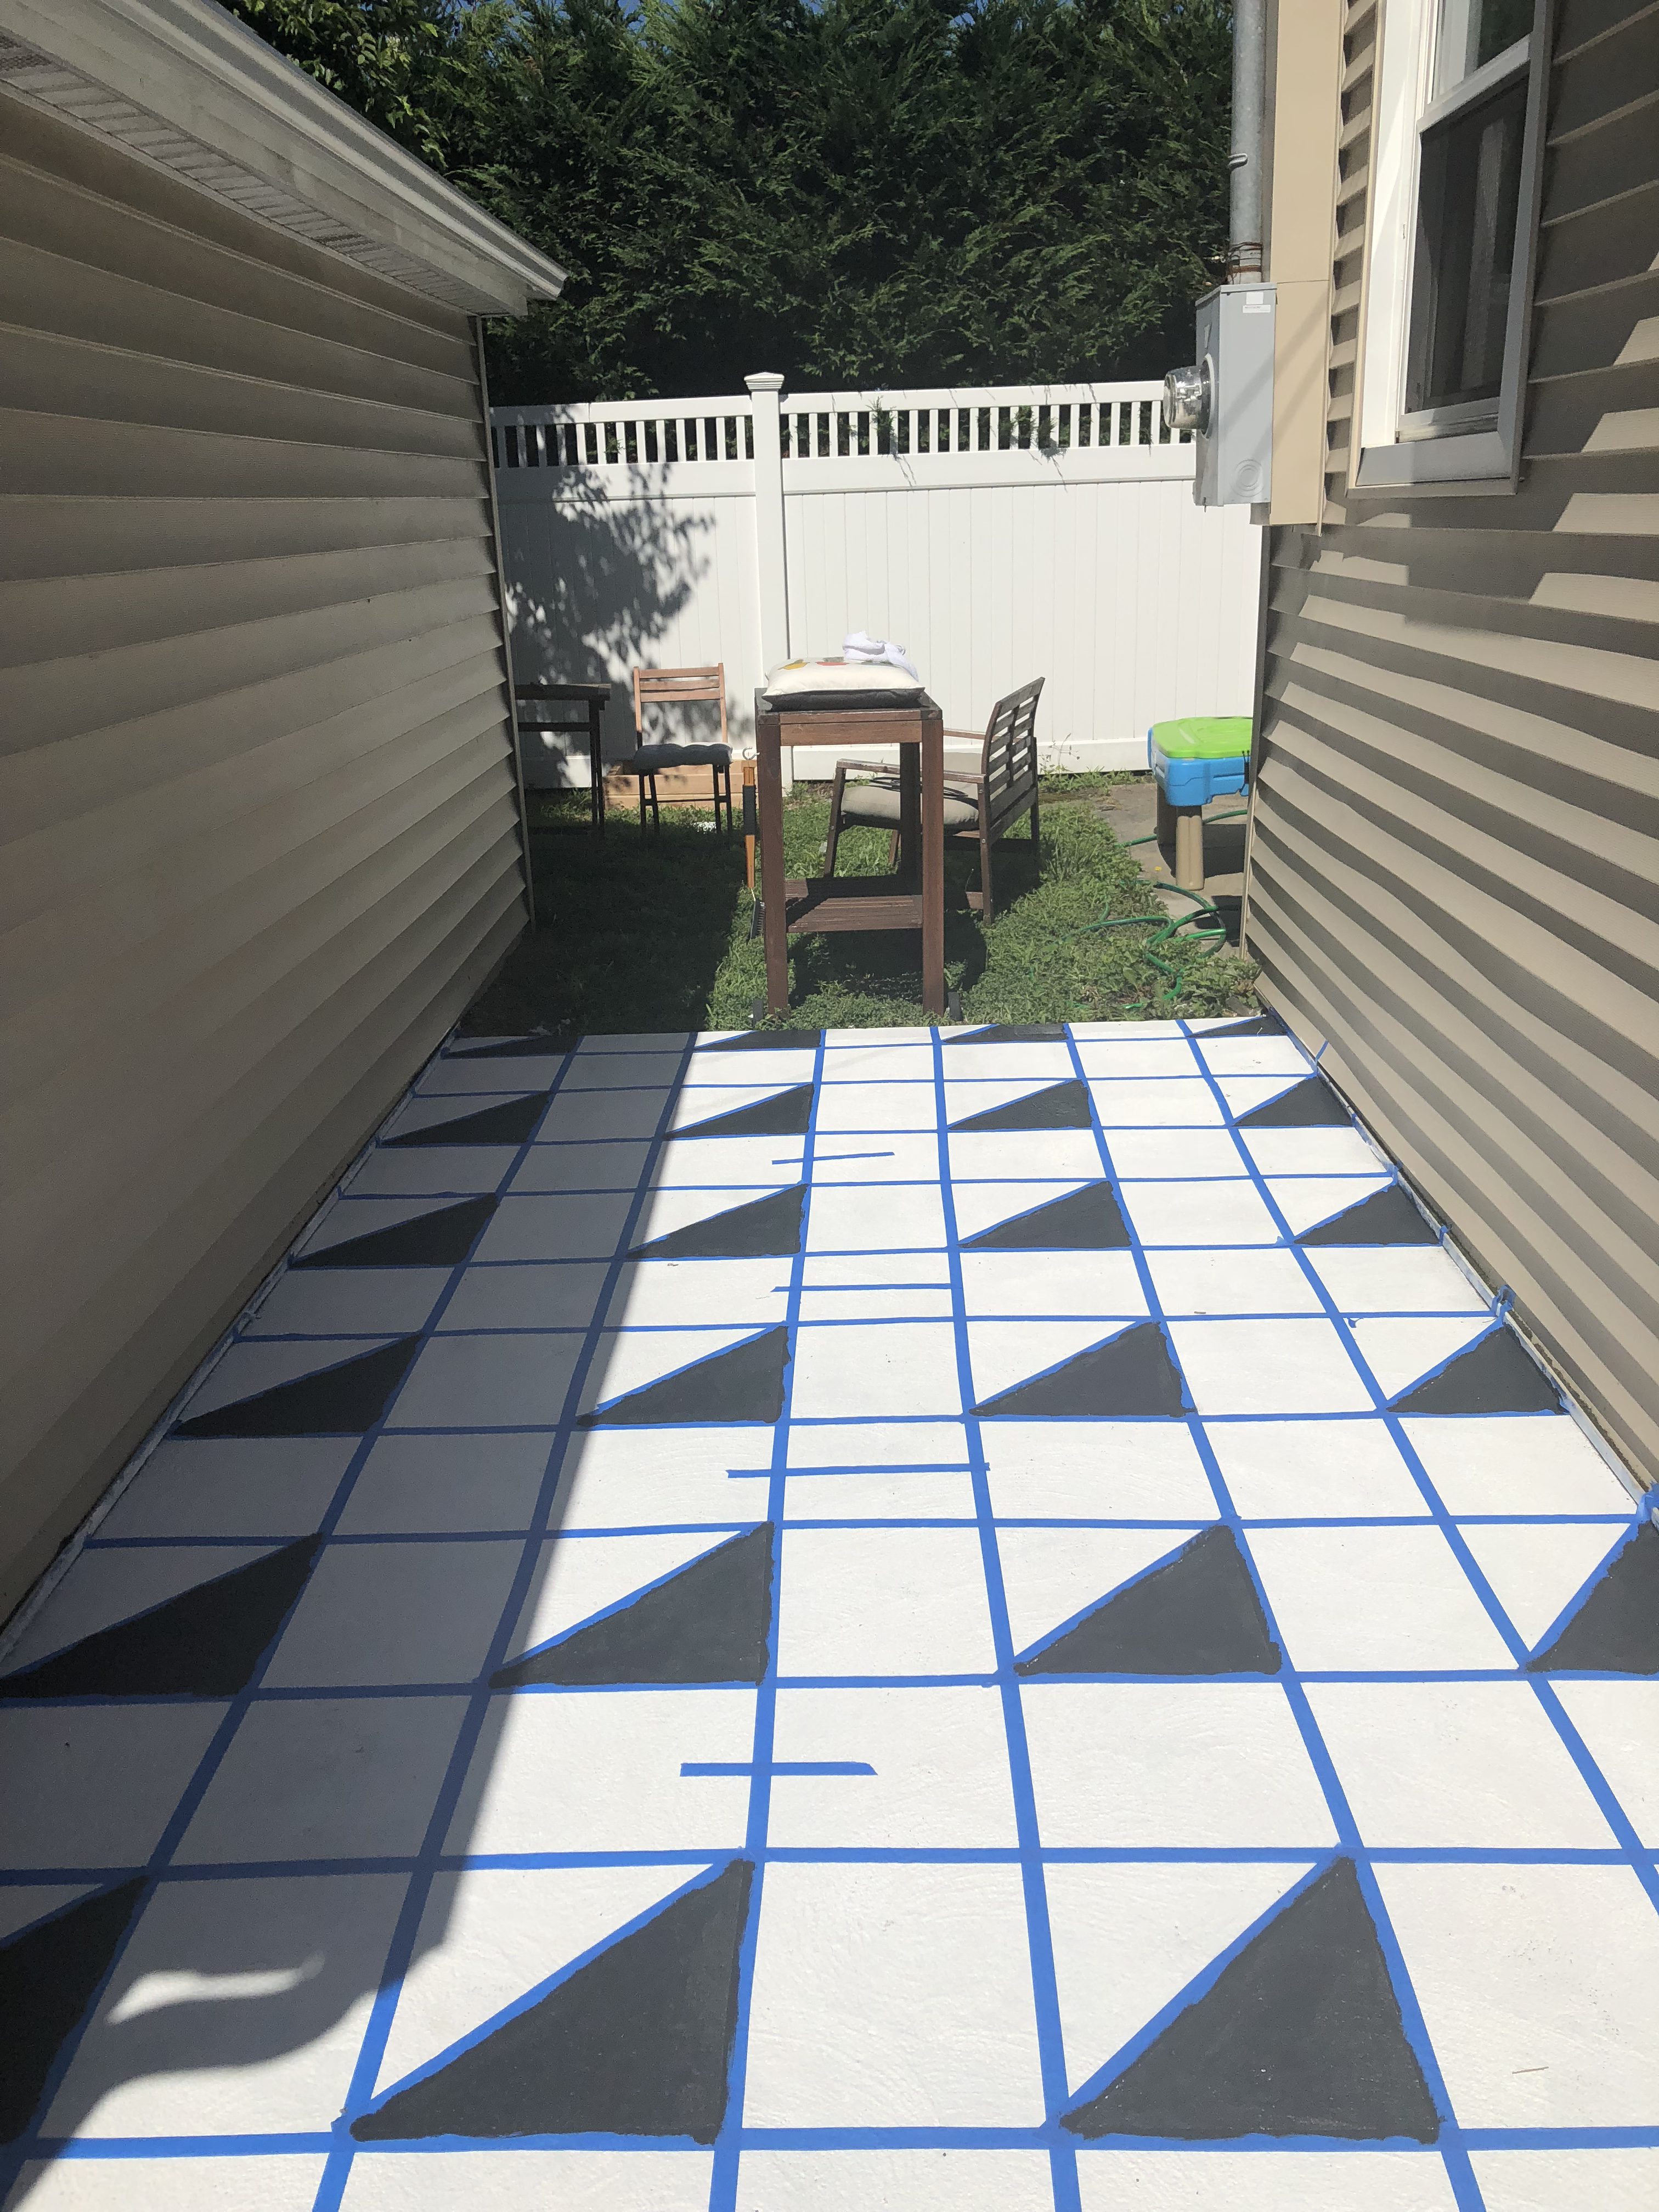
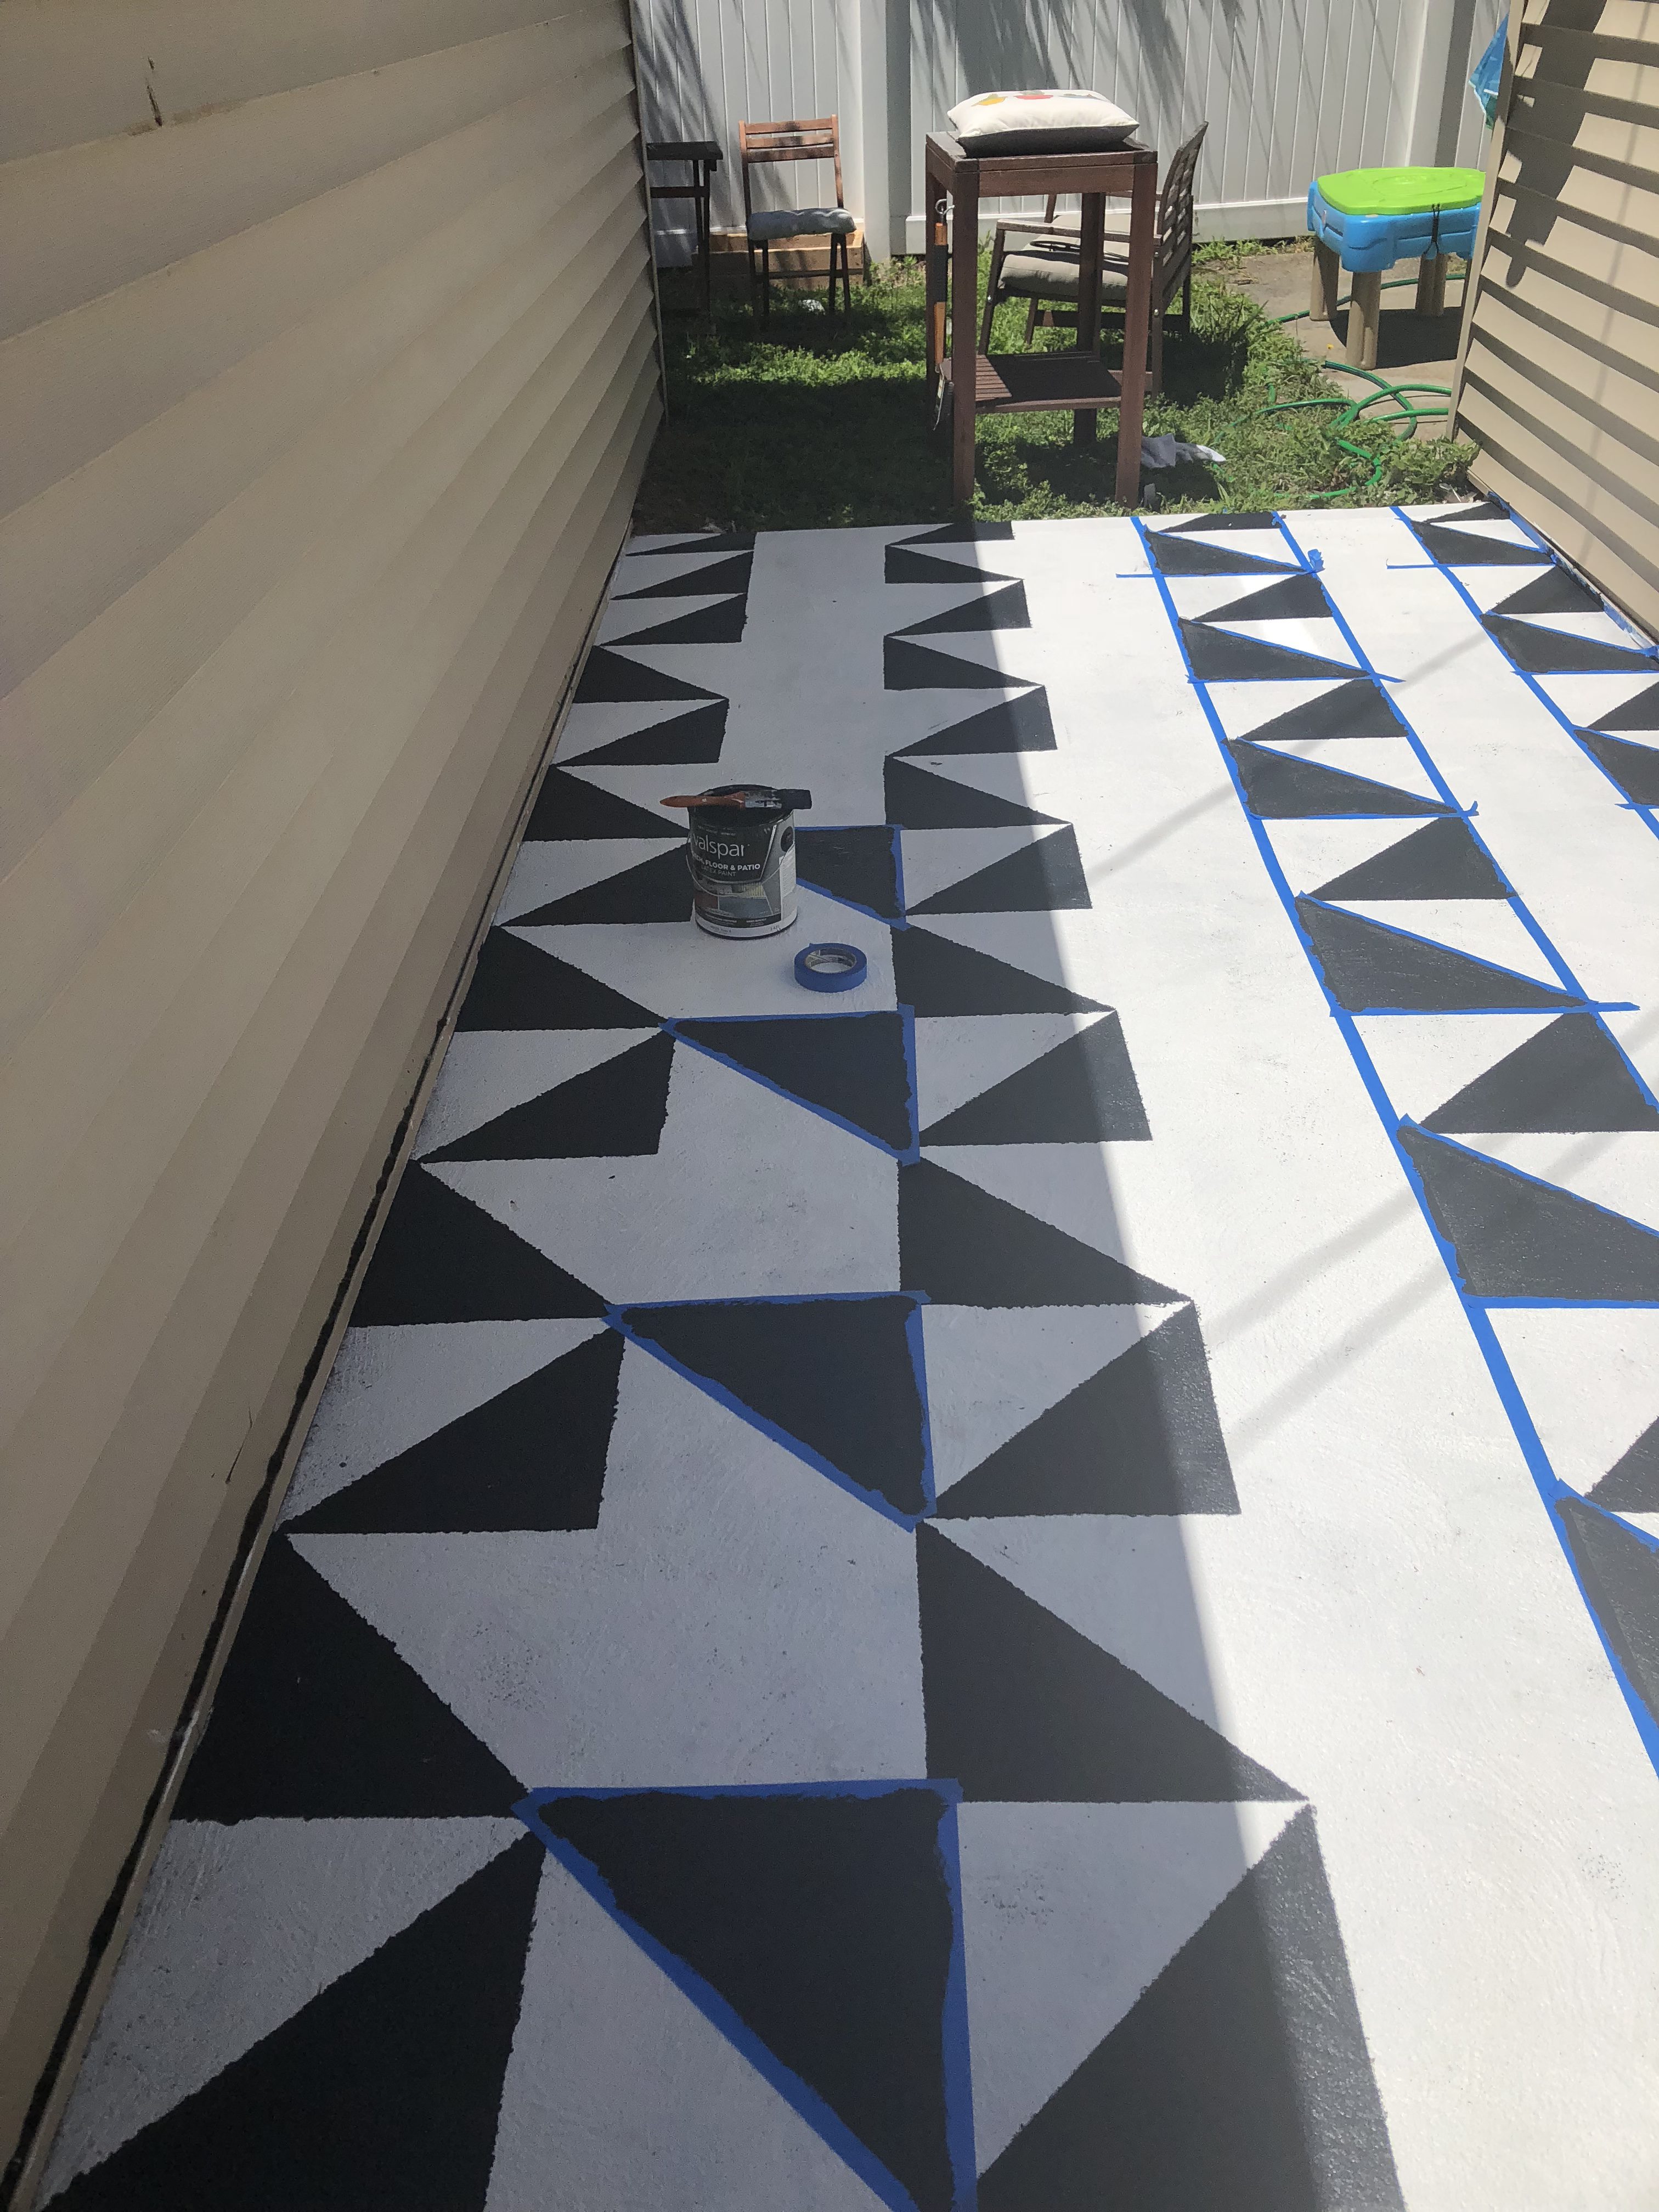
Step 5: Lay down the tape, but account for the distance of the actual tape itself, so you’ll have to paint every other row, and then fill in the taped region after. It’s a bit confusing, but I promise it becomes more clear as you’re working on it, and I tried to show as much in the photos as I could. I basically taped the entire floor, knowing that every other row was an incorrect size, but I put a line through it to remind myself not to paint in that area. I painted every other half square, and then peeled off all of the tape and begin to slowly fill in all of the gaps using a measuring tape, and based on the loose guidelines that the already painted triangles created for me.
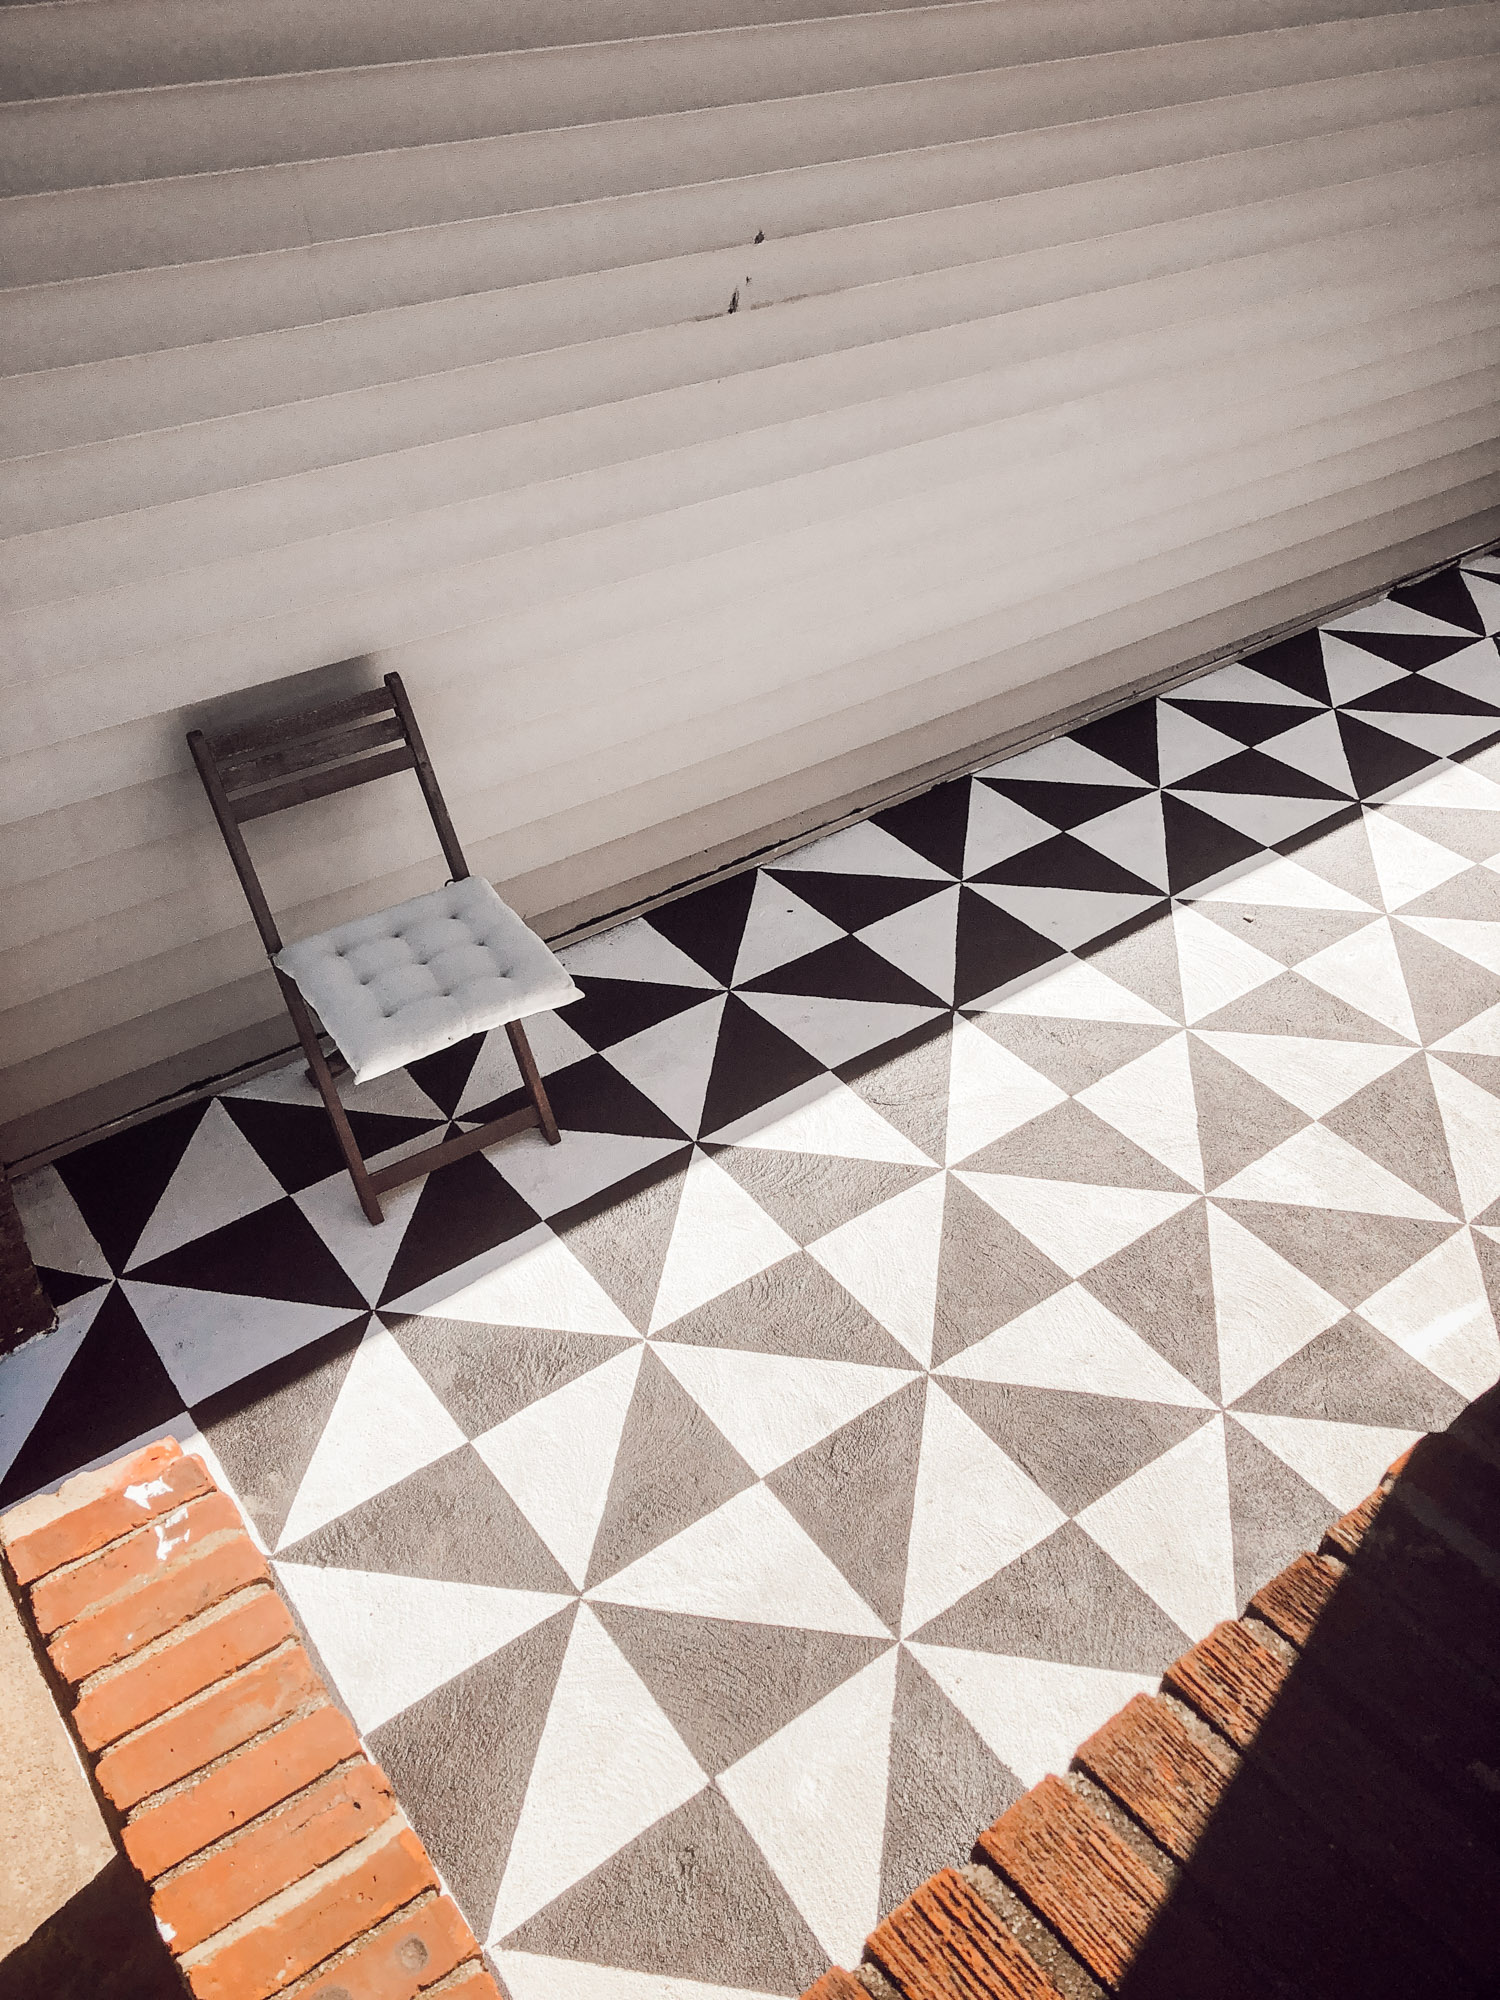
Step 6: Once all of the black areas have been painted, and the tape has been pulled off, you’ll notice that because of the cement surface, a lot of paint has bled underneath the tape. DO NOT PANIC! This happened to me too, and it looks ugly, but it is a very easy fix. When everything is dry, you’re going to go back in with your edger and straighten all of the lines. It’s a bit time consuming, but makes it look 995793 times better!
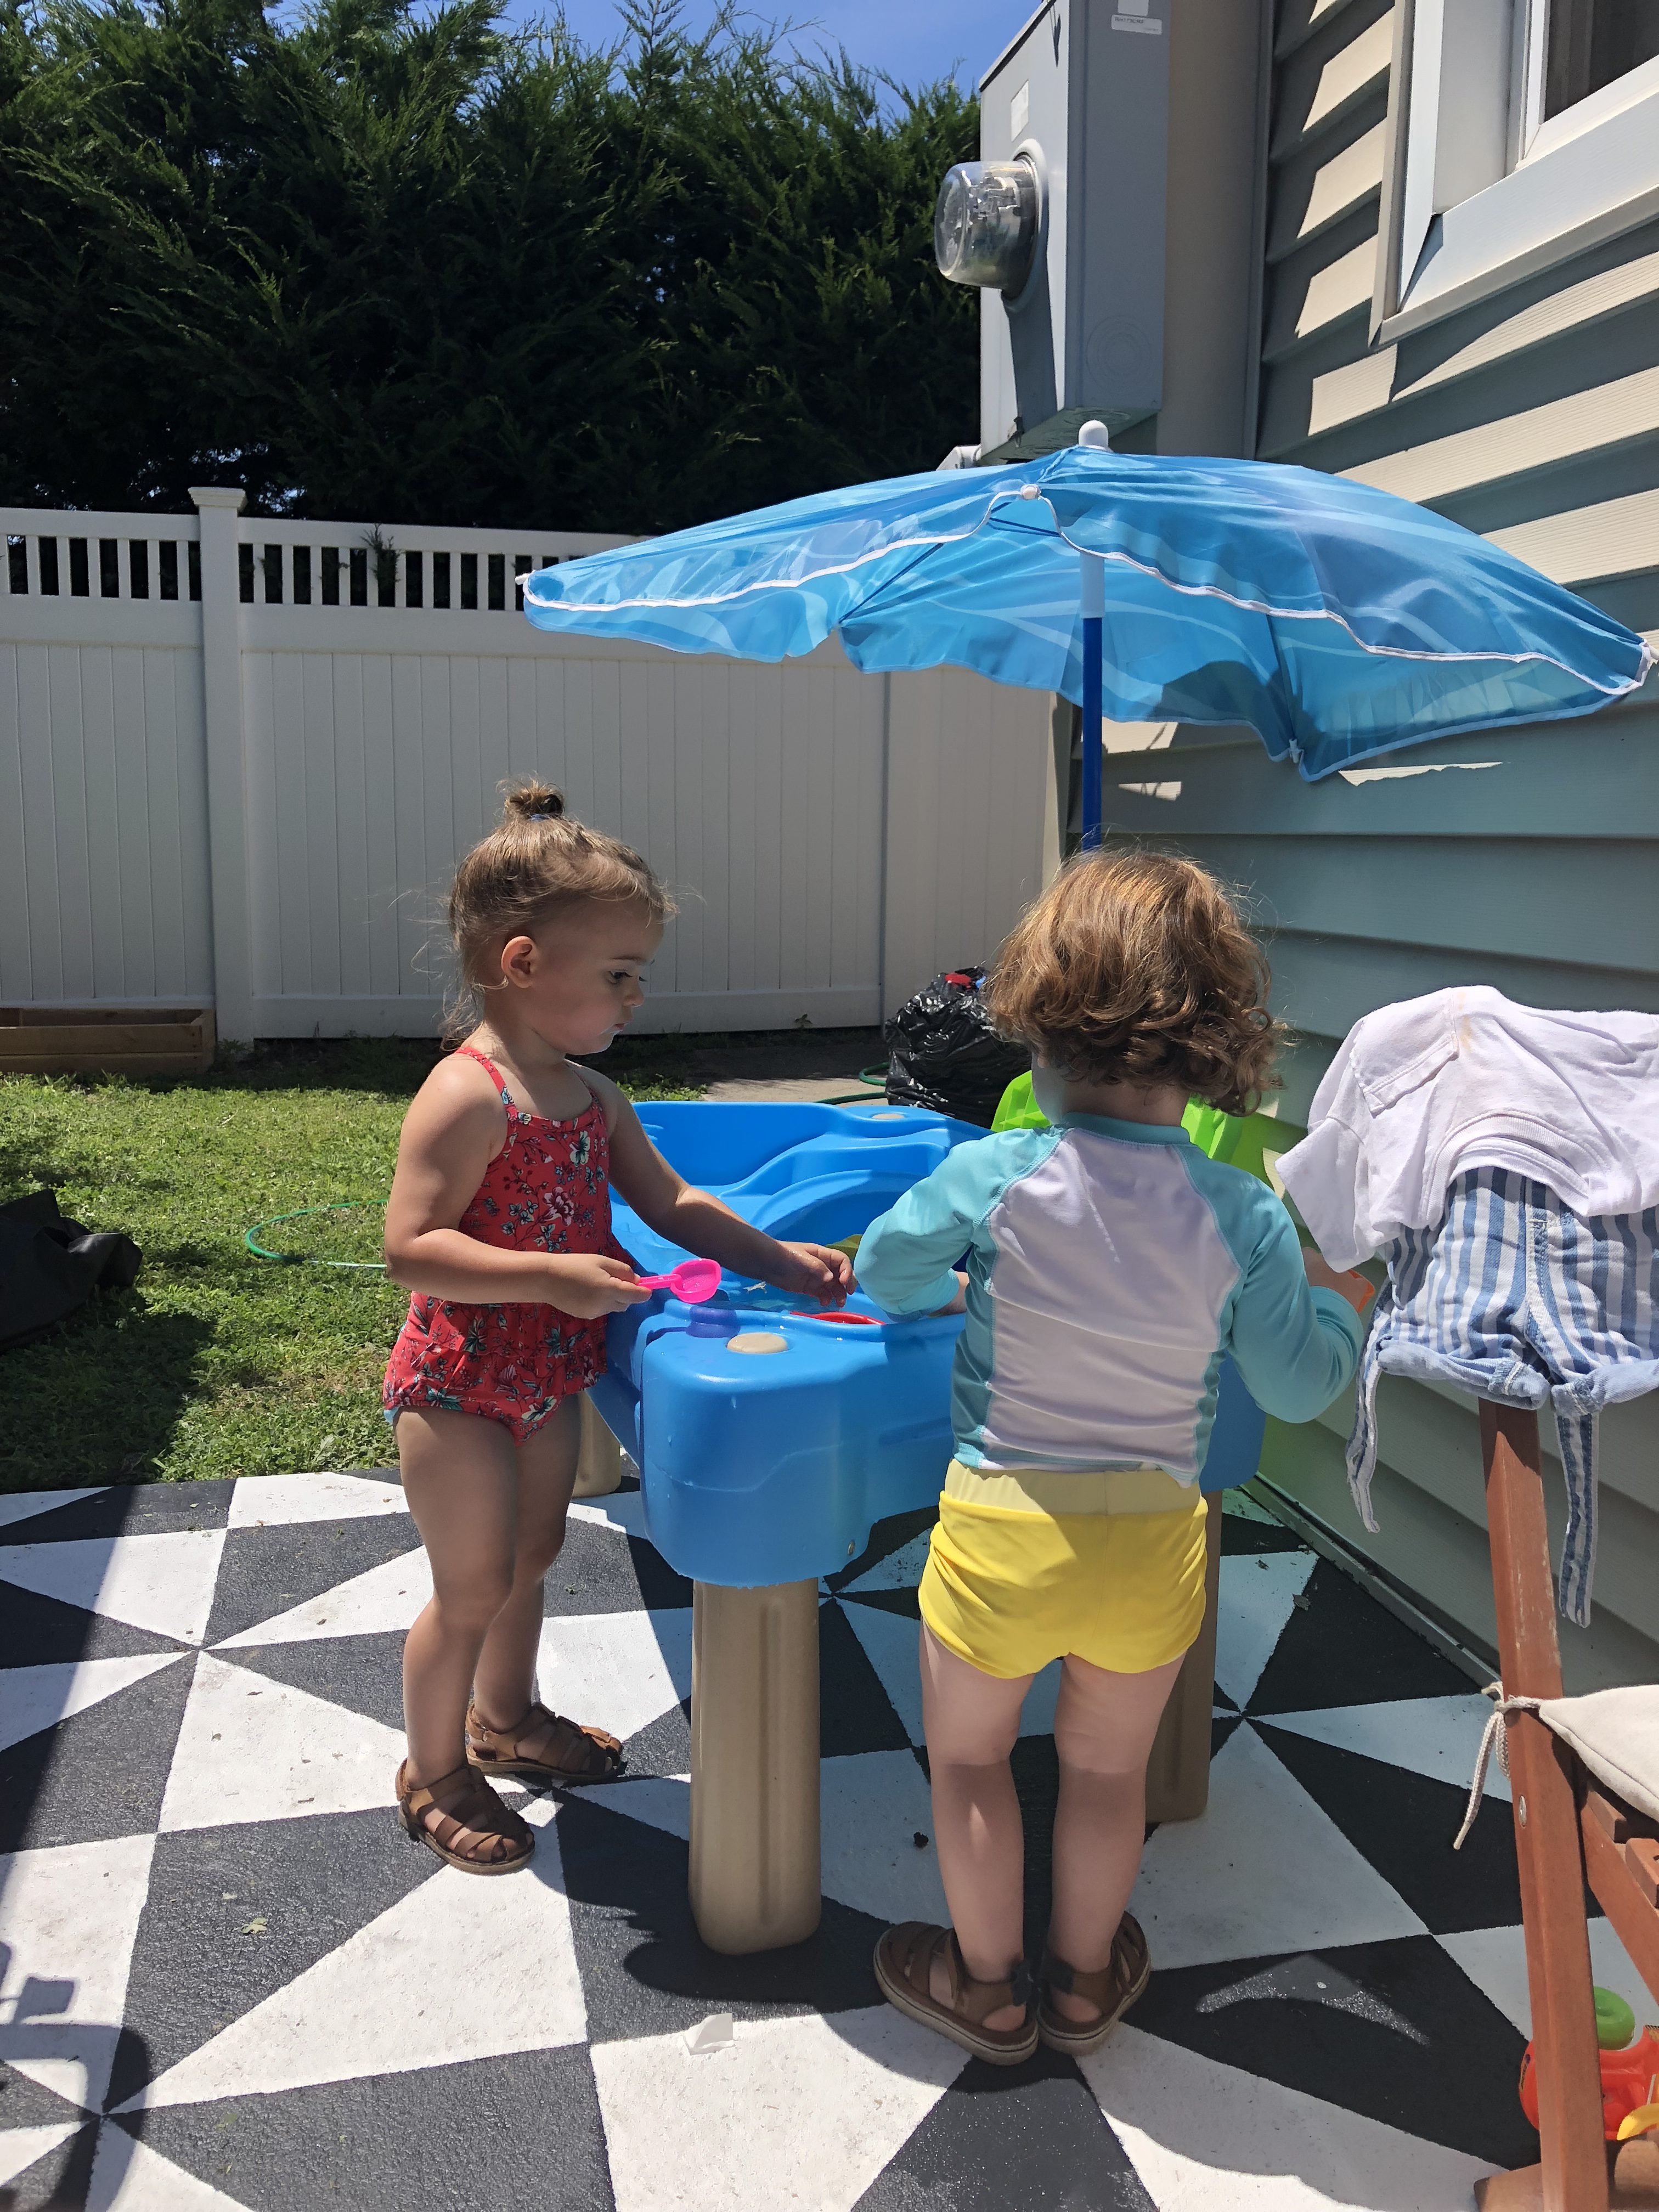
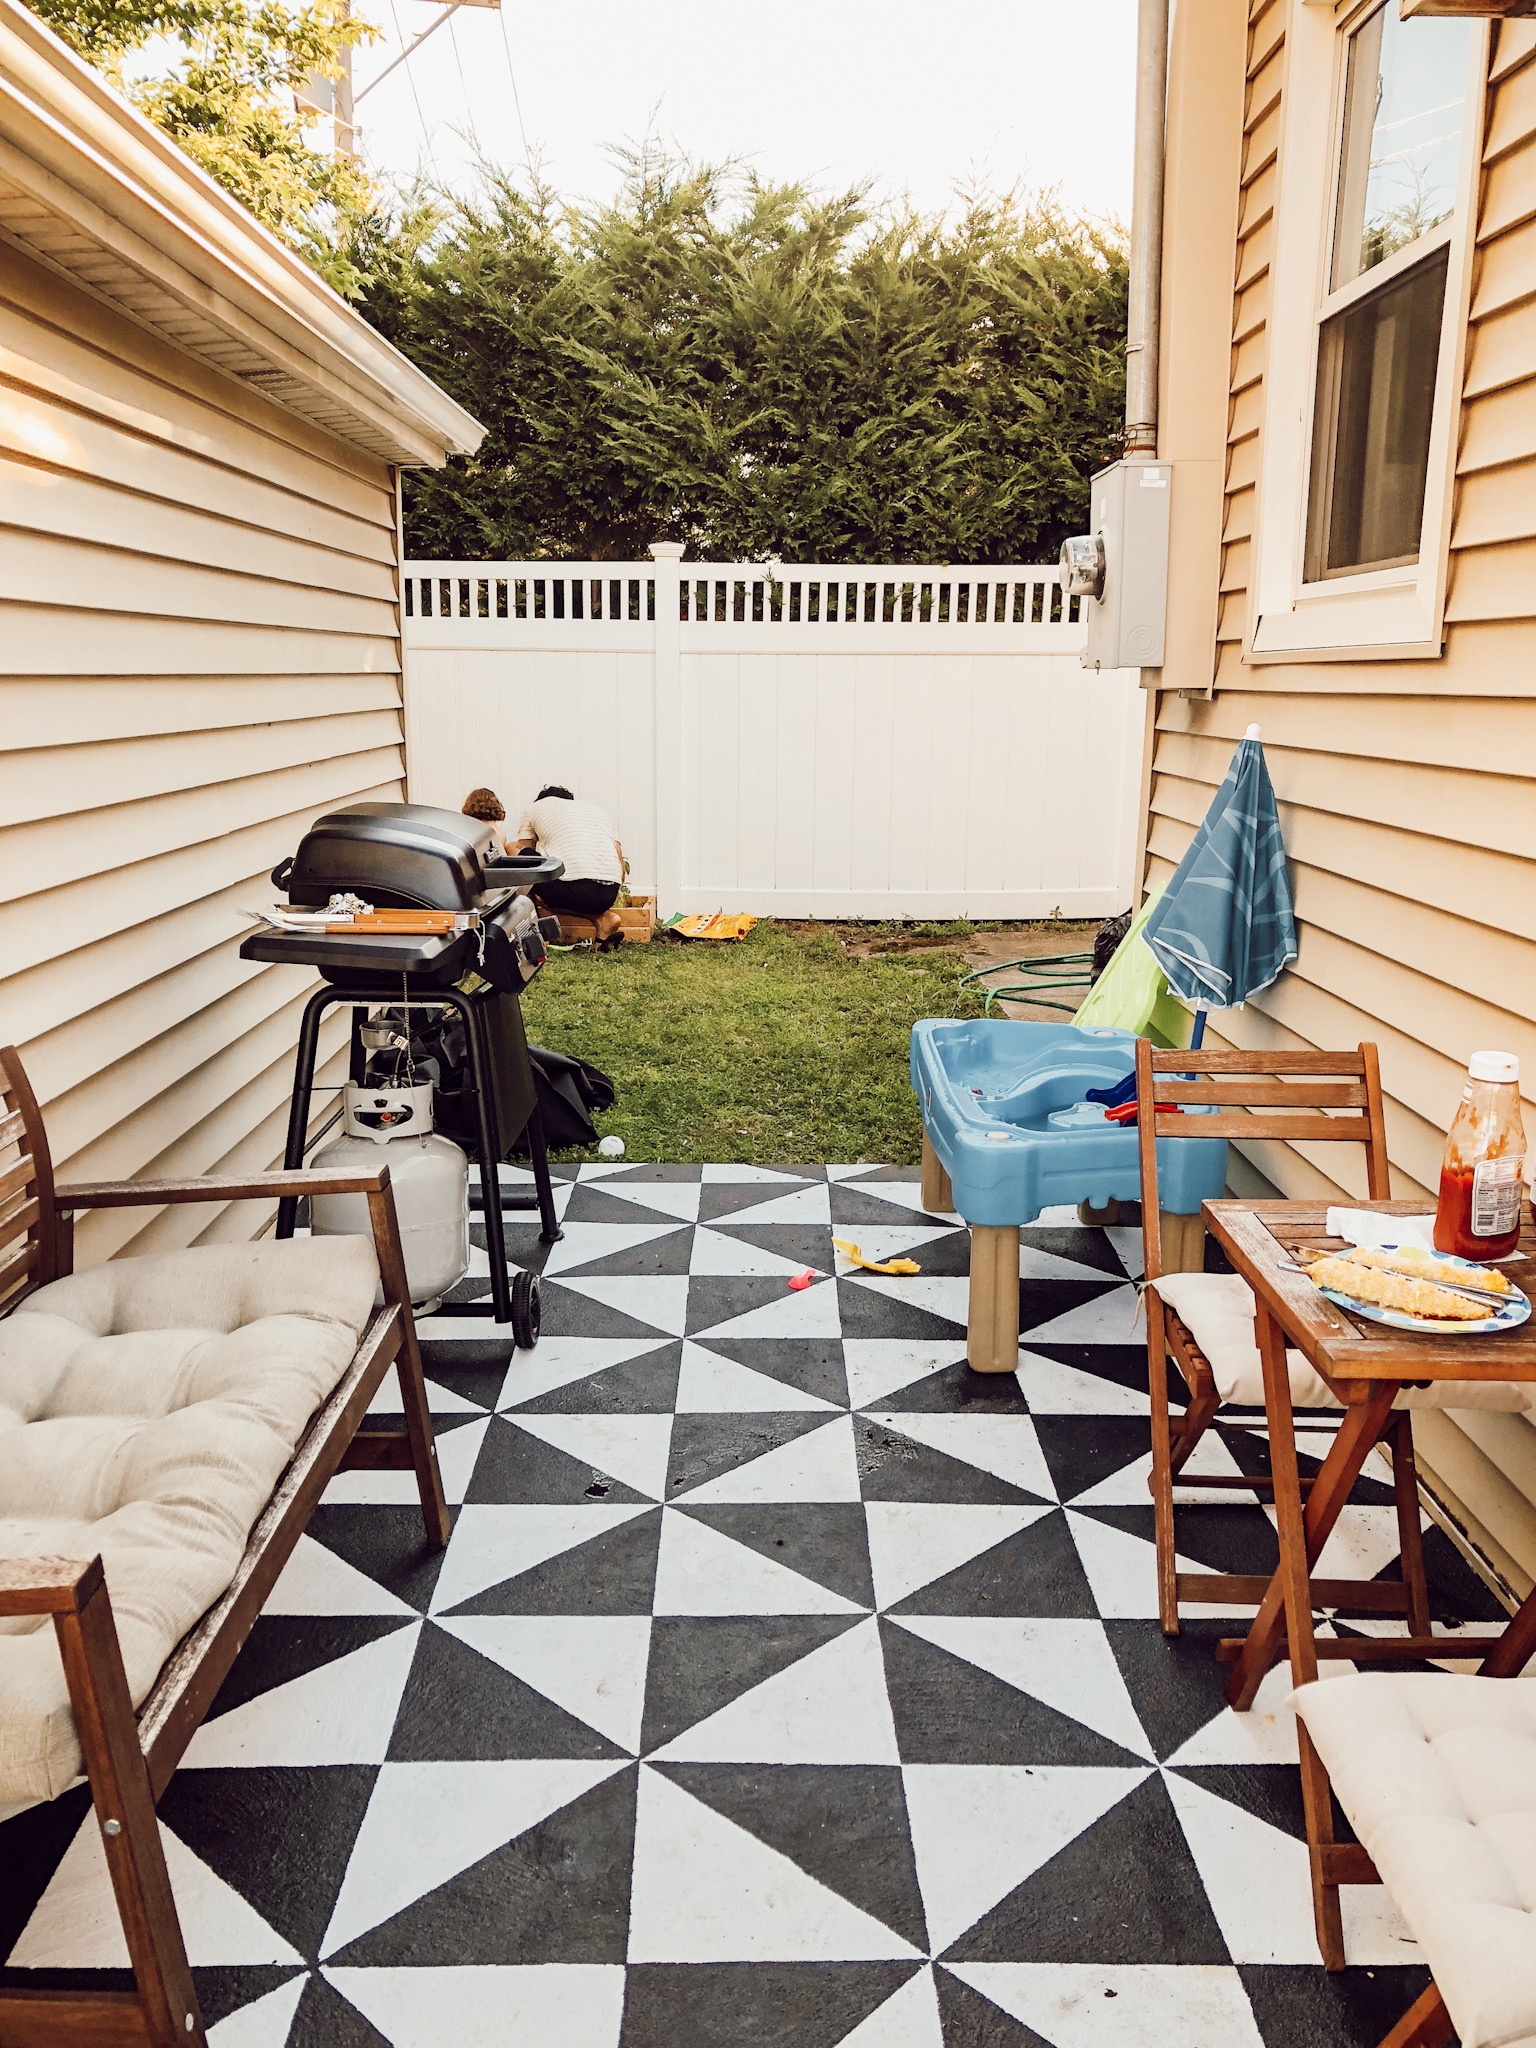
The entire project took me a total of around 8 hours to complete, and like I said we worked on it over two days. It was SO worth it, and since painting it we’ve been using the space so much more! Stay tuned for a full reveal coming soon…