
The part of instagram that you don’t usually see is everything that goes in to every. single. post. Even things that are shot in my very own home have tons of effort put into them, so I thought it would be fun to show you the step by step I take to get my kitchen ready for a shoot! This is usually what happens before you see the finished image on my feed!
We’re pretty organized, so overall our home is never super messy, but it has usual mess and clutter that may deter from a photo, such as Hudson’s highchair (not so glamorous), cereal boxes and leftover coffee, dirty dishes in the drying rack, etc. etc. In order to prep for a shoot, we usually take 15-20 minutes to do a deep clean and organize, and these are the little details we alter:
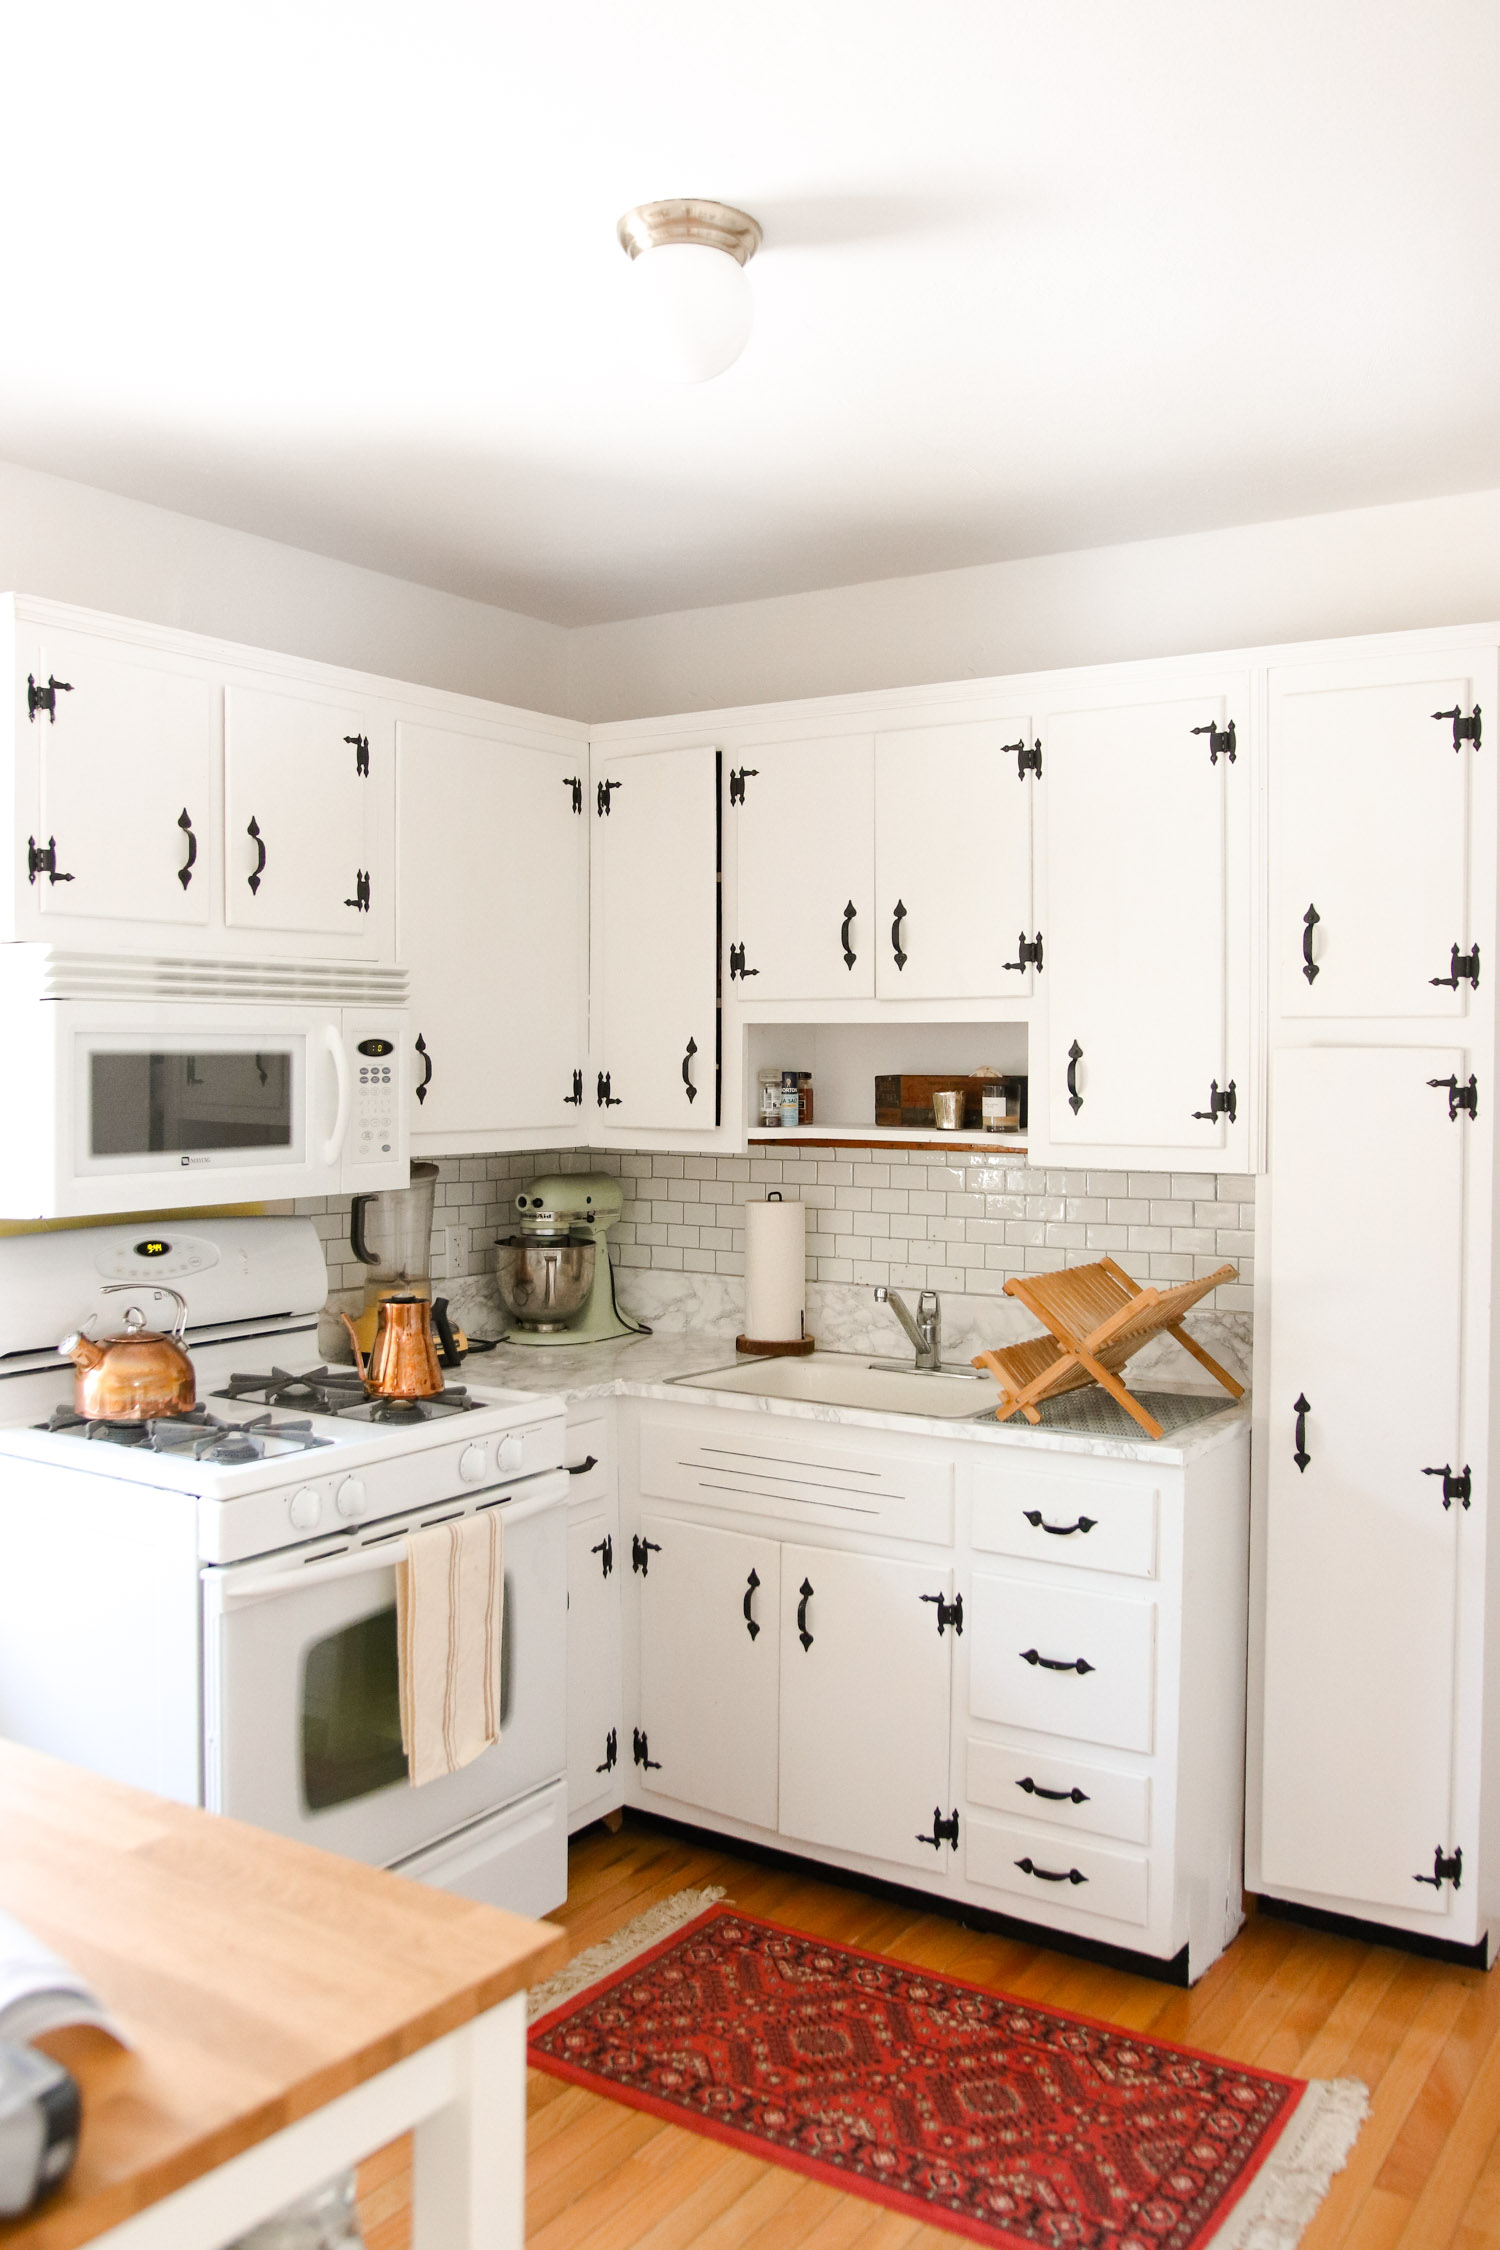
MY KITCHEN BEFORE:

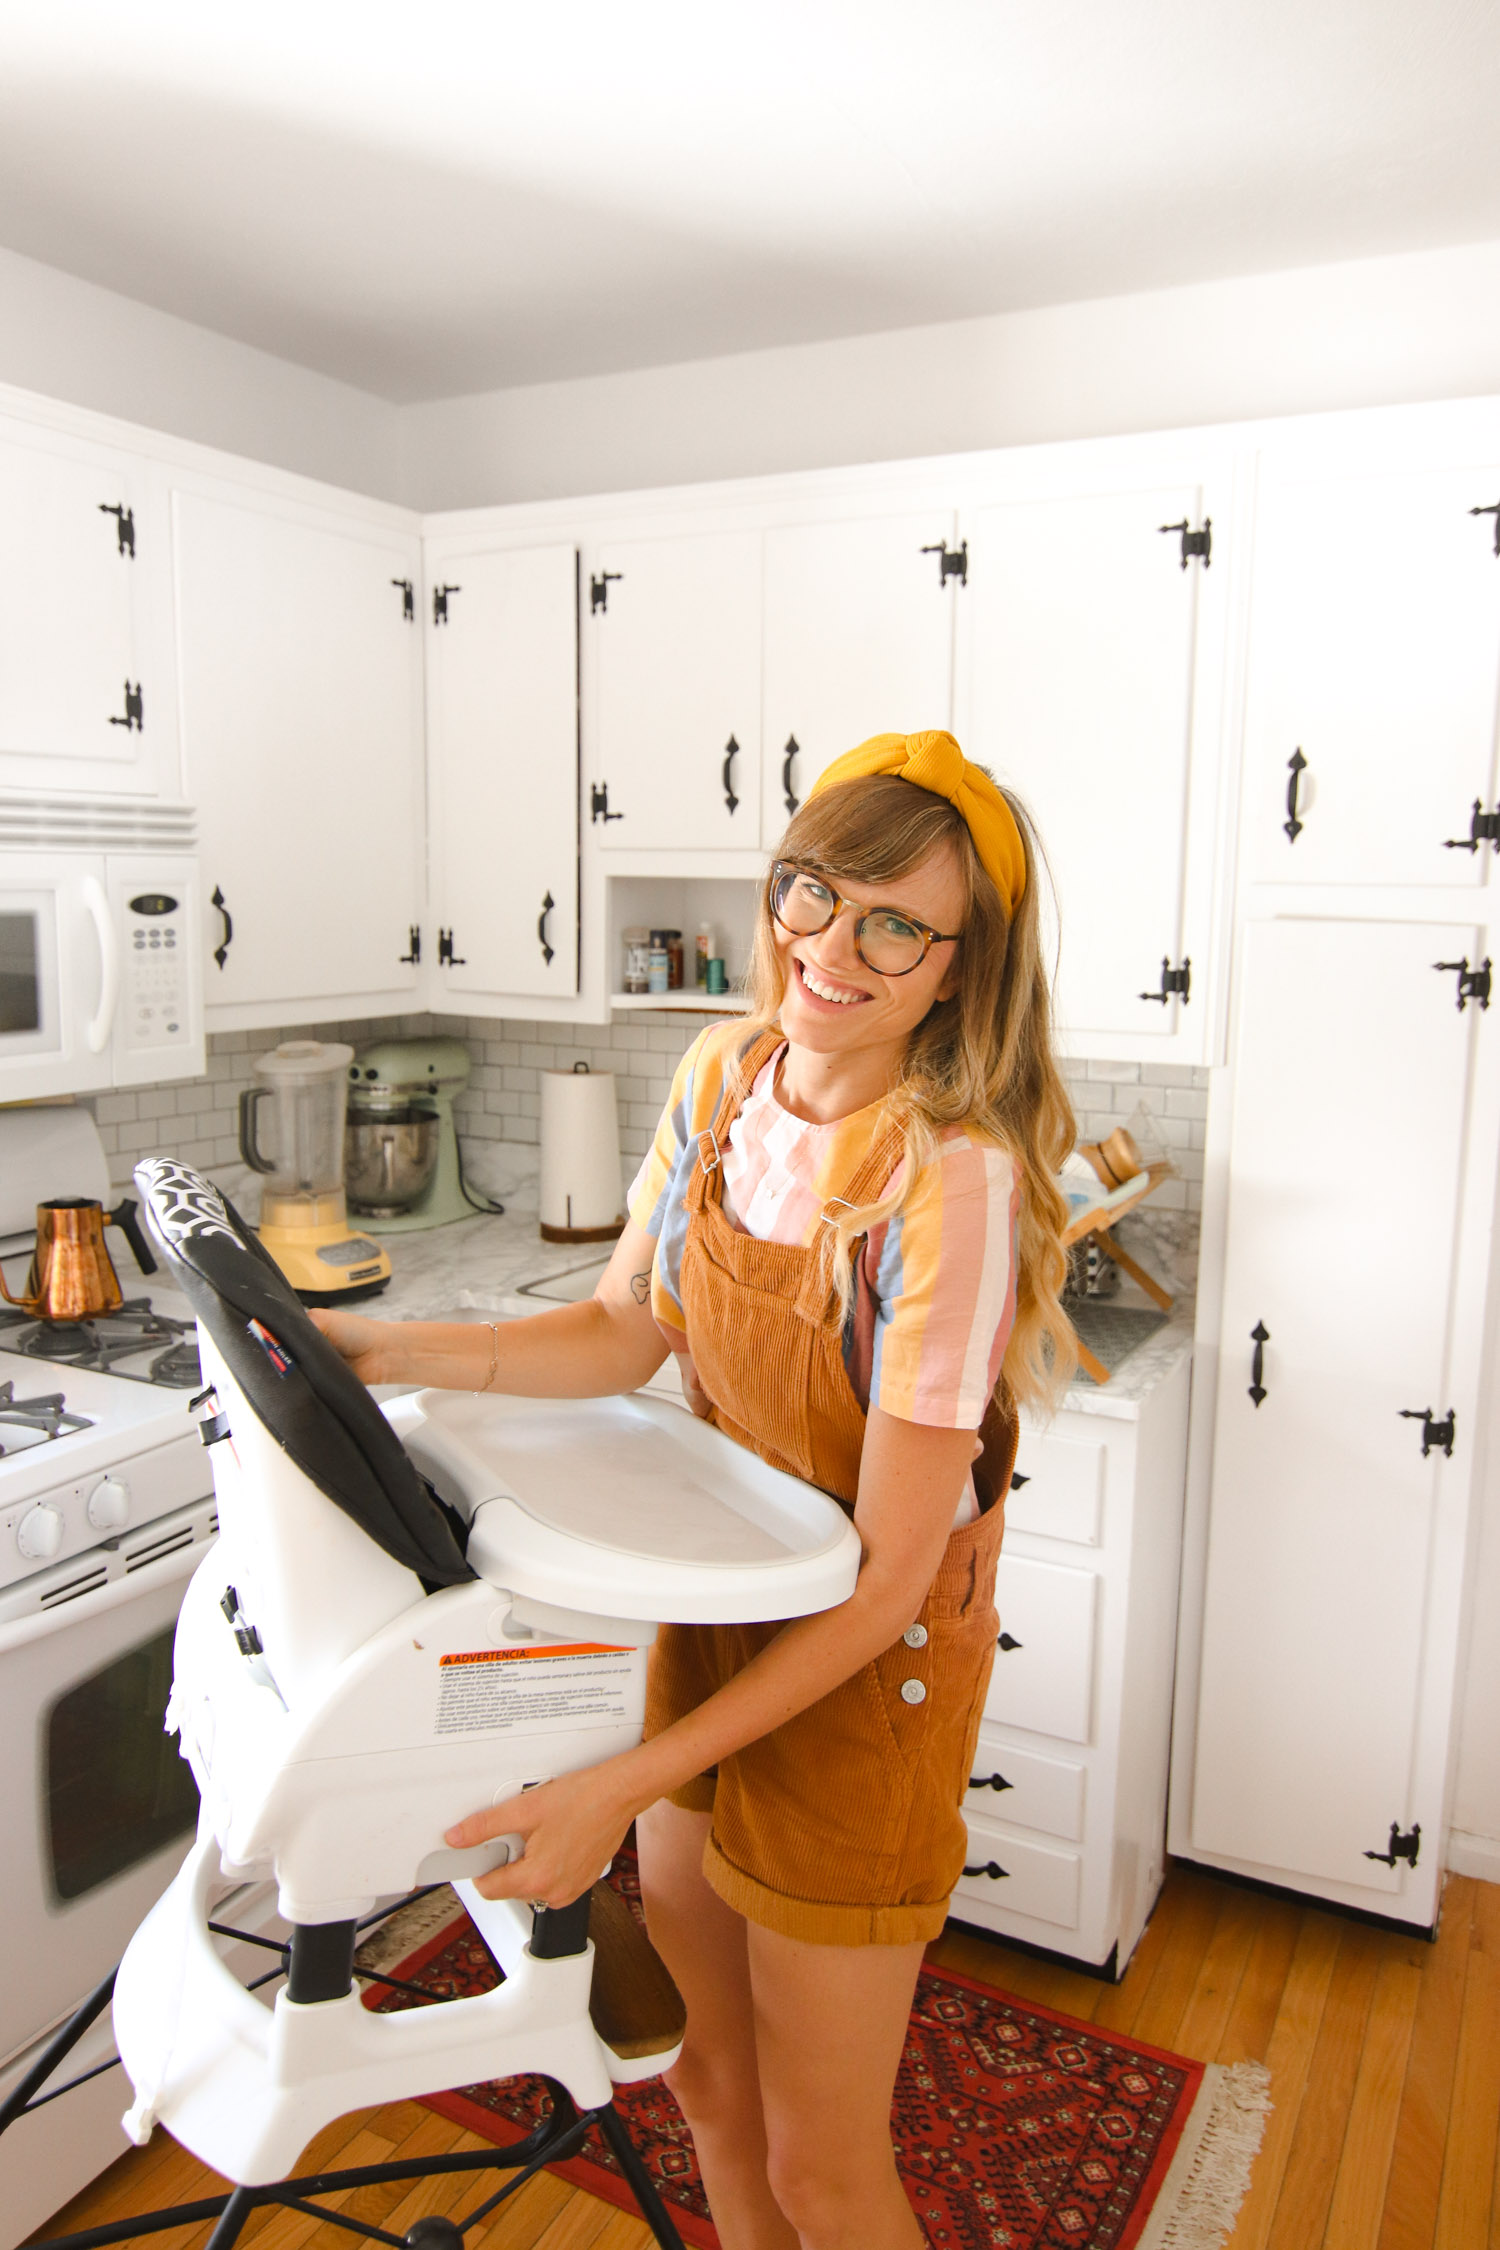
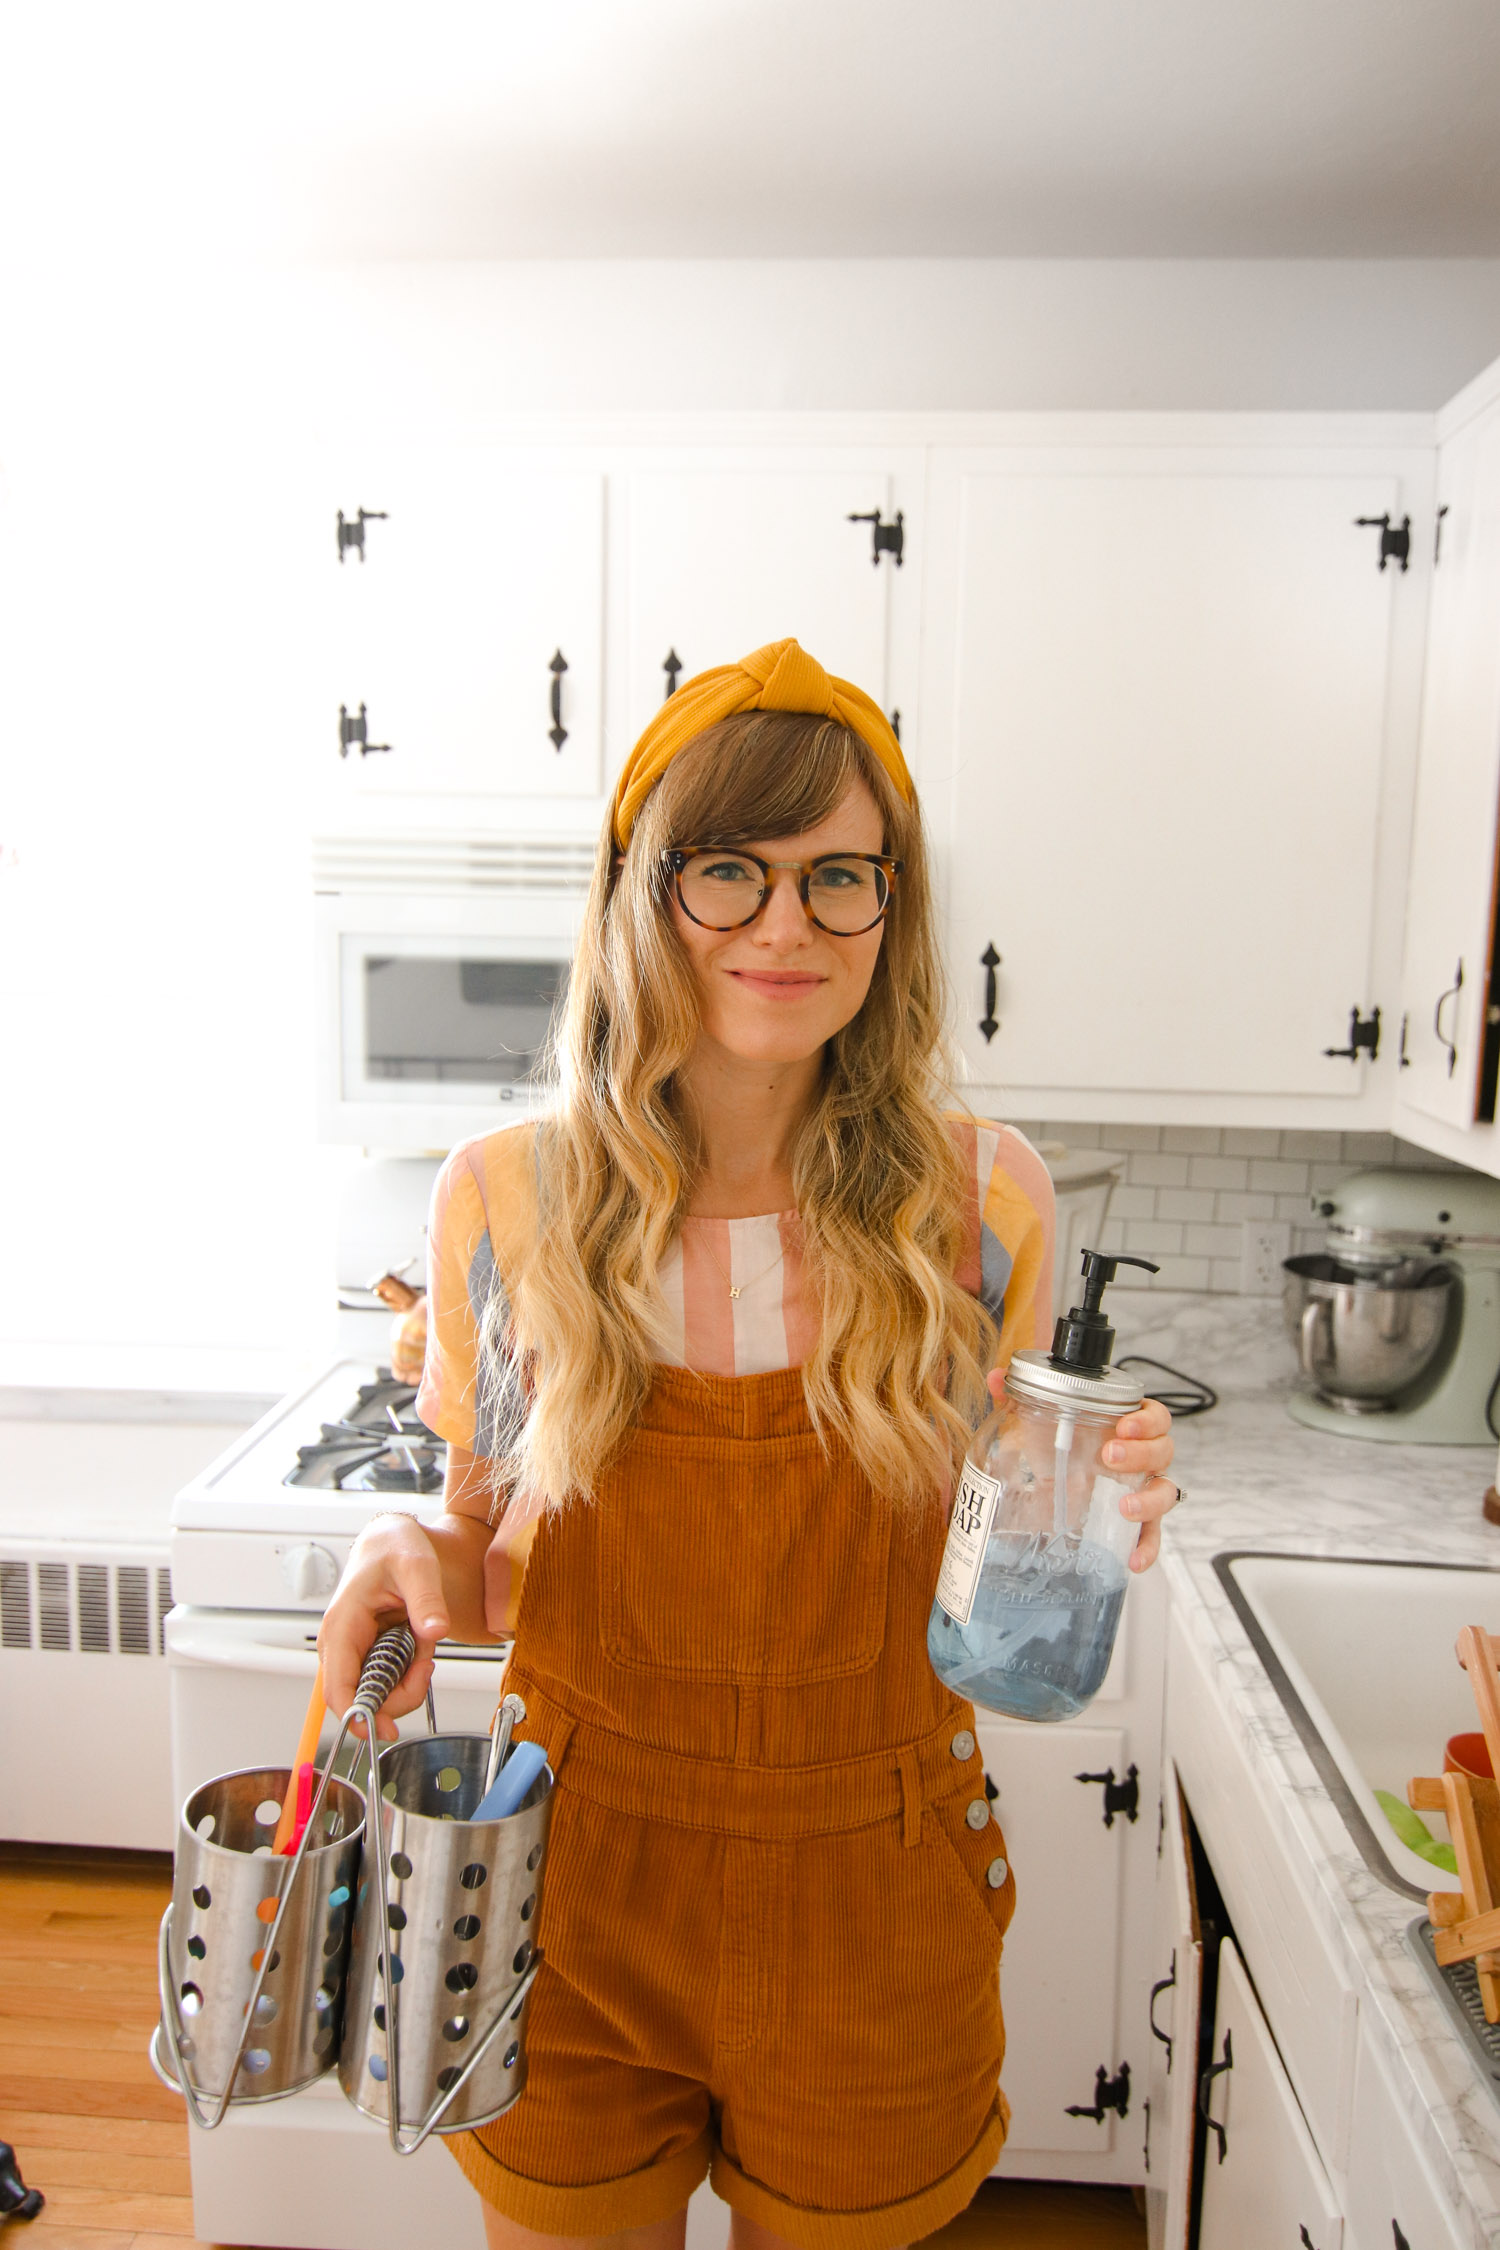
Step 1 – Remove clutter – This includes (for us) moving Hudson’s high chair out of the kitchen, removing the unattractive necessities like neon blue dish soap, and bottle brushes, and moving the canister we use to let utensils dry. In day to do life, these are all important to us, but when we shoot, we try to get rid of any extras that may catch the eyes attention, or deter from what we’re shooting!
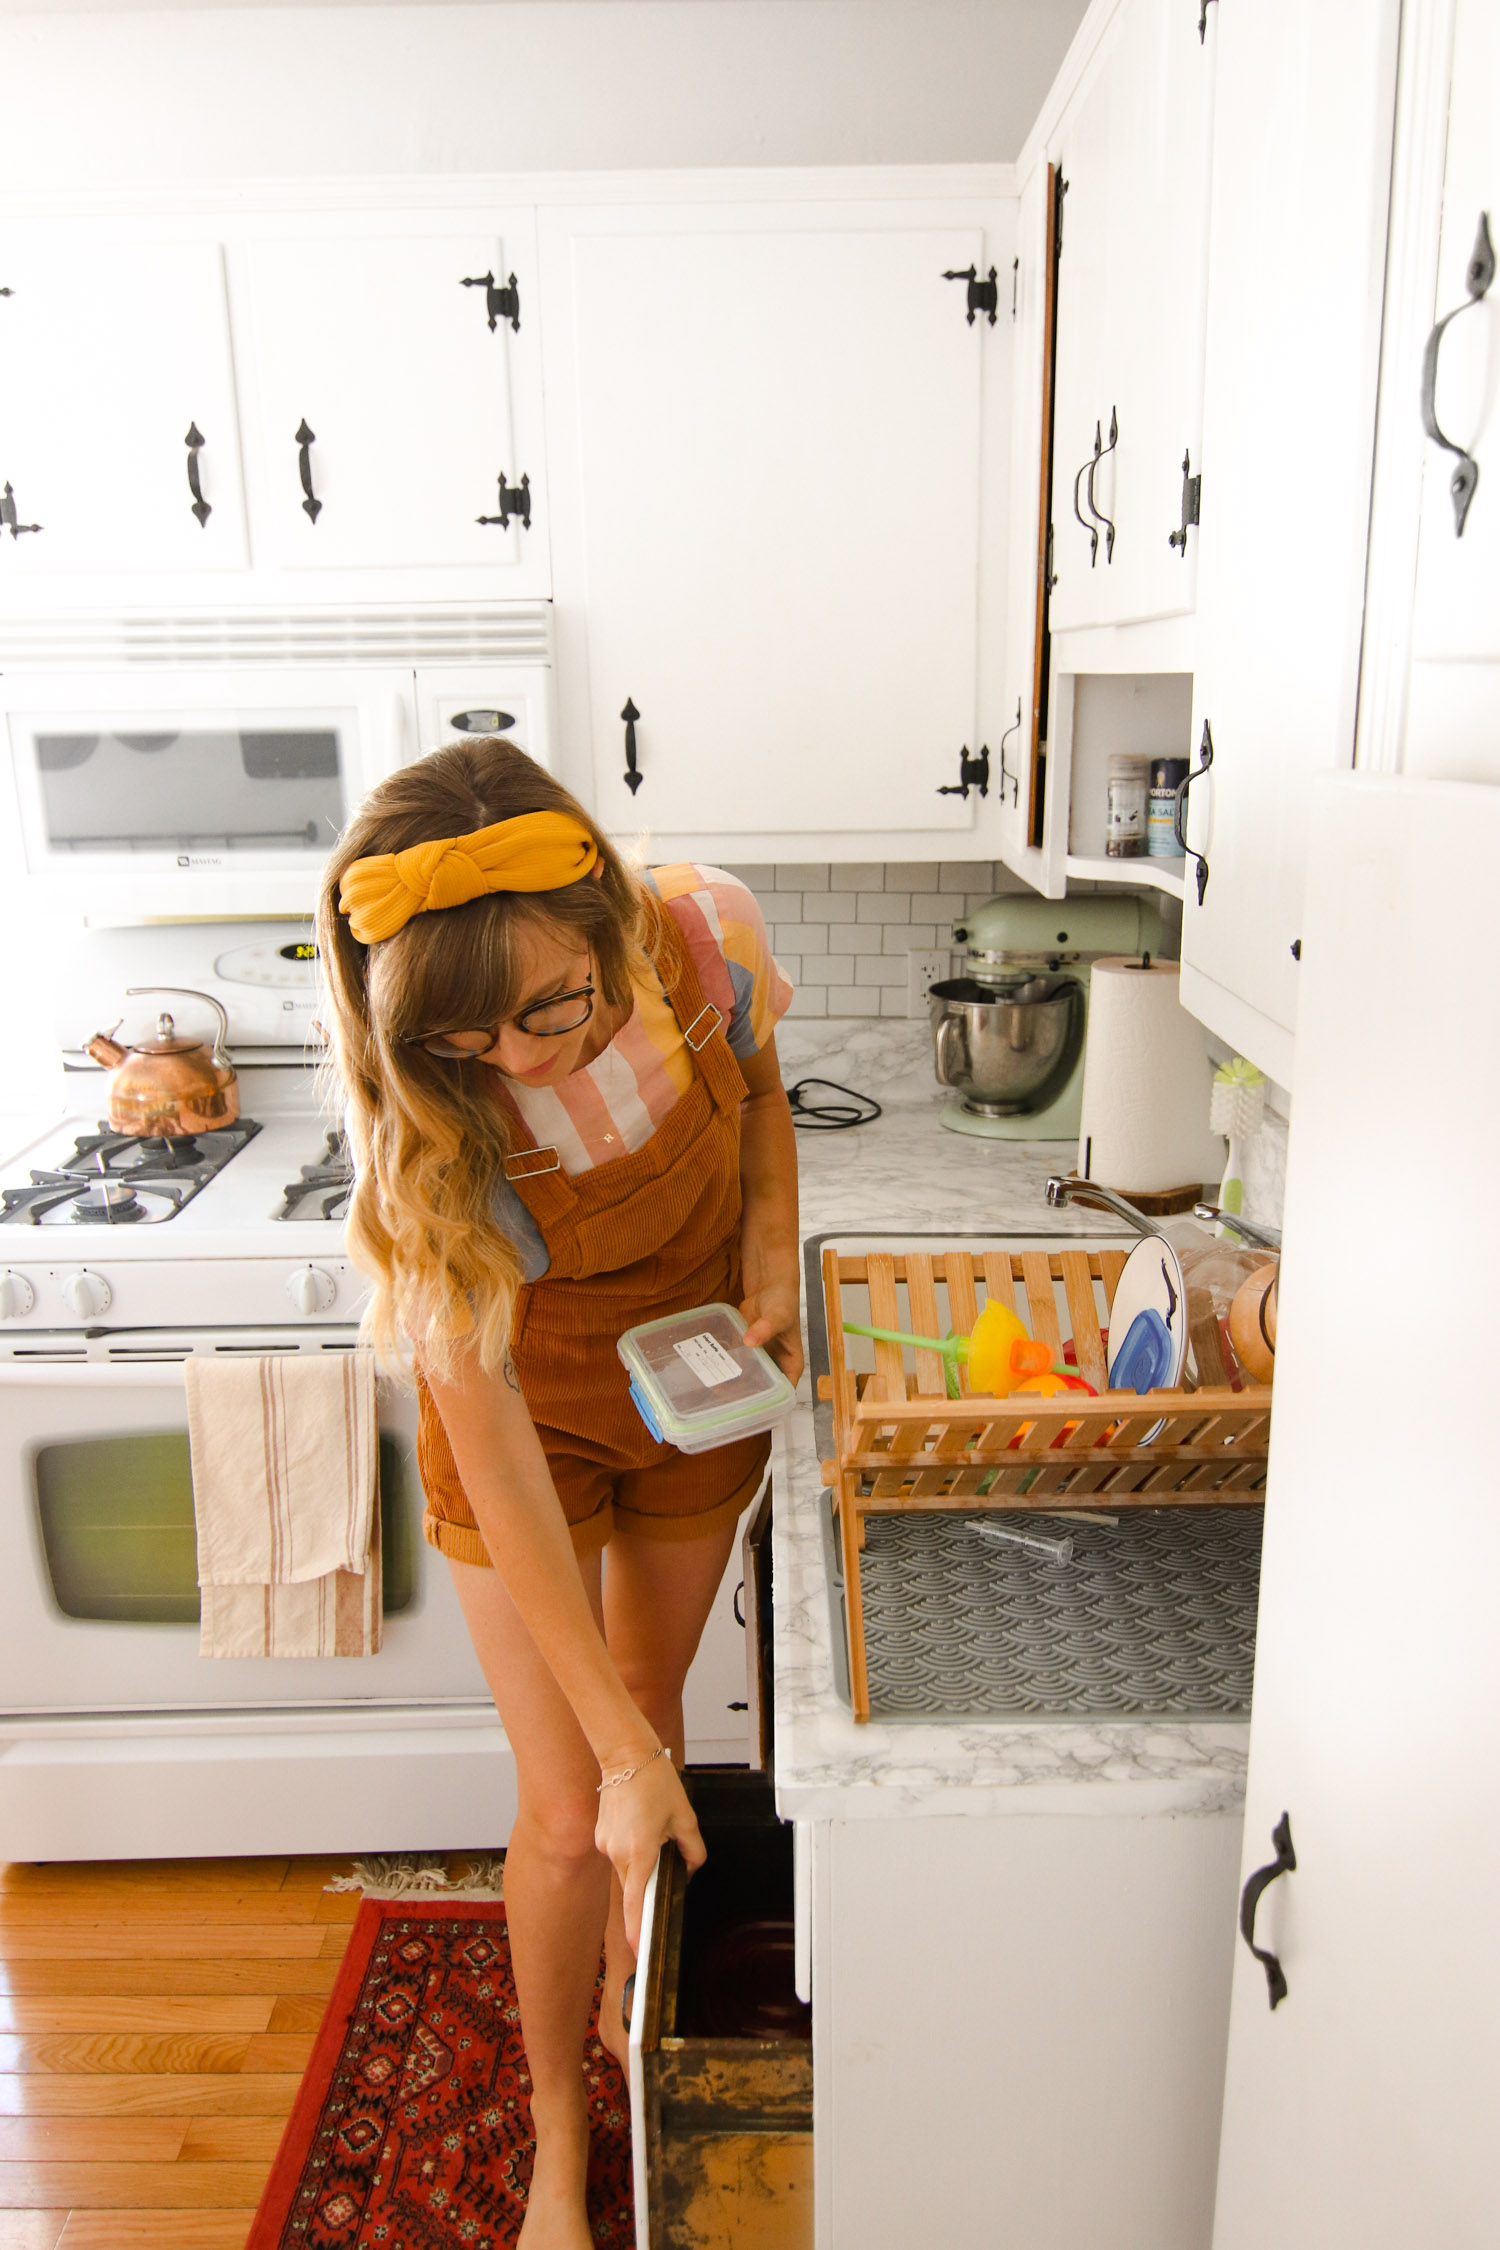
Step 2 – Put away the dishes! This may seem obvious, but a sink or drying rack full of random dishes or sippy cups is less than instagram worthy! We are human, and usually have heaps of dishes, especially since we do not have a dishwasher, but when we are getting ready to shoot photos we always make sure to clear out the drying rack.
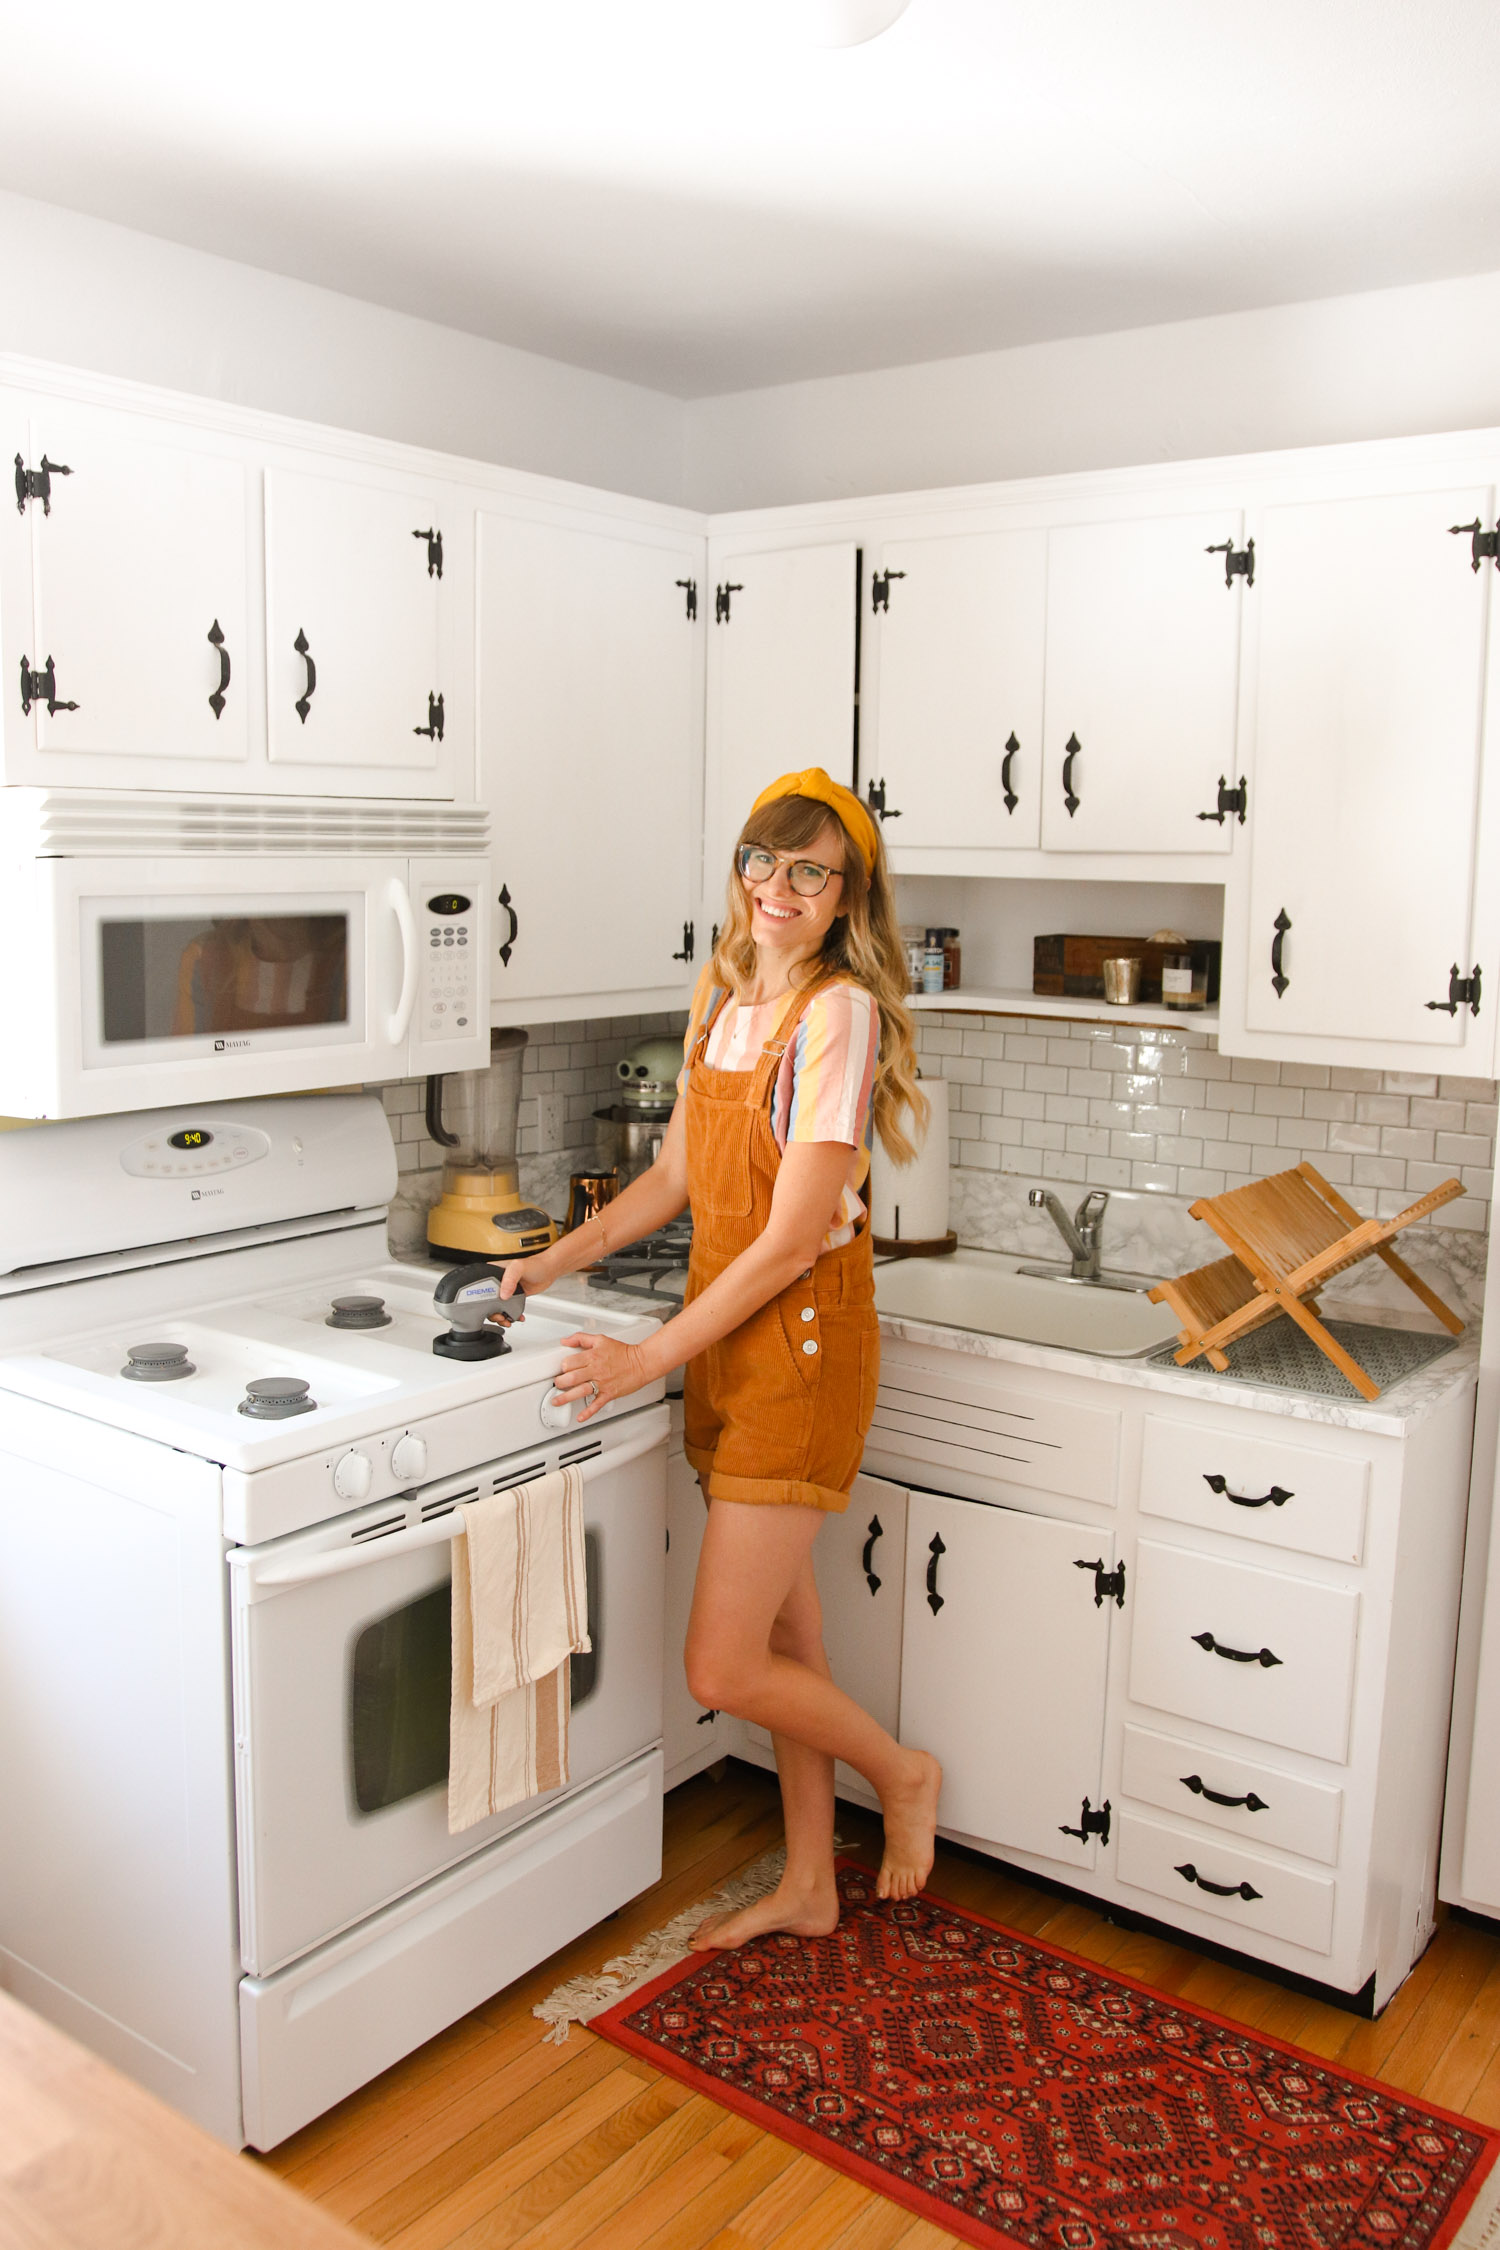
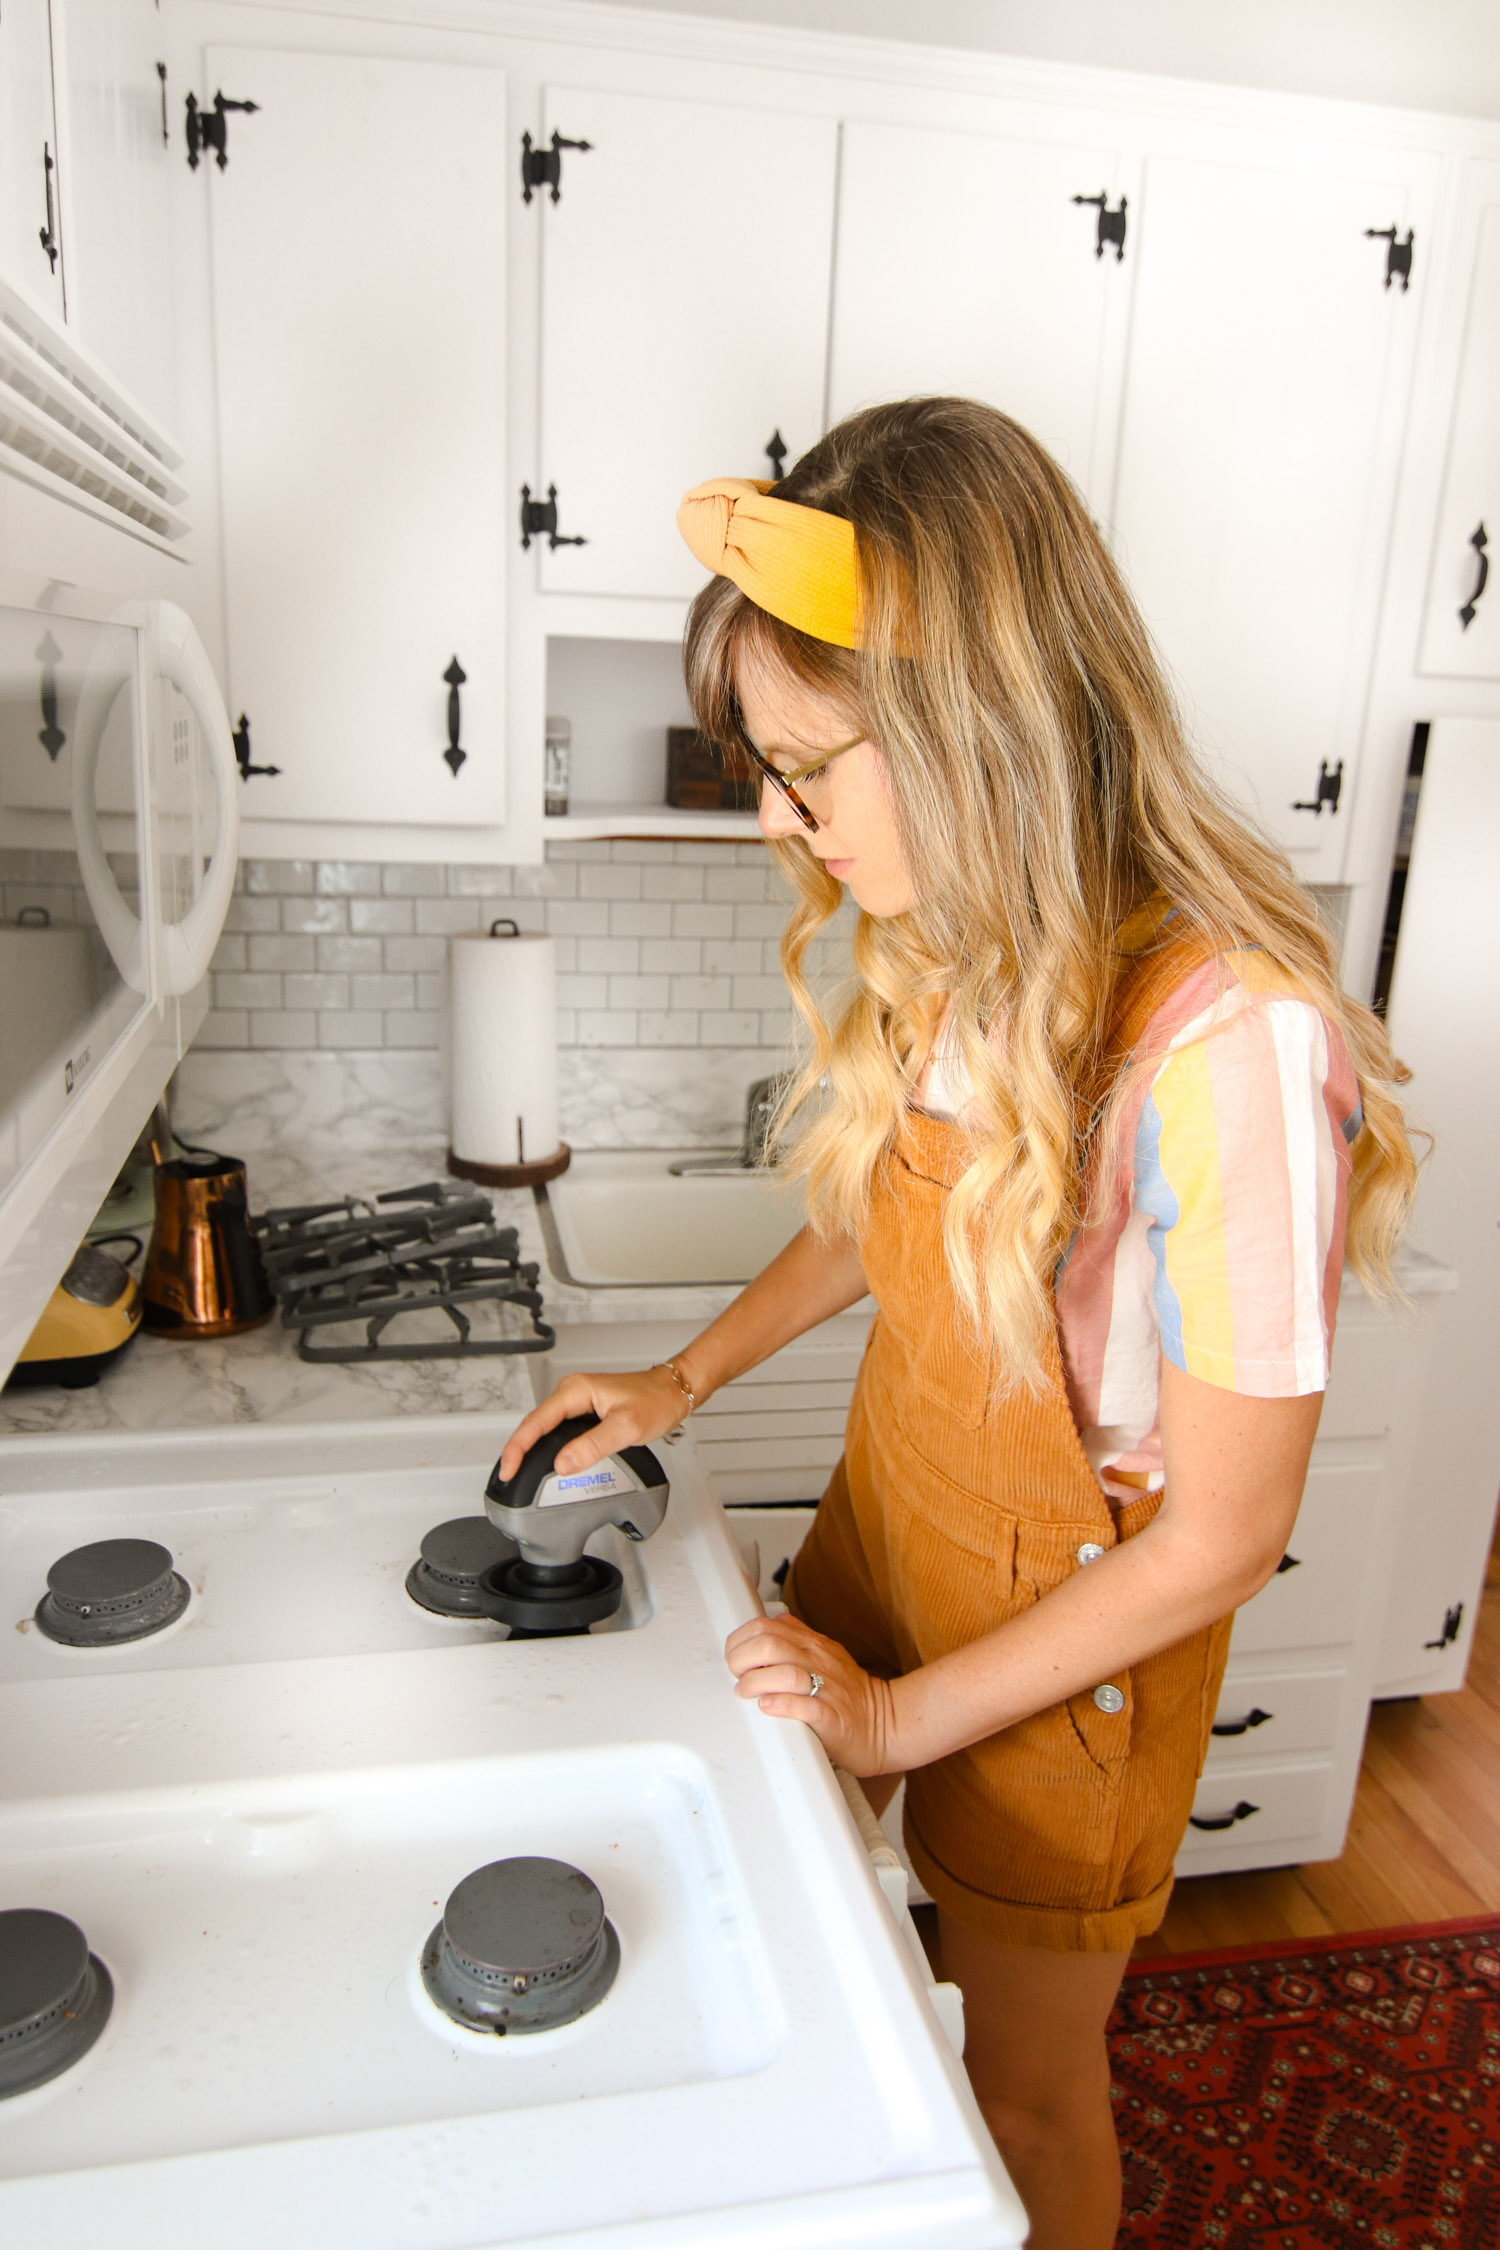
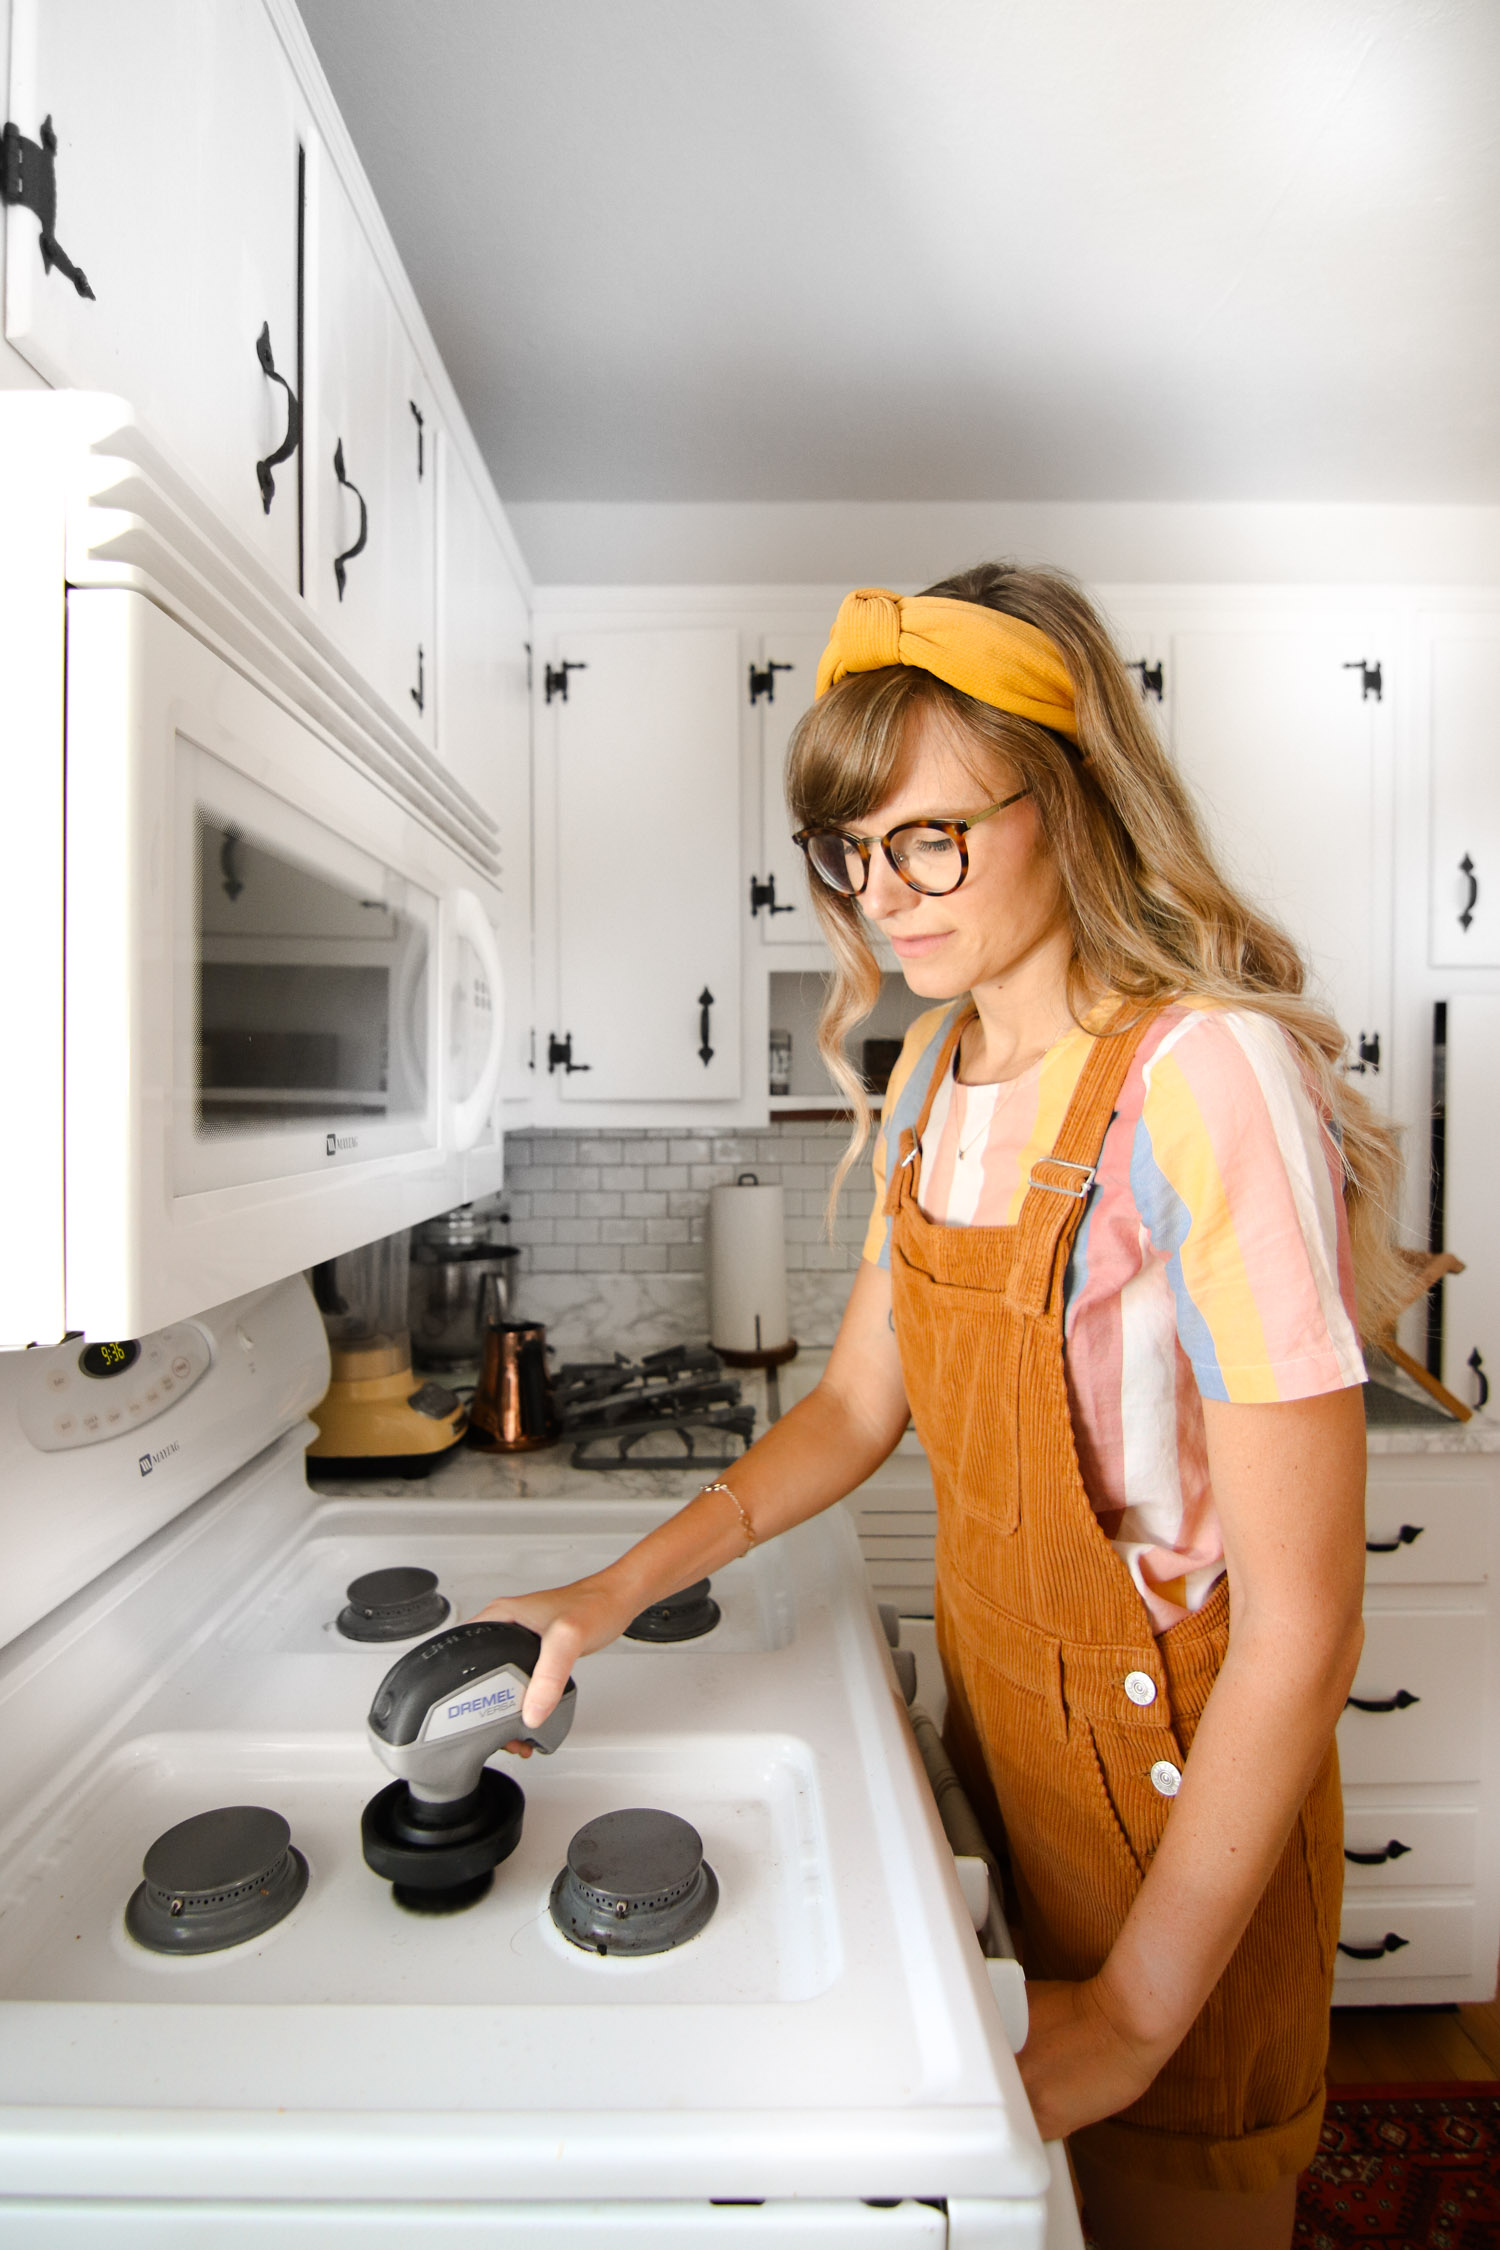
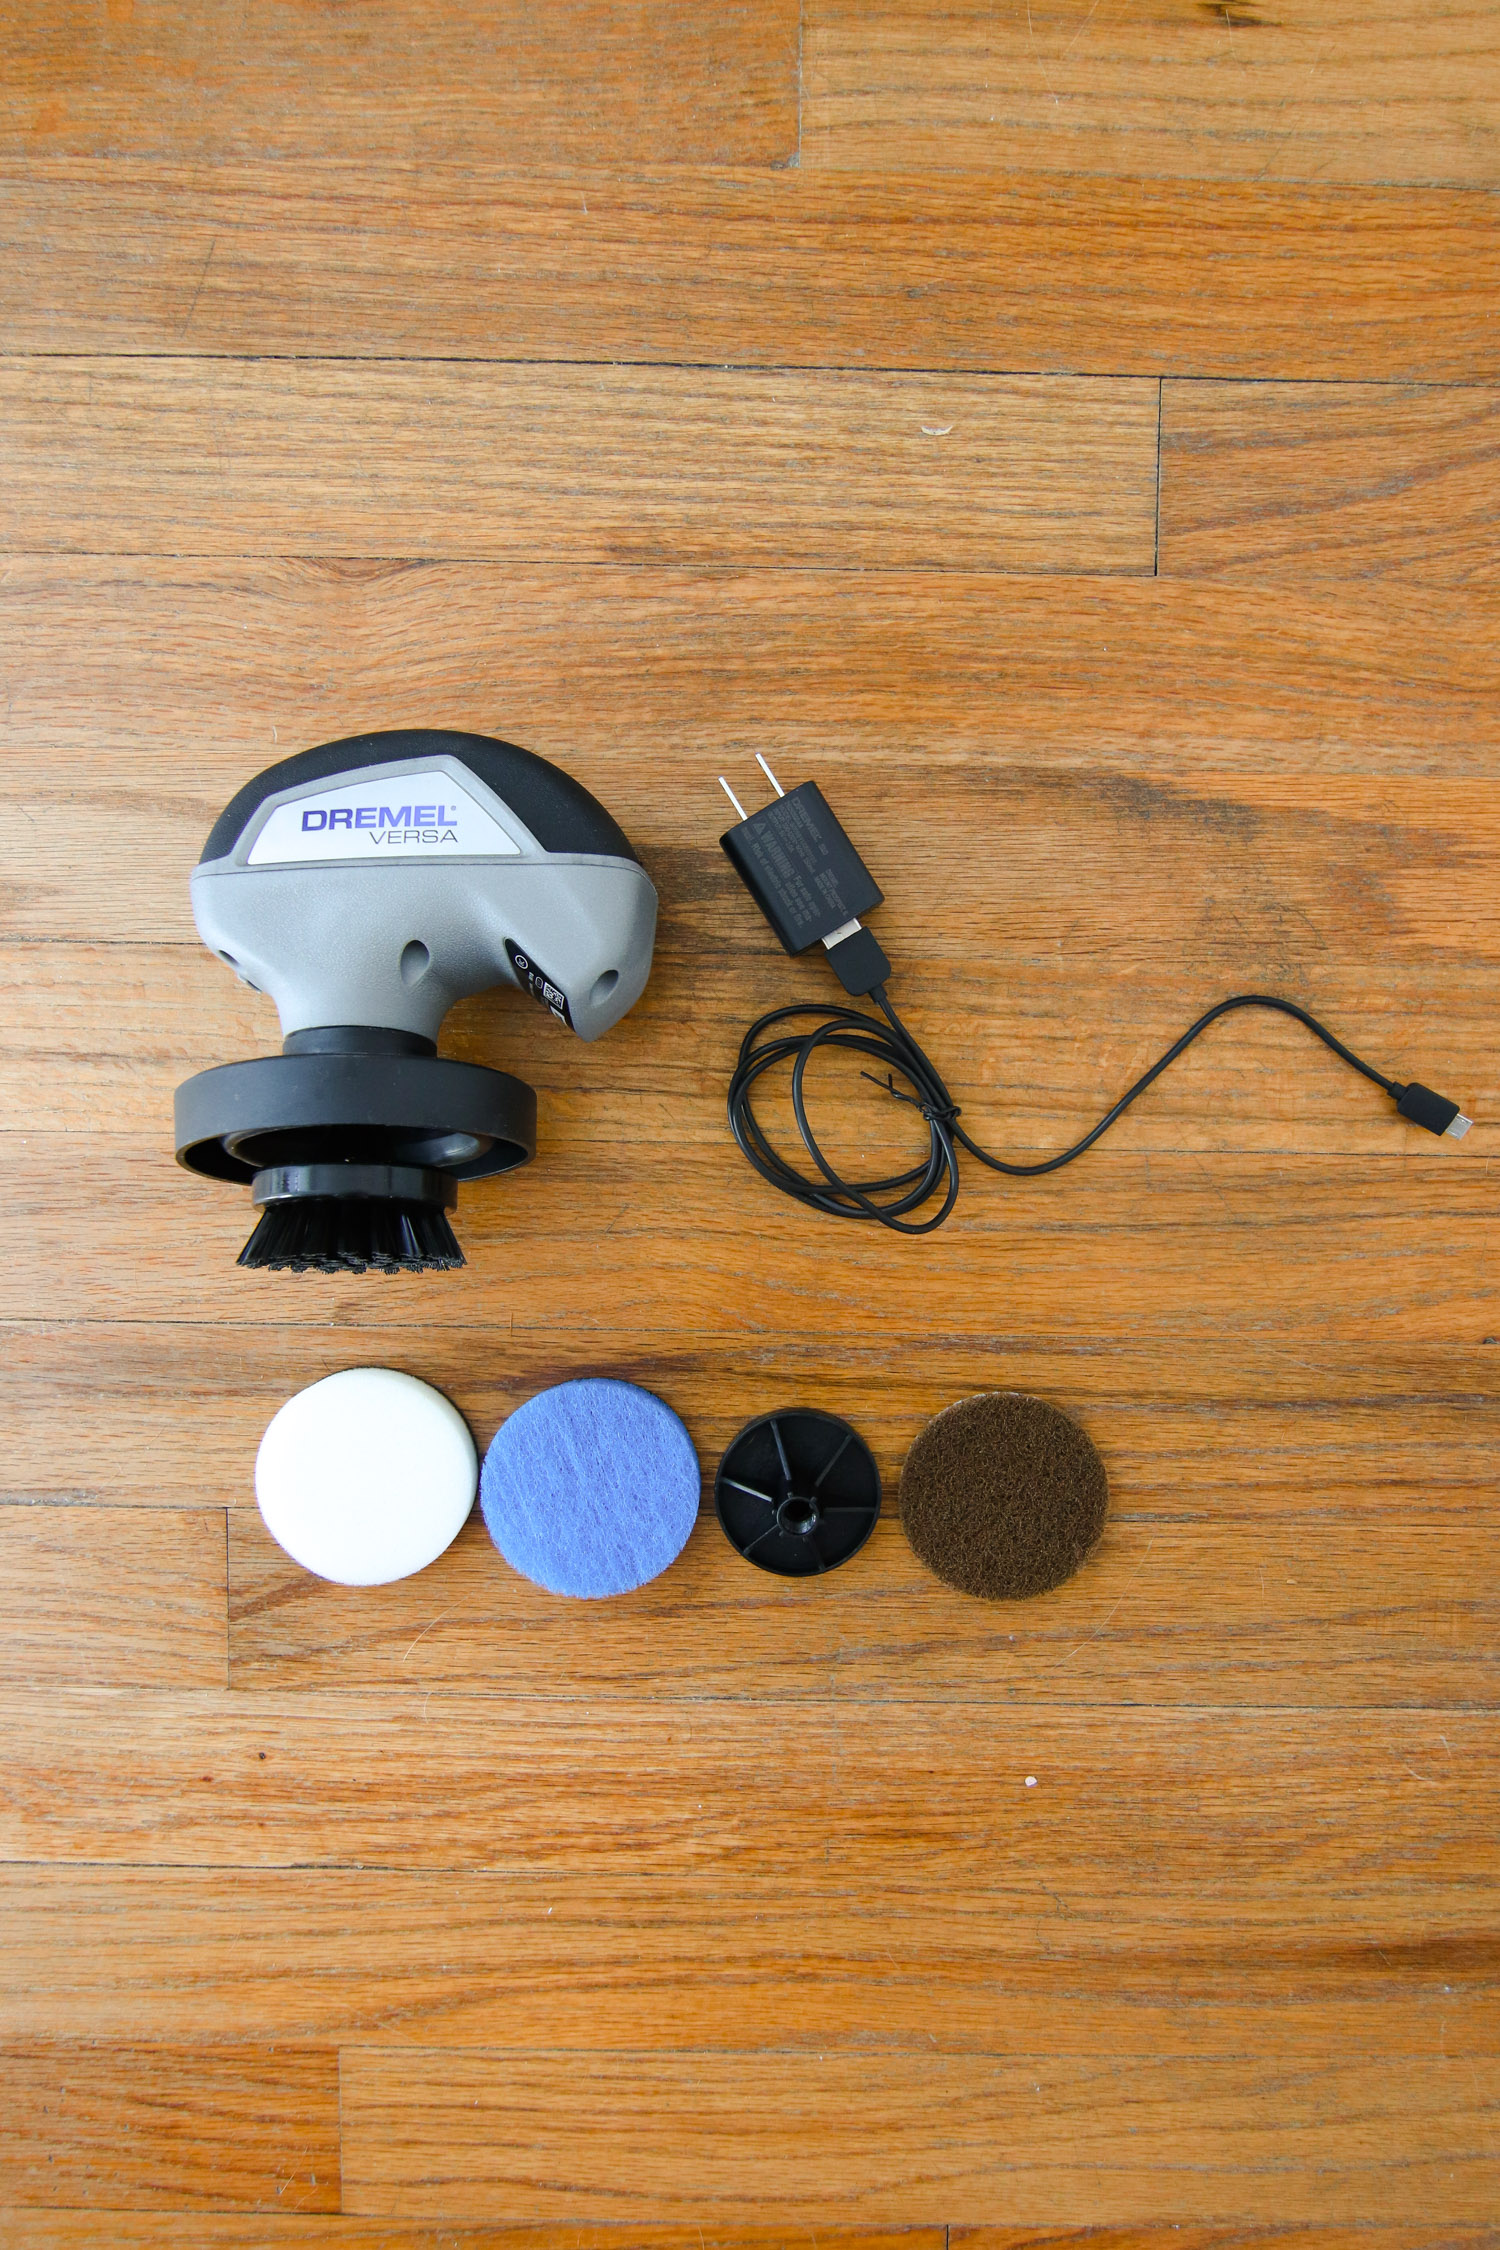
Step 3: Quickly Clean! My final step before shooting is to clean, because there is nothing worse than noticing crumbs or dust after shooting a set of photos! I’ve found the sauce drips on the stove to be what sticks out most in photos, so I always quickly clean it before we shoot using my cordless Dremel Versa! It has four easily interchangeable accessories, so I can use it to clean my stove top and pans, but also to clean the patio furniture outside too! It charges super quickly because it comes with a USB adapter, and it’s water resistant. It’s my trusty go-to when prepping for a shoot!
That’s it, then we’re all ready to shoot! It always feels so minimalist and fresh when we’re shooting, and always bums me out to put all of the clutter back afterward! ha! Let me know in the comments if you loved this behind the scenes peek!

READY TO SHOOT:
*Thanks to Dremel Versa for sponsoring this post, as always all opinions are my own!